HACHETTE PARTWORKS - BUILD YOU OWN ROUTEMASTER

ISSUES TWENTY ONE TO THIRTY

TO RETURN TO THE MAIN INDEX CLICK HERE


Photographs taken by me of the magazine pages are purely to illustrate the build stages, so that the entire project can be followed from the start to the completed model in issue order. The copyright of Hachette Partworks is acknowledged.

MAGAZINE ISSUE 21 - FITTING THE SECOND PAIR OF REAR WHEELS
The 4th consecutive issue of fitting wheels so I have now become an expert and they take me no time at all to put together. This issues magazine continues the journey on route 52, specifically the area around Hyde Park. I did not know that the first streetlights were installed in Hyde Park in 1690! Installed by King William III, it was on his route from Kensington Palace to St James Palace. Unfortunately it was frequented by highwaymen, so he had 300 oil lamps installed along the road which was know as Rotten Row. The article goes on to say that Rotten Row is a corruption of the French term "Route du Roi" meaning the Kings Road! The second article is an interesting read about the development of steam and electric trams. I never knew that Dick Kerr first developed a steam tram before they went onto develop the electric trams we are familiar with. St the end of this build my model will now have a full set of rear wheels!

Click here for a higher resolution image Click here for a higher resolution image Click here for a higher resolution image

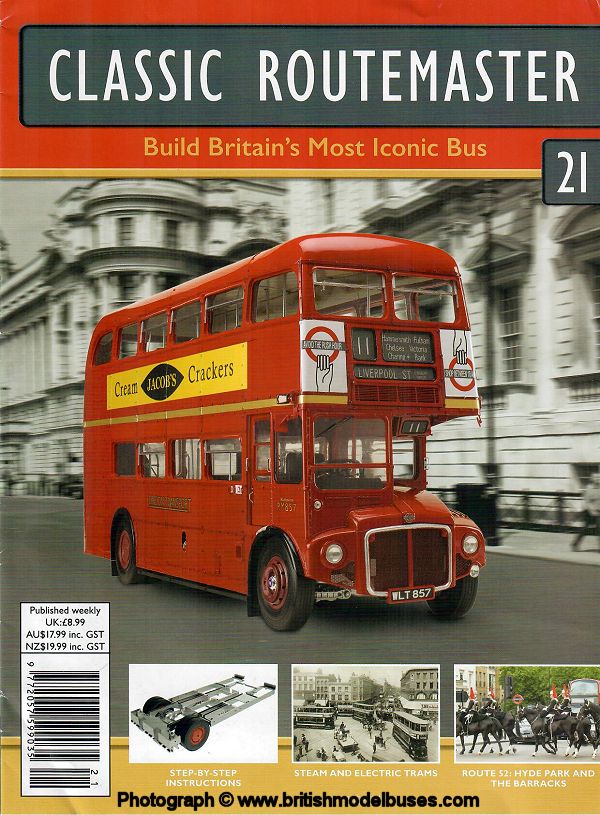
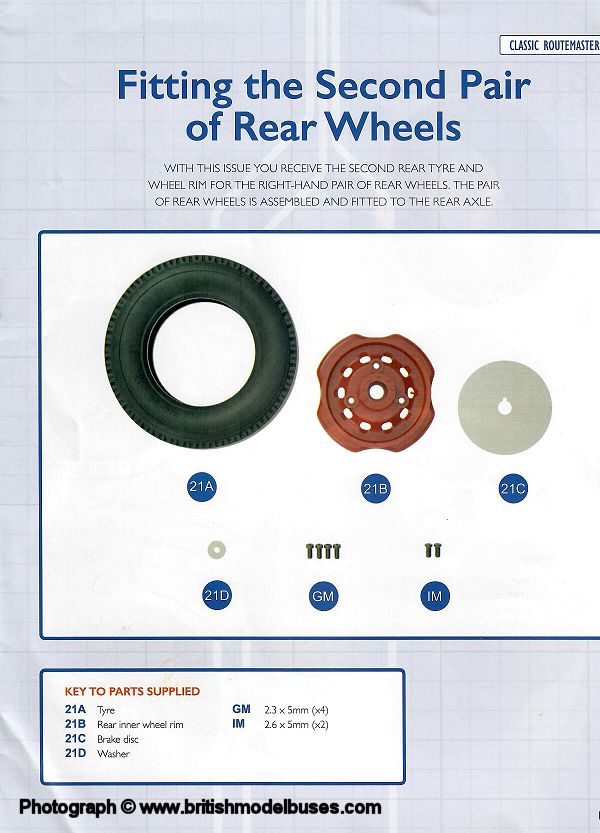
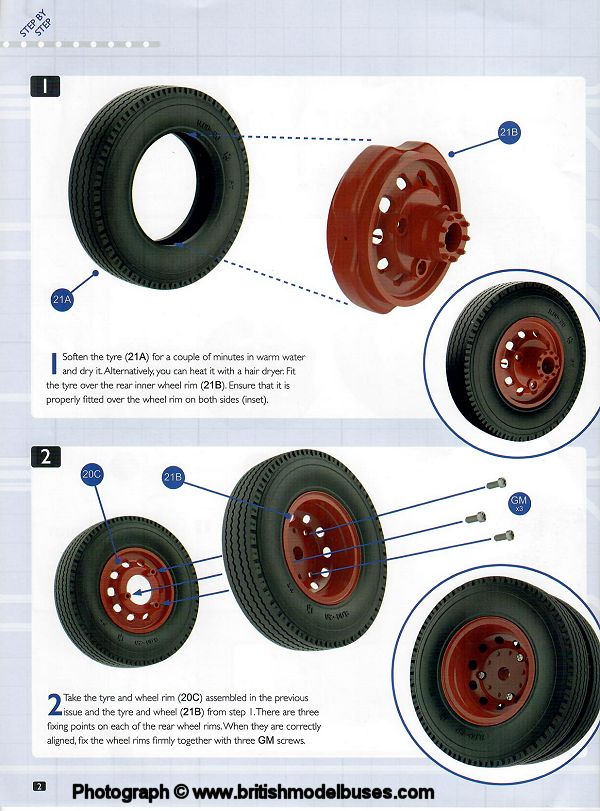
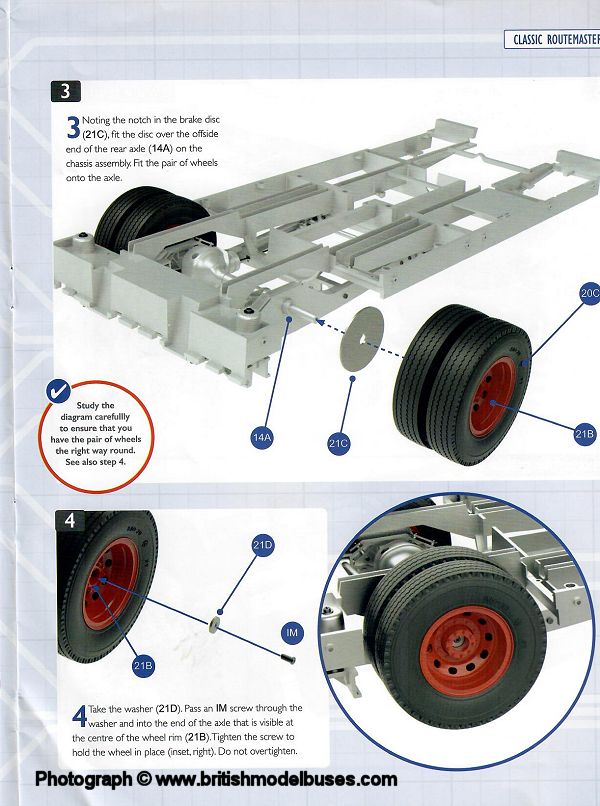
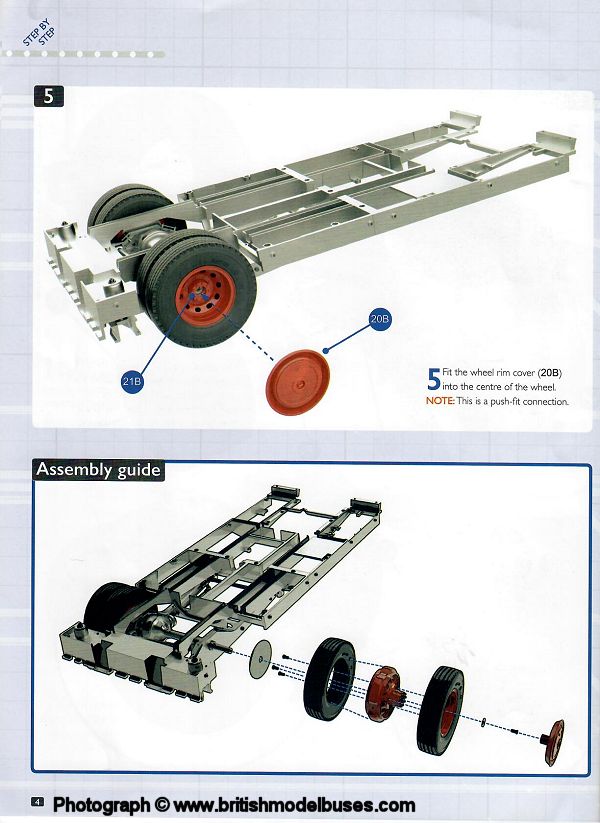
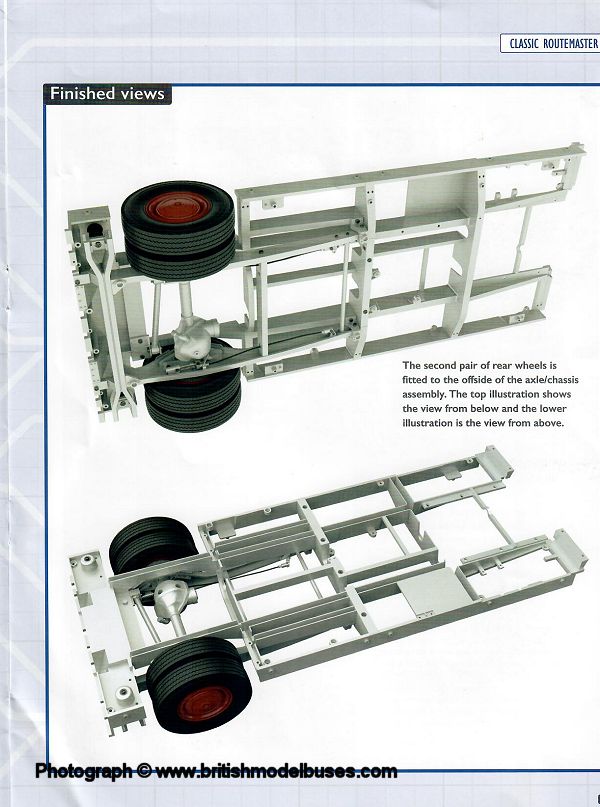
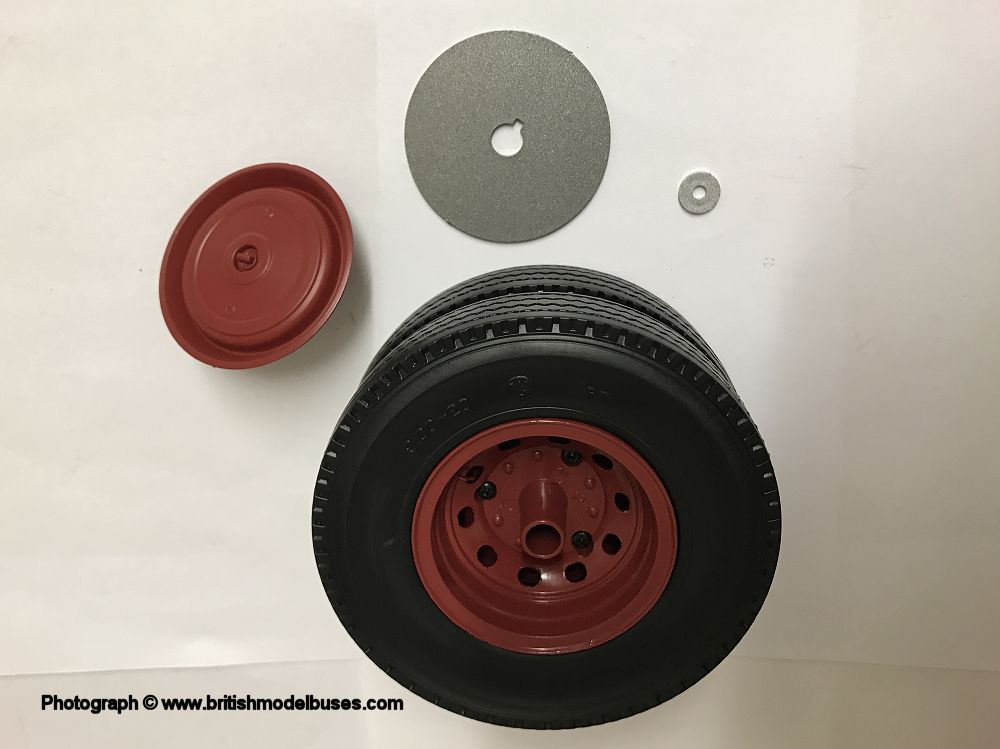
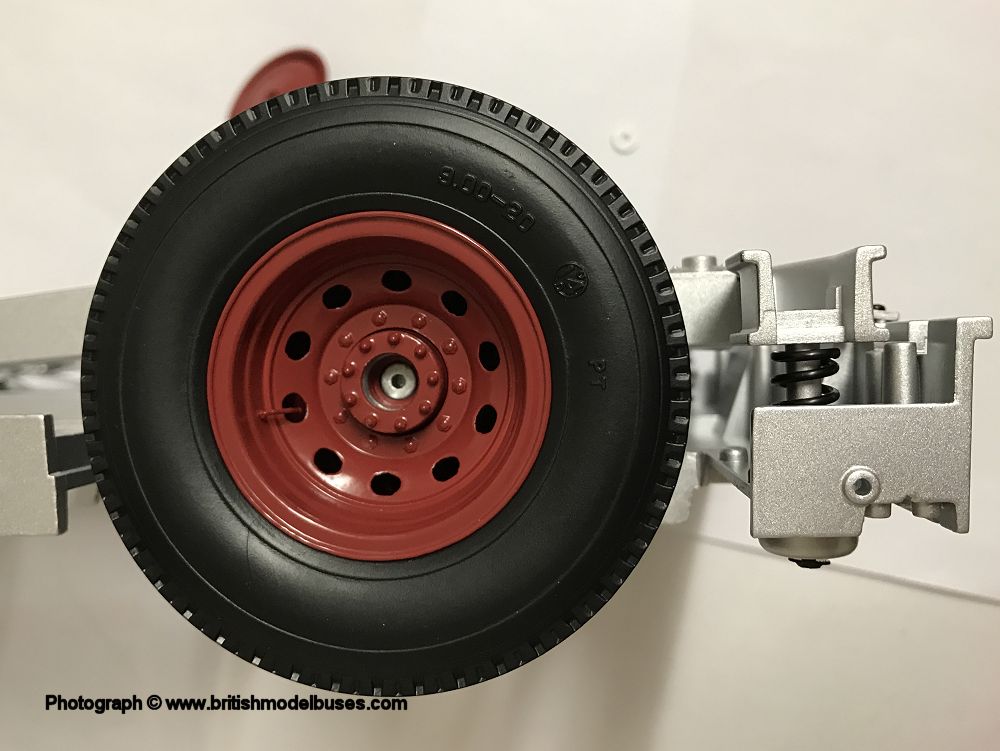
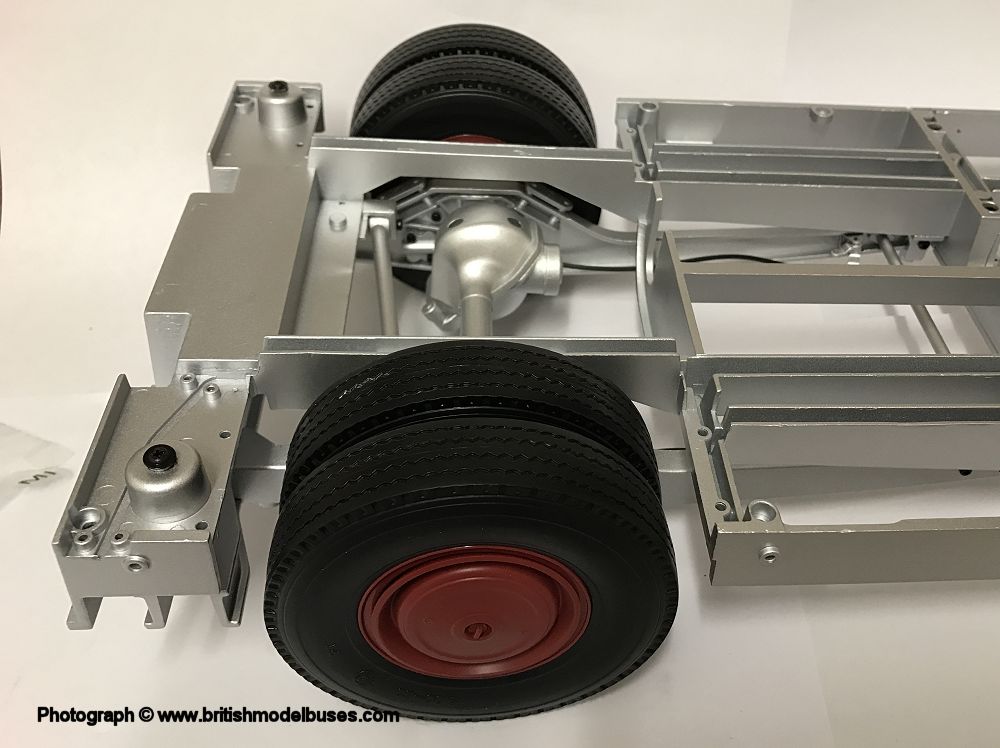
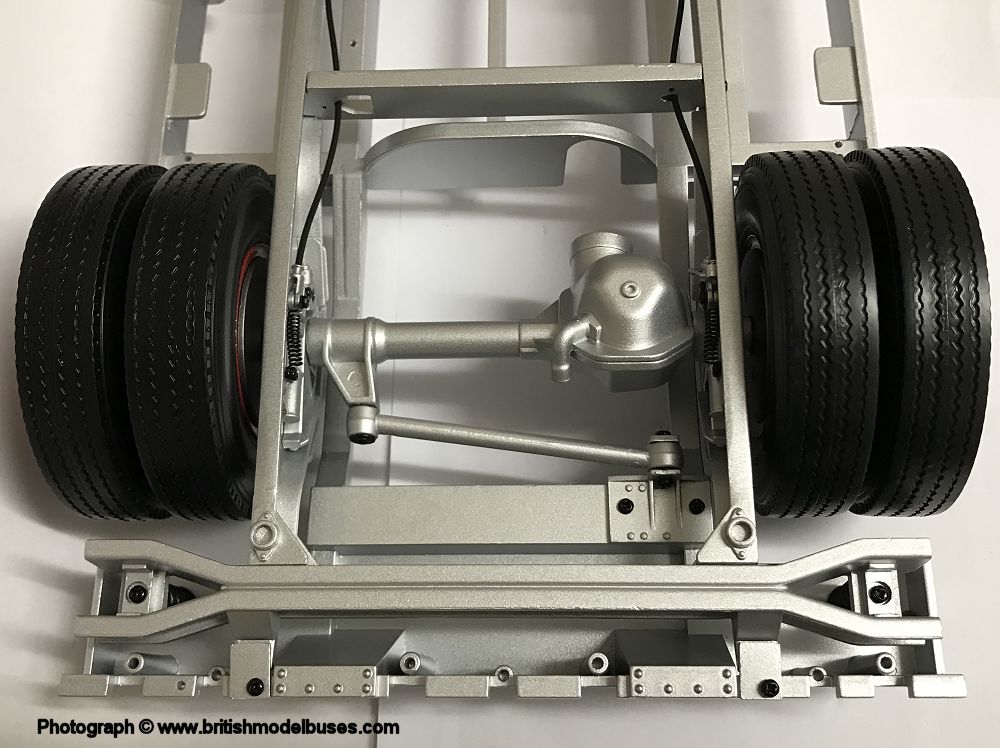
INSTRUCTIONS ISSUE 21 - FITTING THE SECOND PAIR OF REAR WHEELS

Click here for a higher resolution image Click here for a higher resolution image Click here for a higher resolution image Click here for a higher resolution image Click here for a higher resolution image

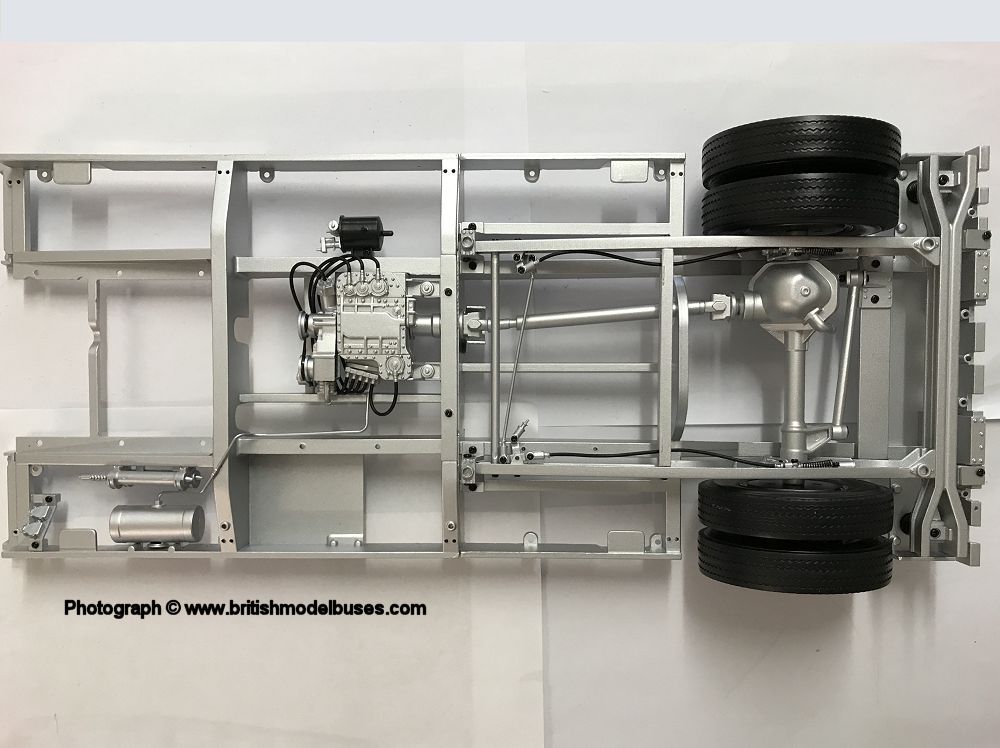
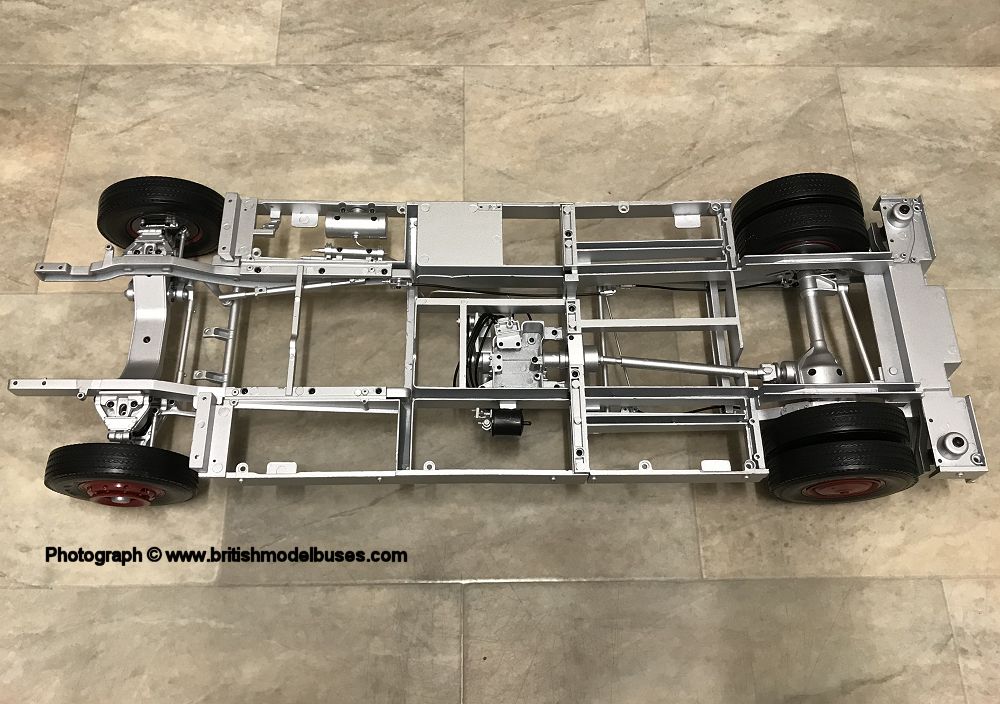
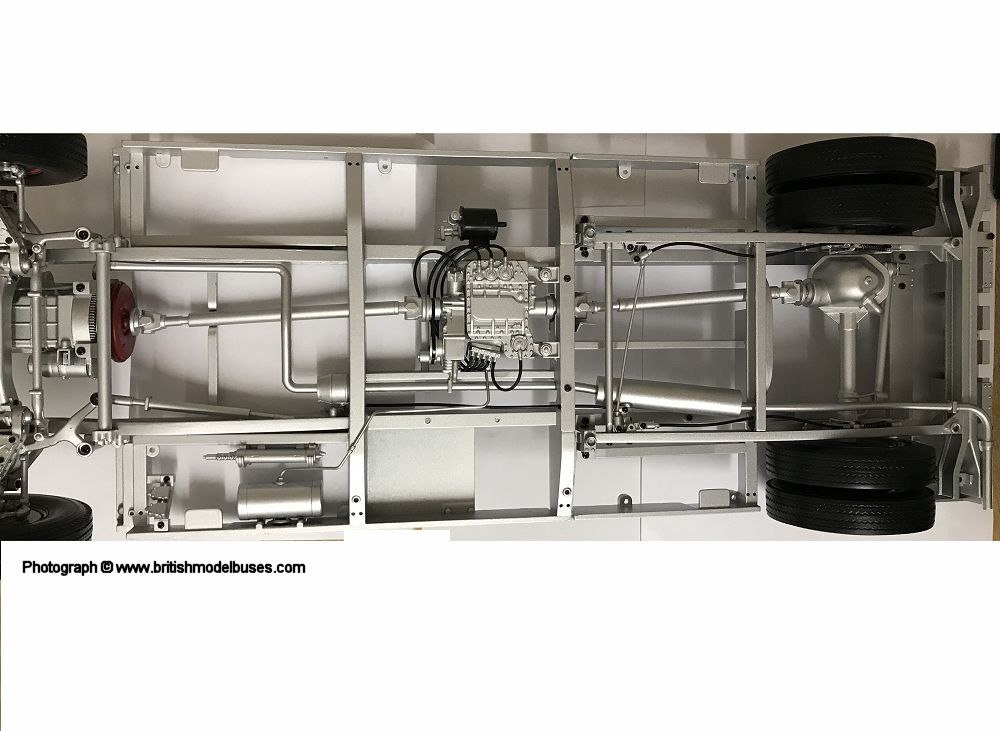
BUILD ISSUE 21 - FITTING THE SECOND PAIR OF REAR WHEELS

My bus now has a rear wheels!

Click here for a higher resolution image Click here for a higher resolution image Click here for a higher resolution image Click here for a higher resolution image Click here for a higher resolution image Click here for a higher resolution image

MAGAZINE ISSUE 22 - ASSEMBLING THE DRIVE UNIT
Making a nice change to putting together wheels, this was again a simple build and only took approx 10 minutes. It came with a pair of flat nosed tweezers for future use. The magazine continues with route 52 in the area of Knightsbridge and Buckingham Palace. It talks about the founding of the Harrods store and Buckingham Palace garden parties. The second article talks about the body structure of the Routemaster in its initial design.

Click here for a higher resolution image Click here for a higher resolution image Click here for a higher resolution image

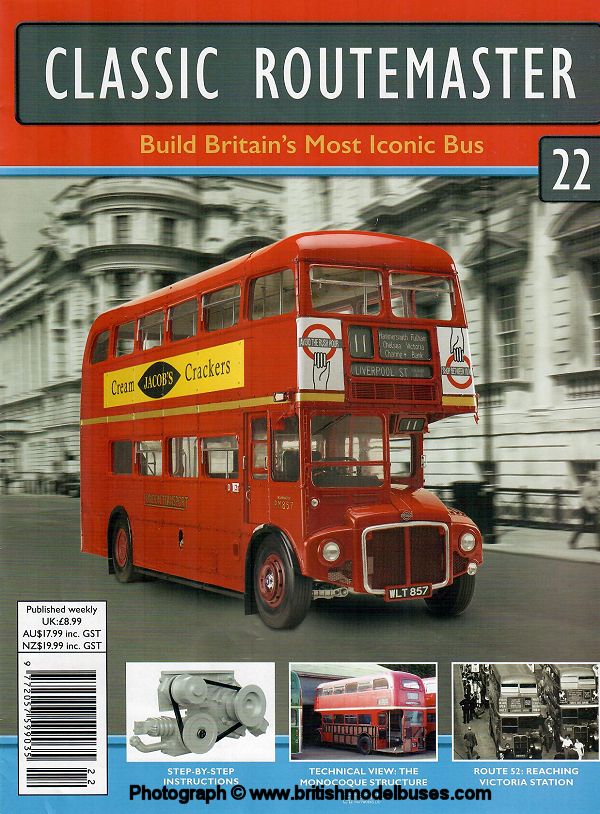
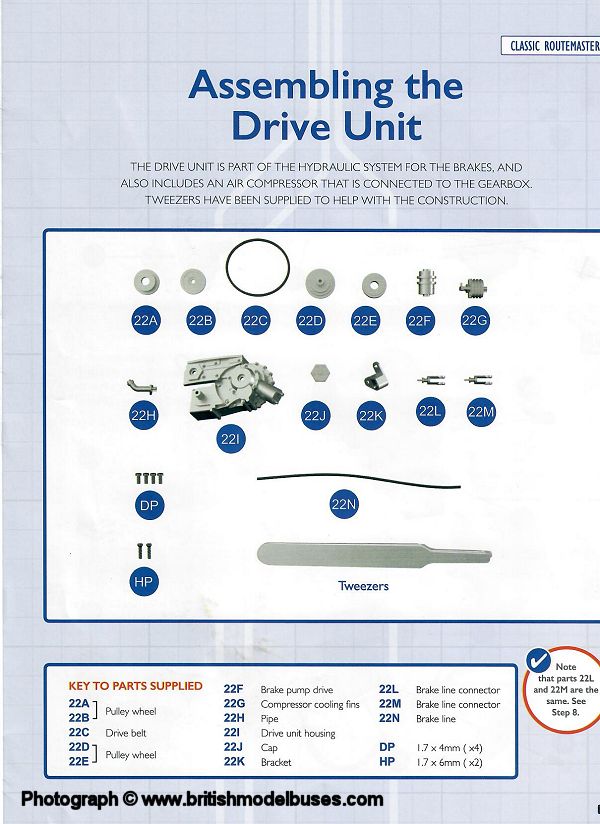
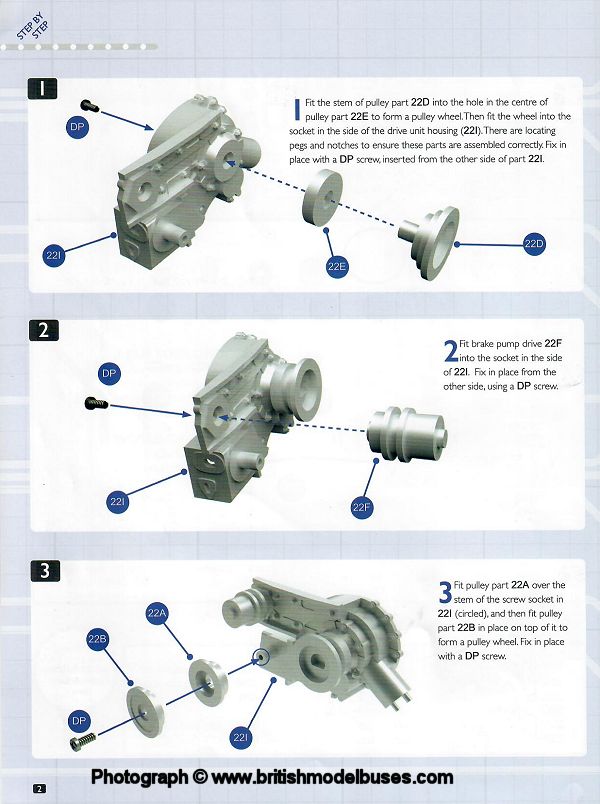
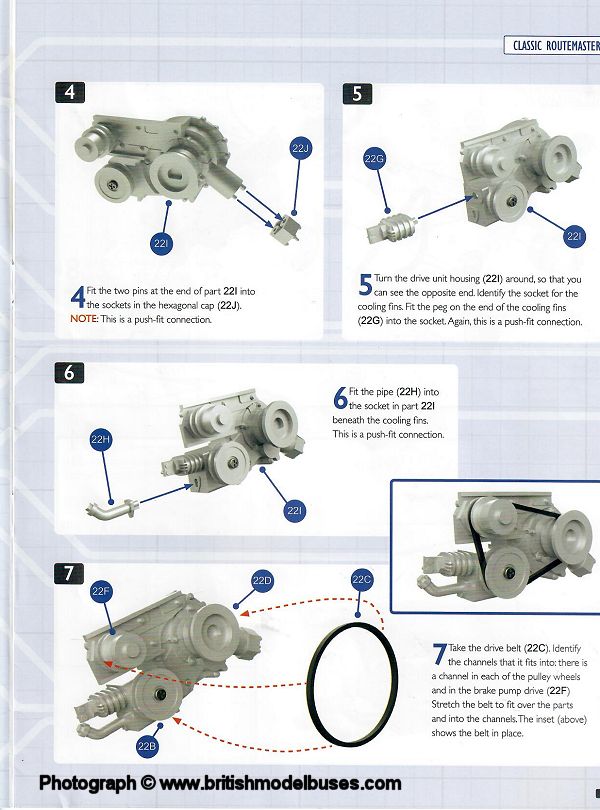
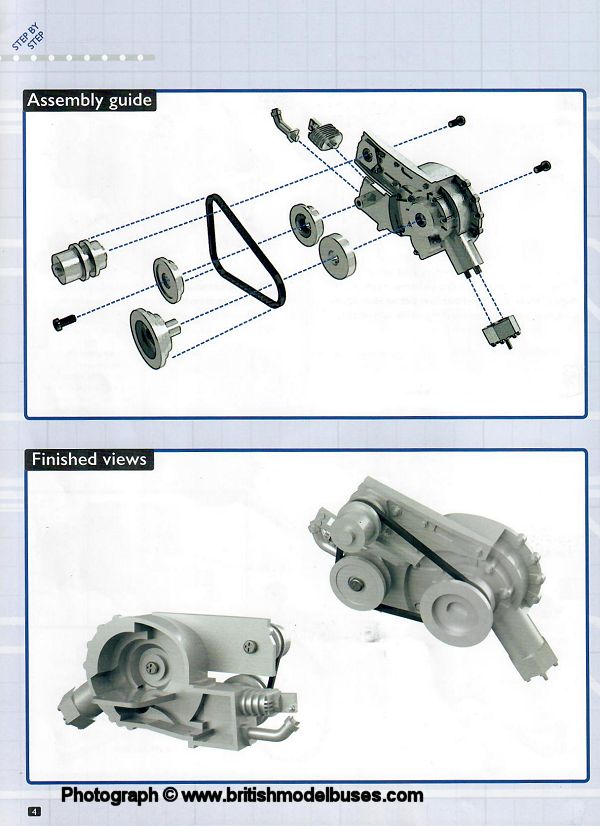
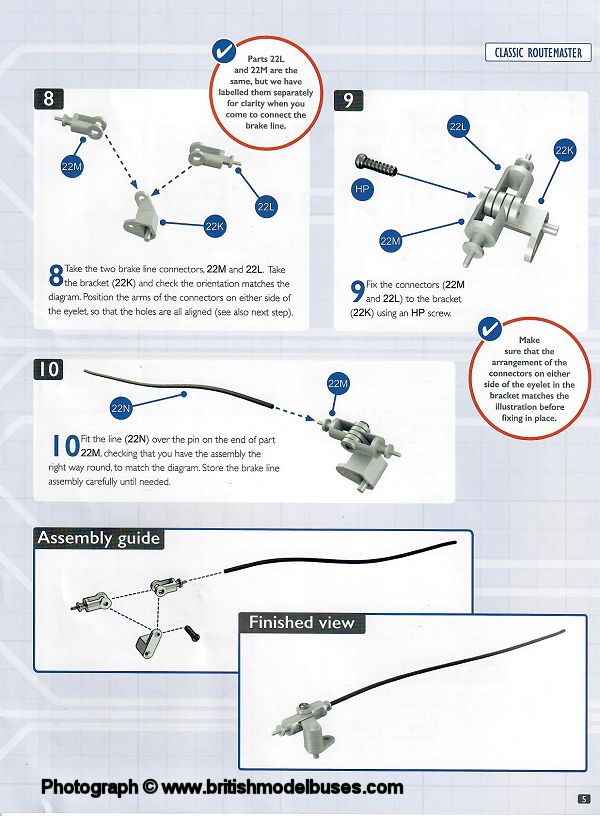
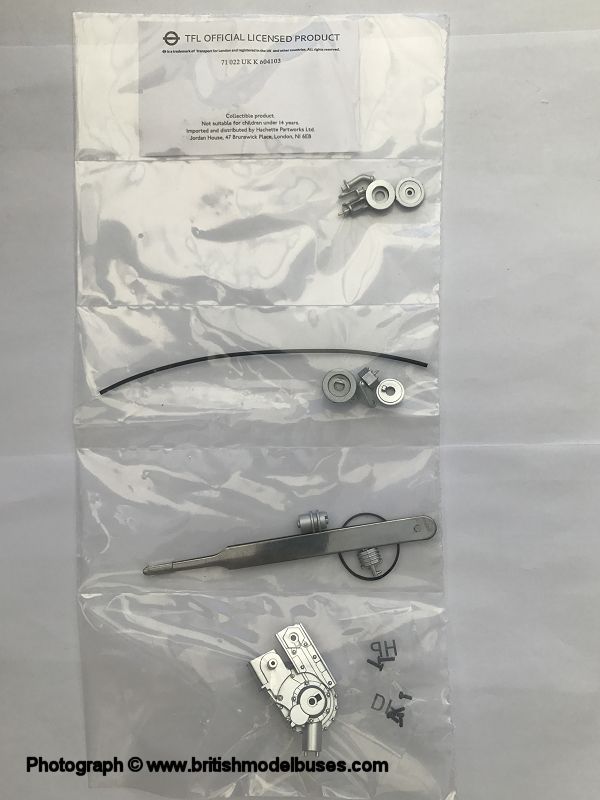
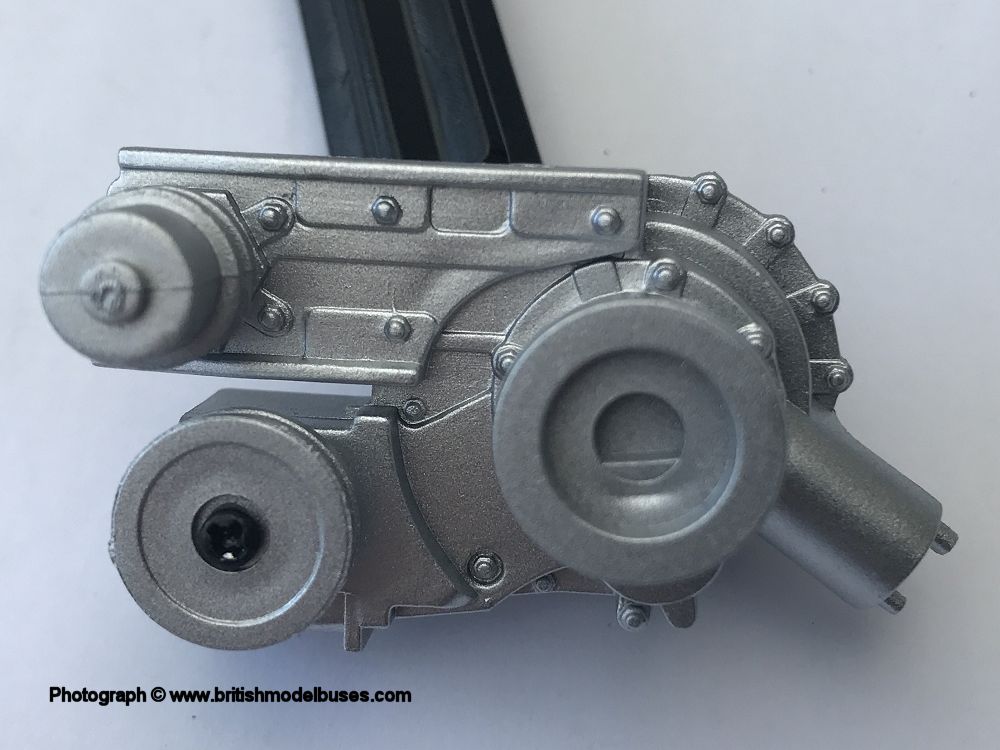
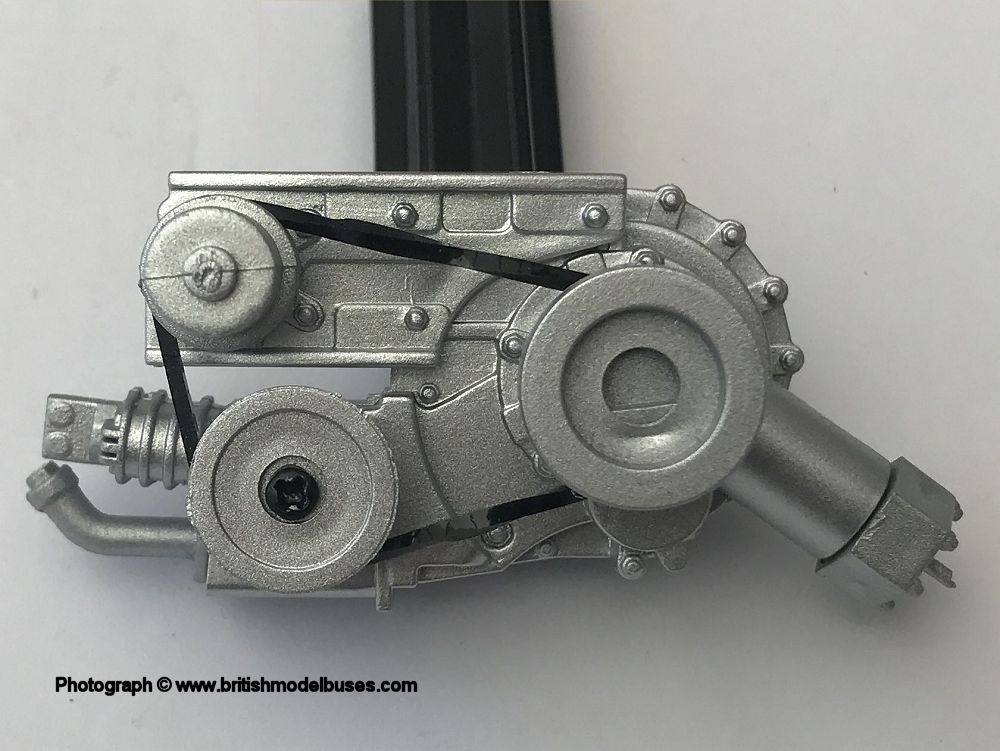
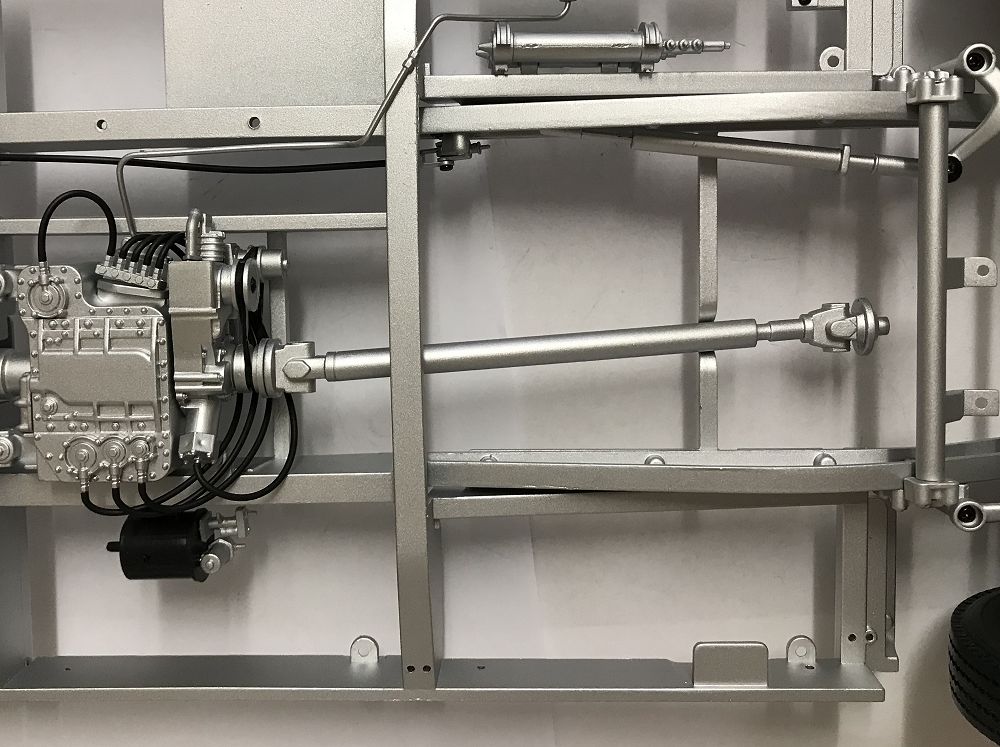
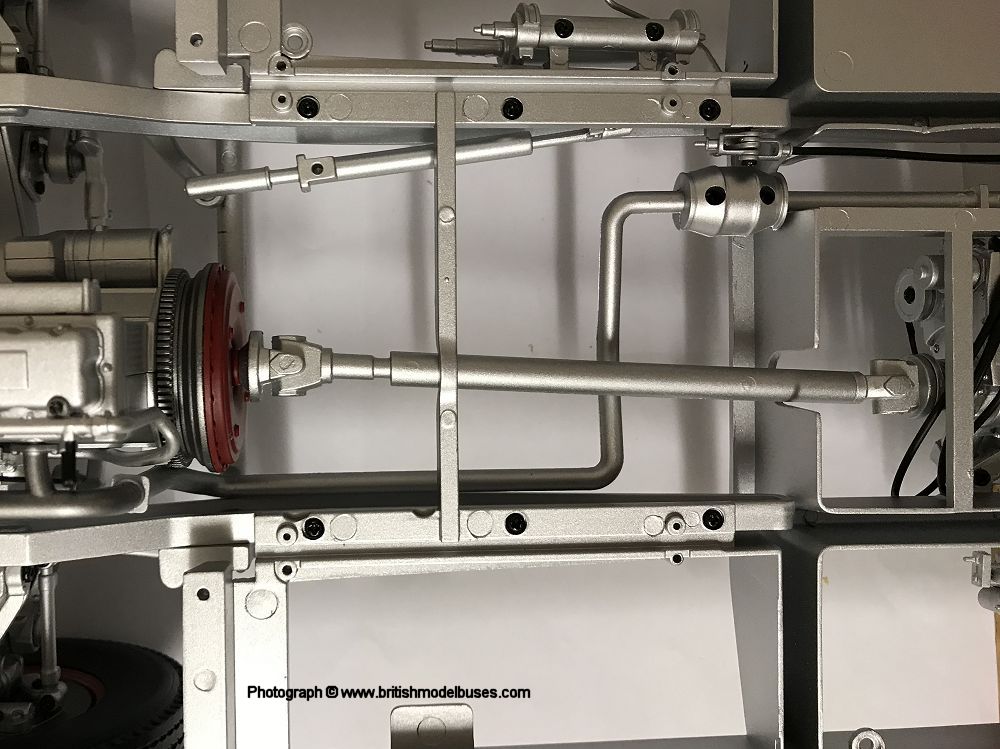
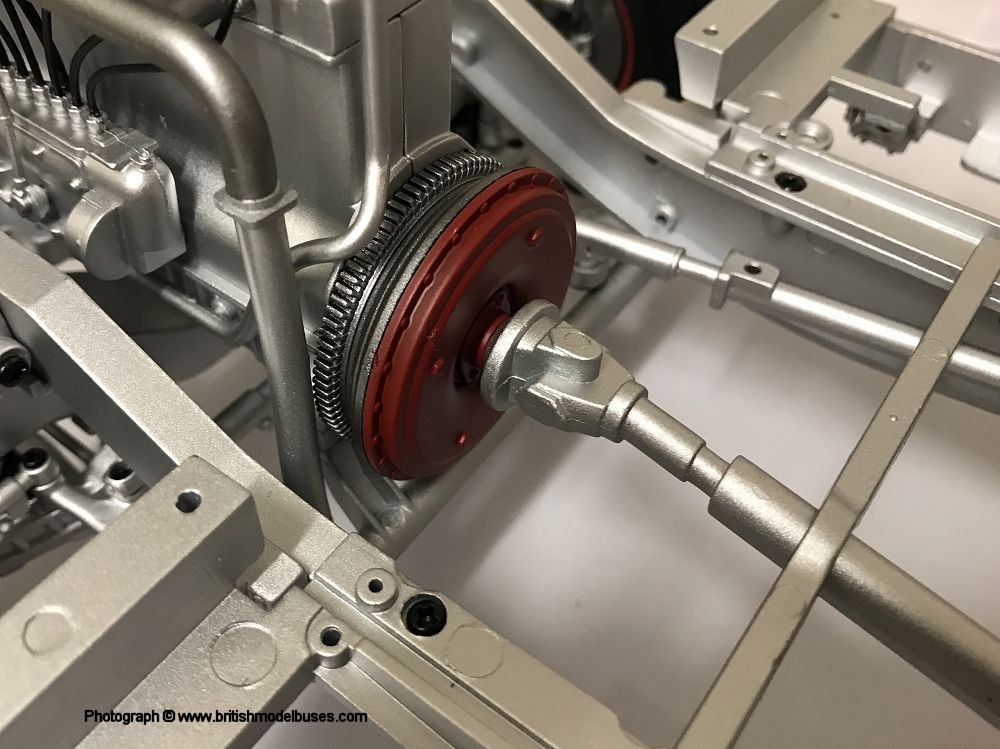
INSTRUCTIONS ISSUE 22 - ASSEMBLING THE DRIVE UNIT

Click here for a higher resolution image Click here for a higher resolution image Click here for a higher resolution image Click here for a higher resolution image Click here for a higher resolution image

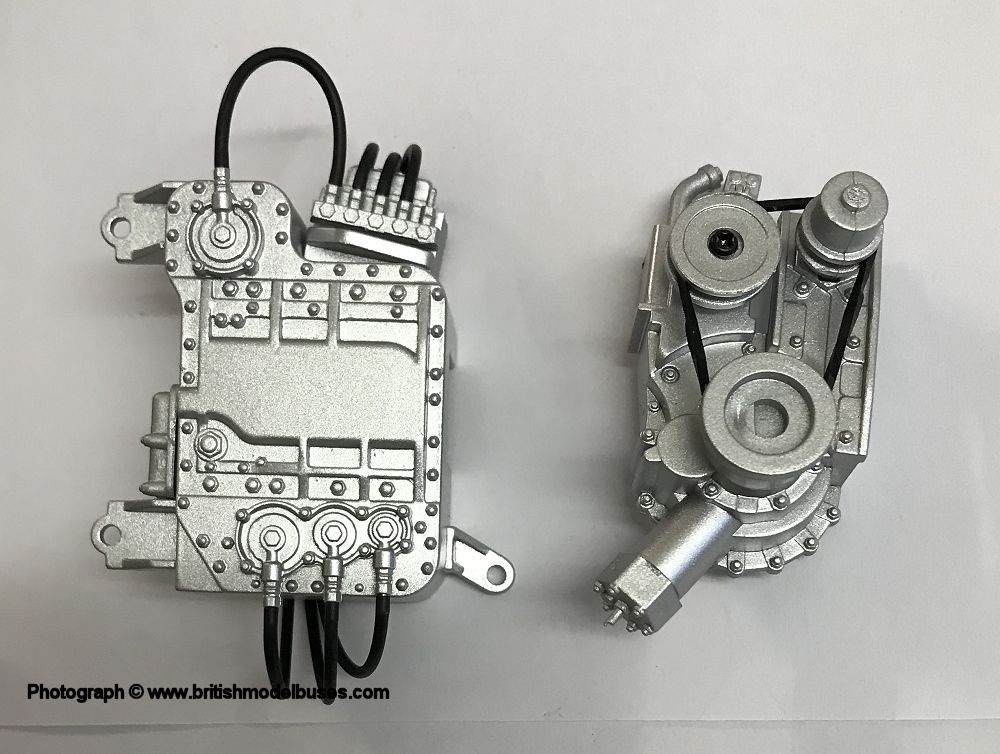
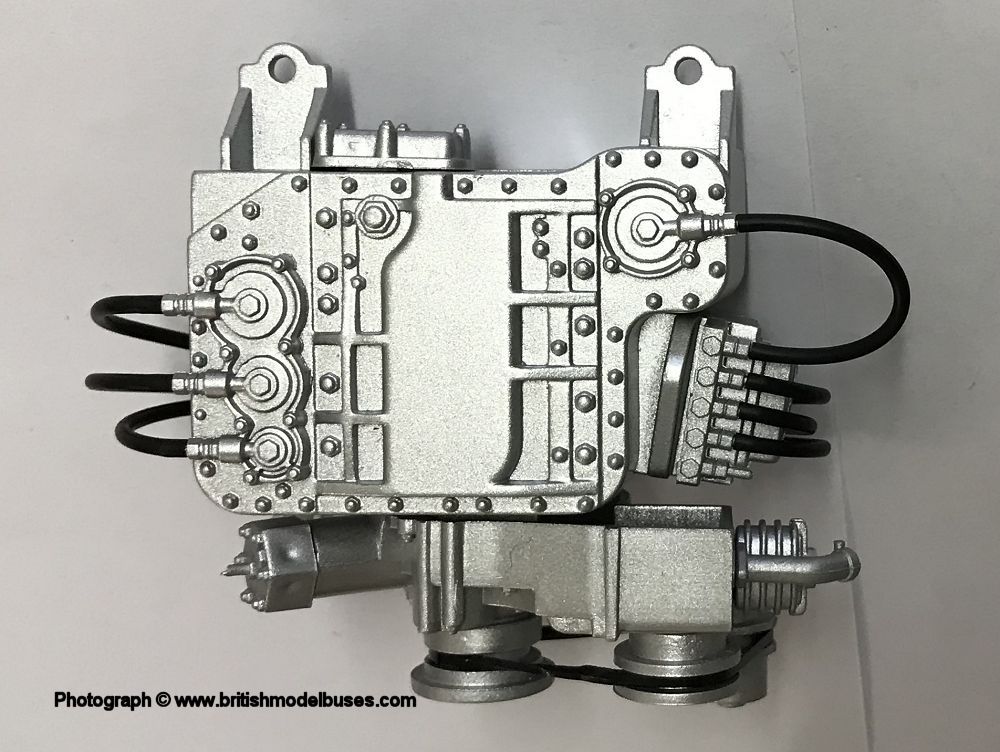
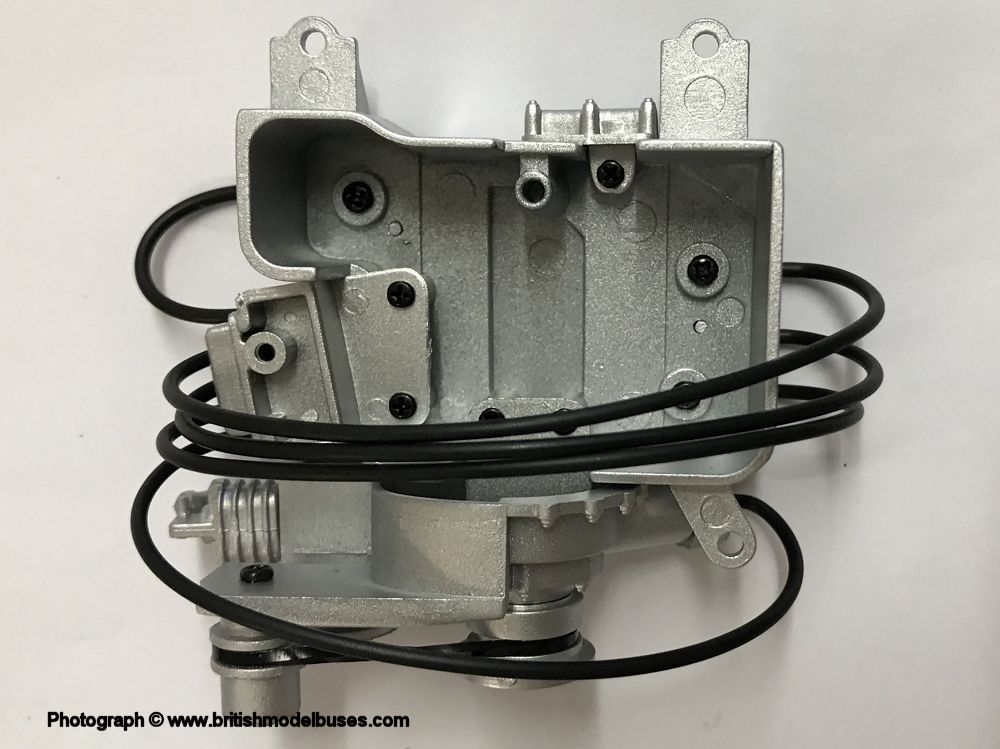
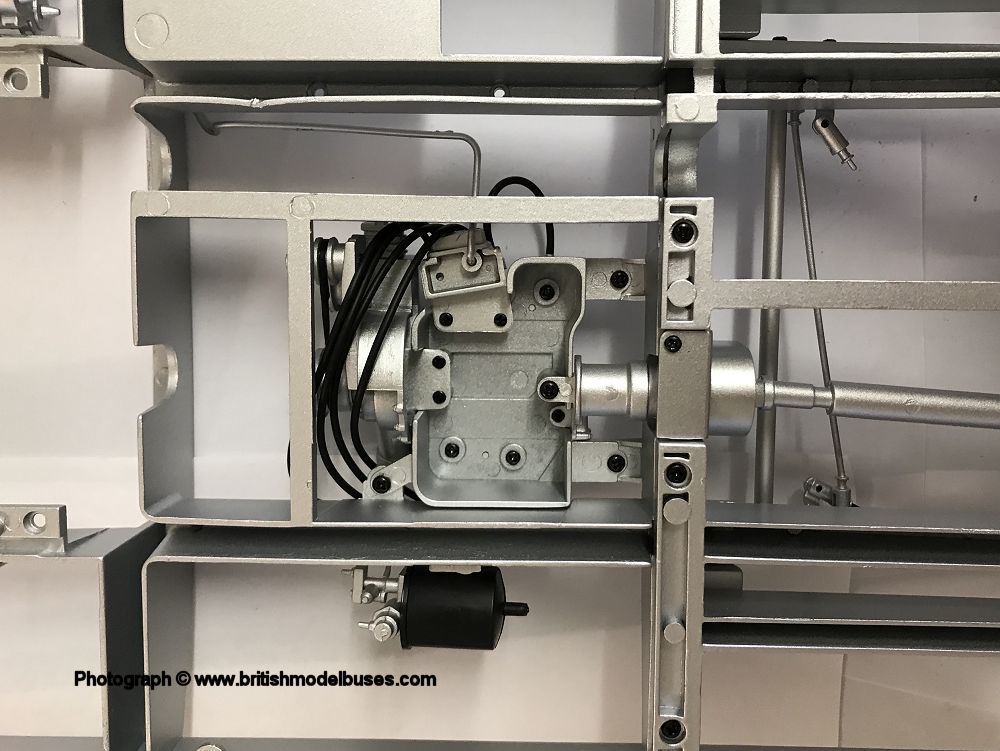
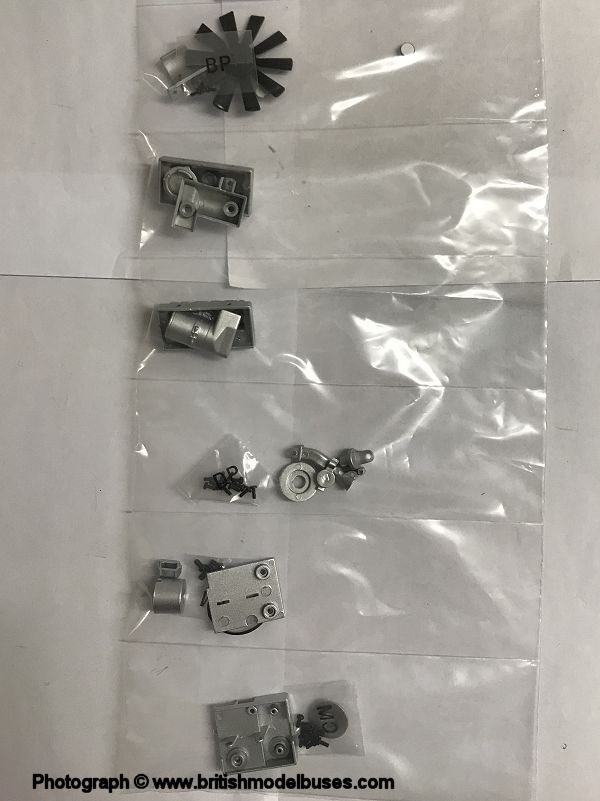
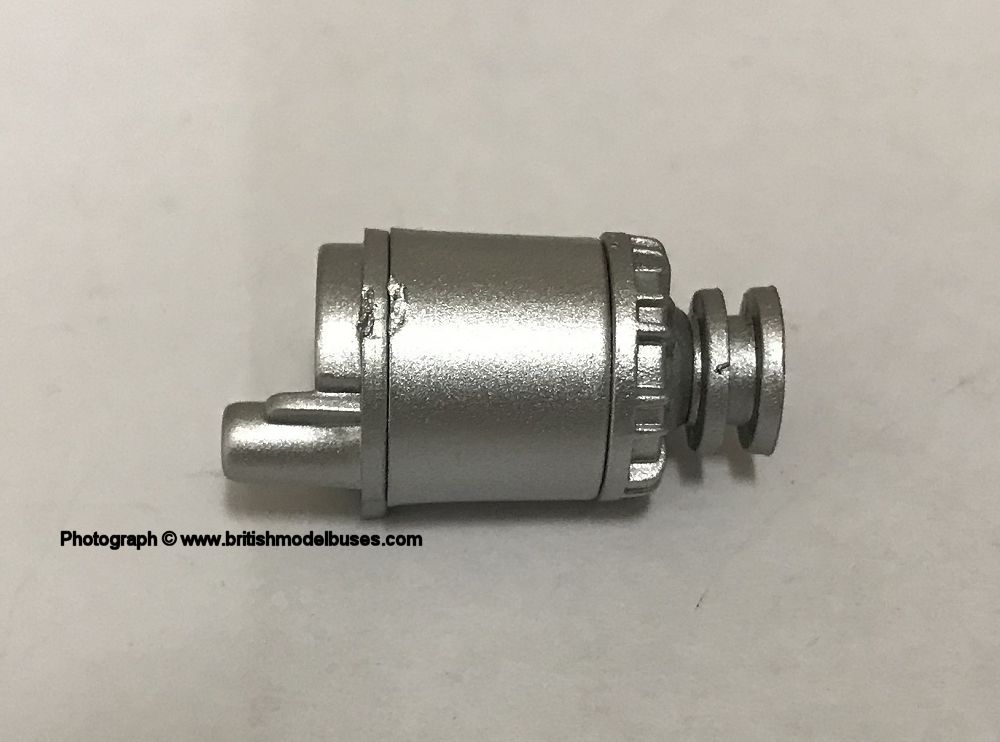
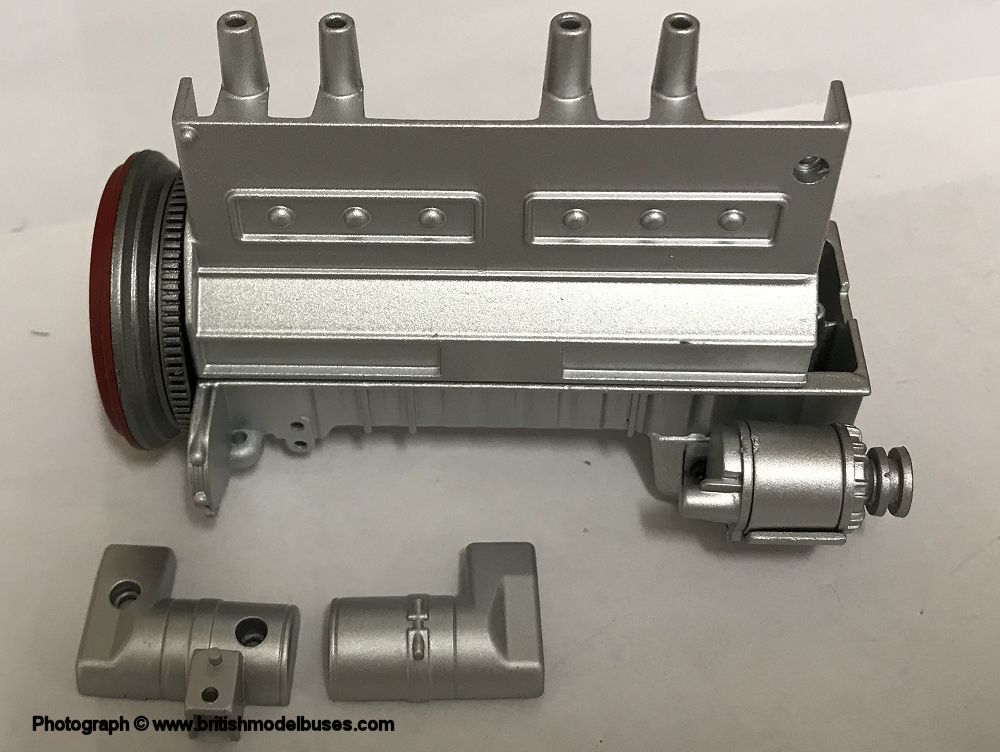
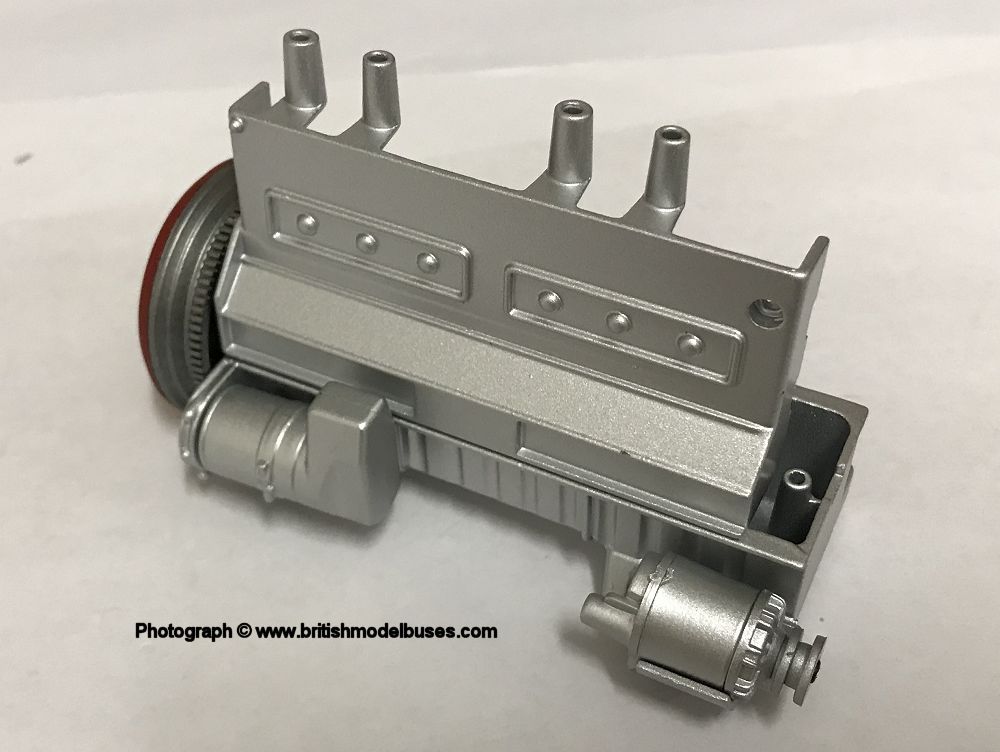
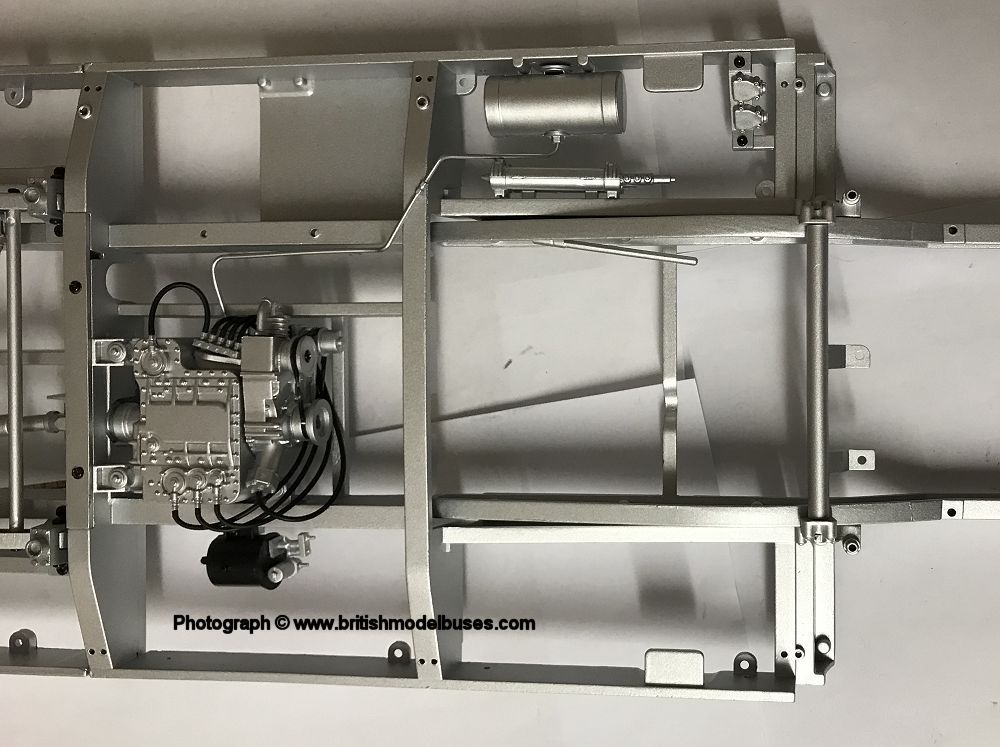
BUILD ISSUE 22 -  ASSEMBLING THE DRIVE UNIT

Click here for a higher resolution image Click here for a higher resolution image Click here for a higher resolution image Click here for a higher resolution image Click here for a higher resolution image


MAGAZINE ISSUE 23 - HEADER TANK ASSEMBLY AND ROD FOR BRAKE SYSTEM
A variety of pieces to install on this build, but with no issues for me, it took me approximately 20 minutes to complete. This weeks magazine starts route 159 which runs from Streatham to Marble Arch, a distance of 8 miles and was the last route to see Routemasters in Operational service. The second magazine article is about buses in action in World War 1.

Click here for a higher resolution image Click here for a higher resolution image Click here for a higher resolution image

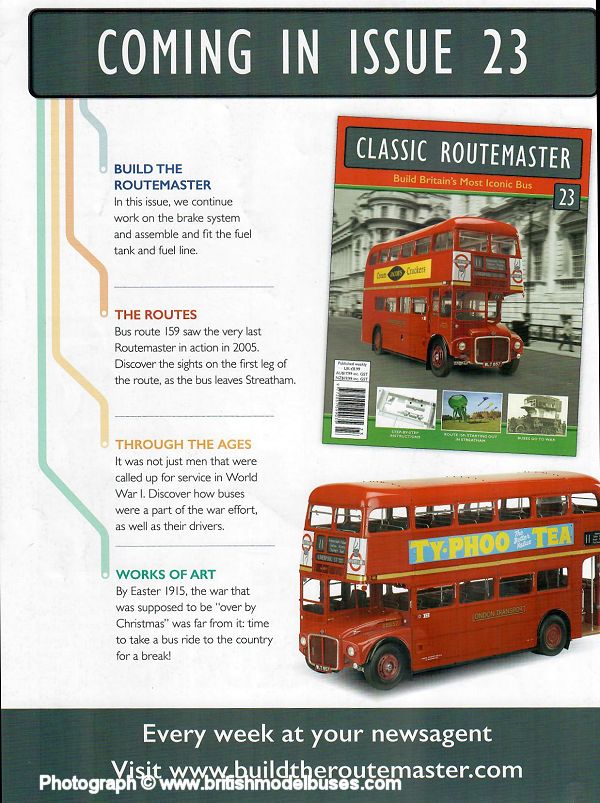
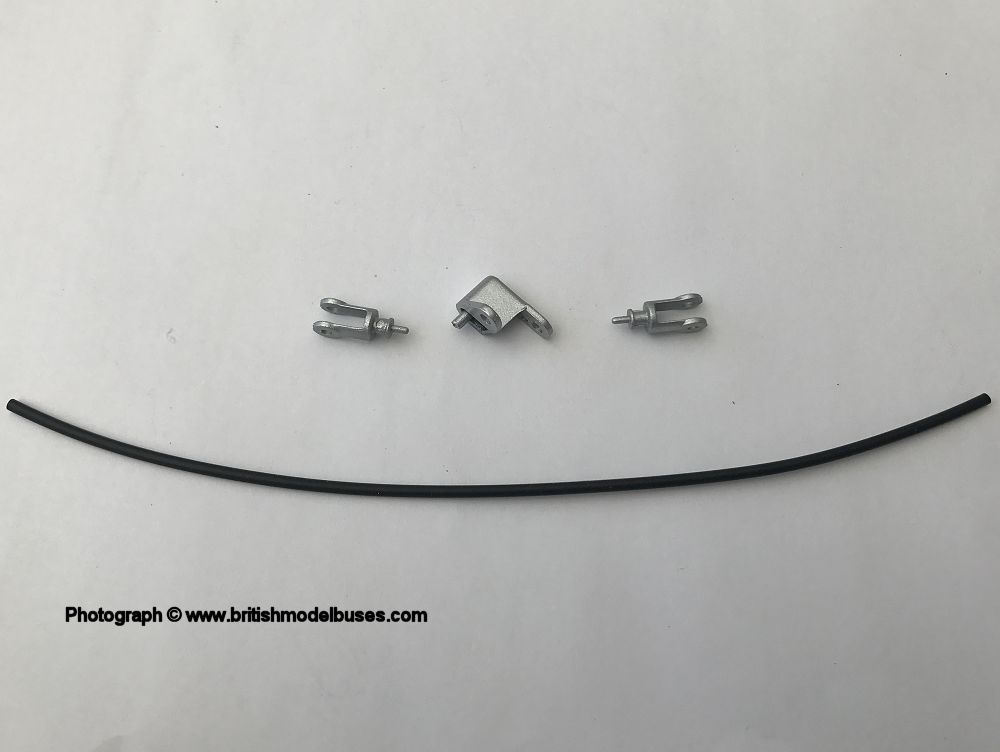
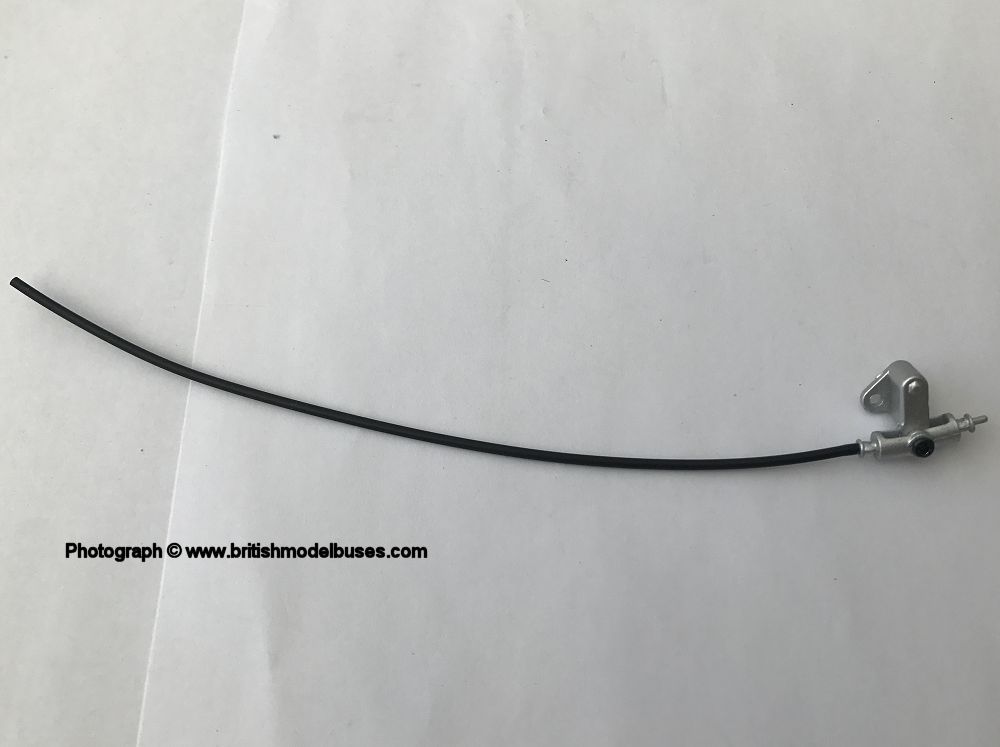
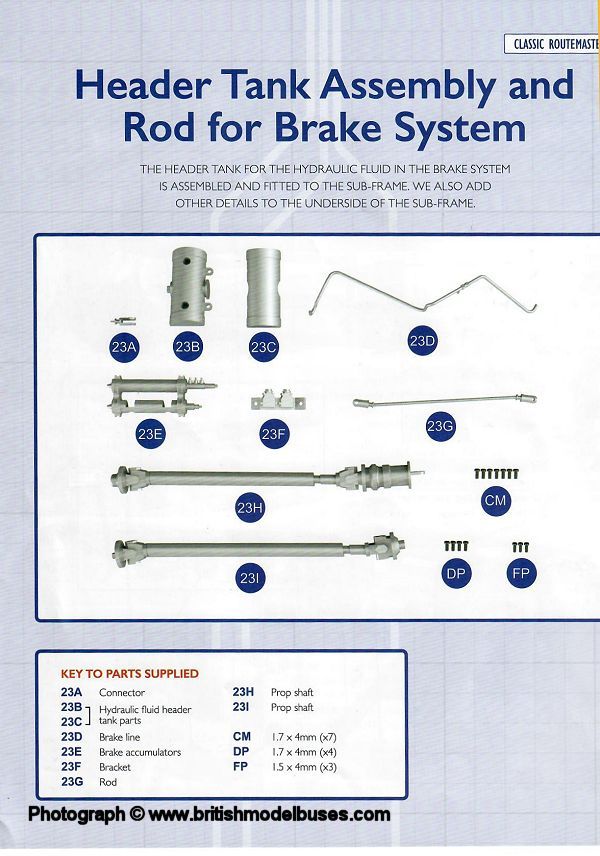
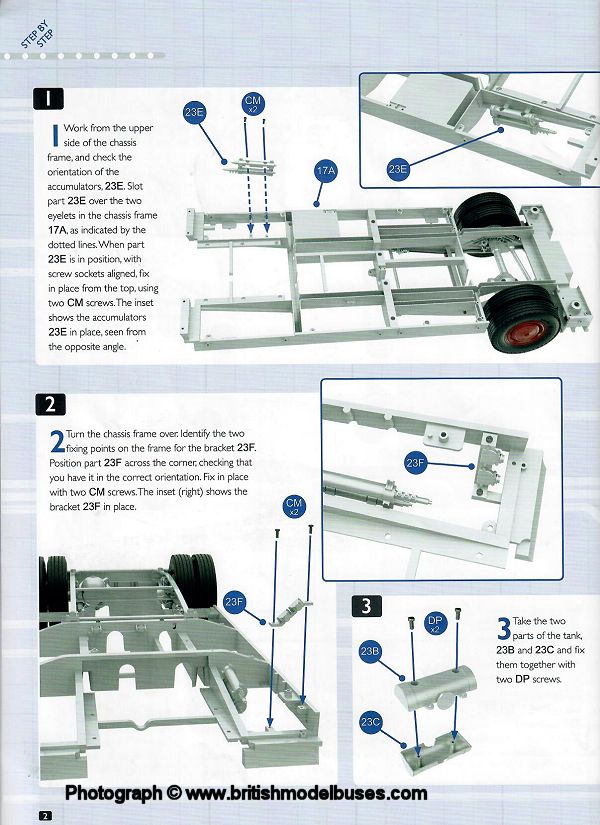
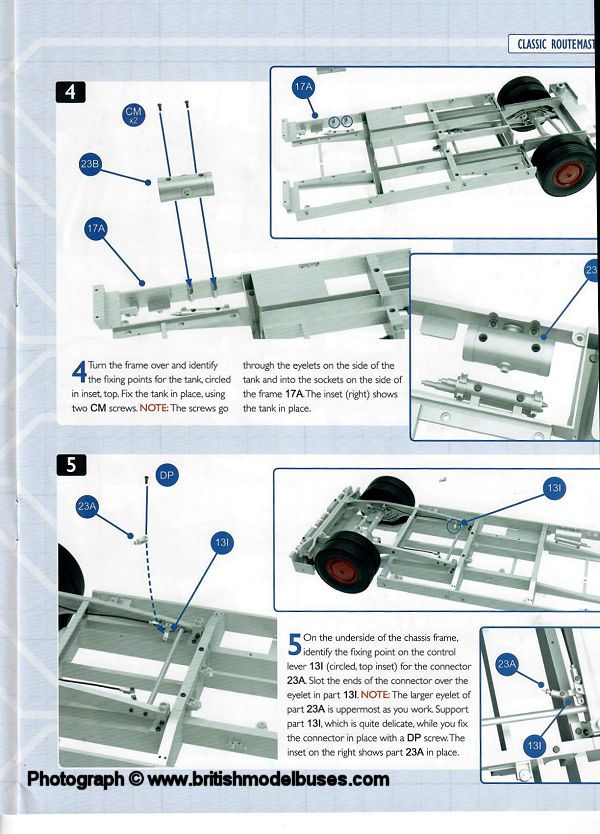
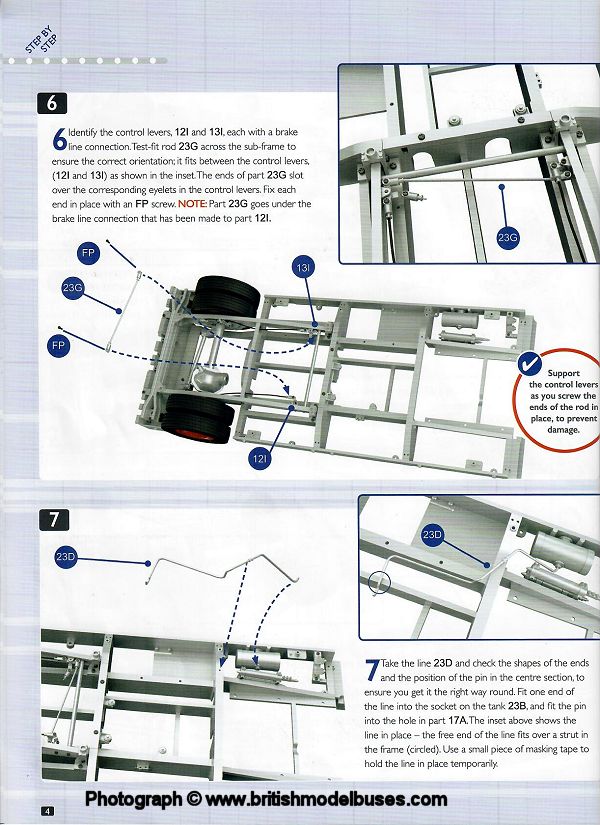
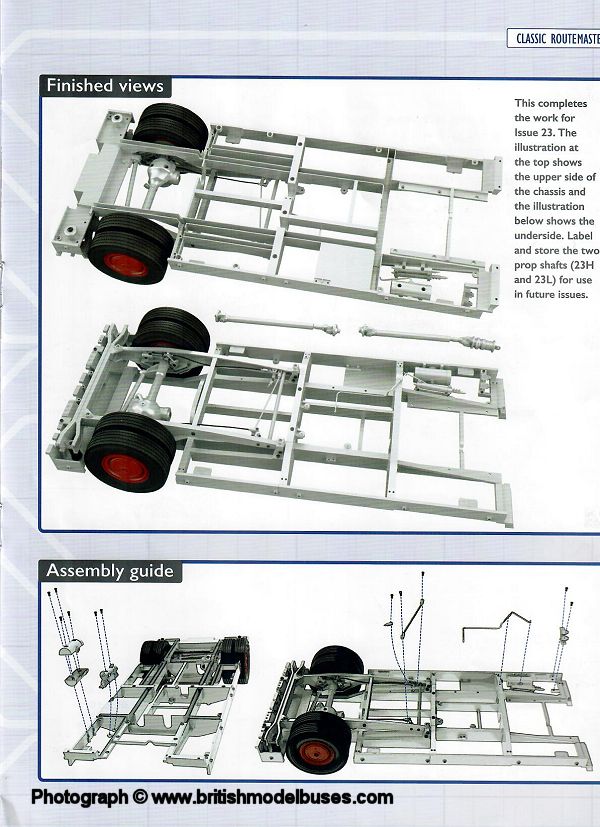
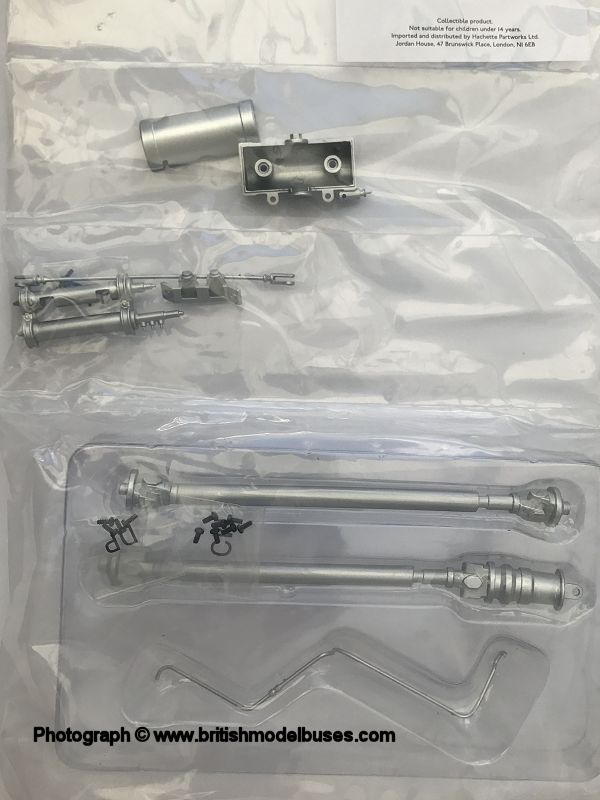
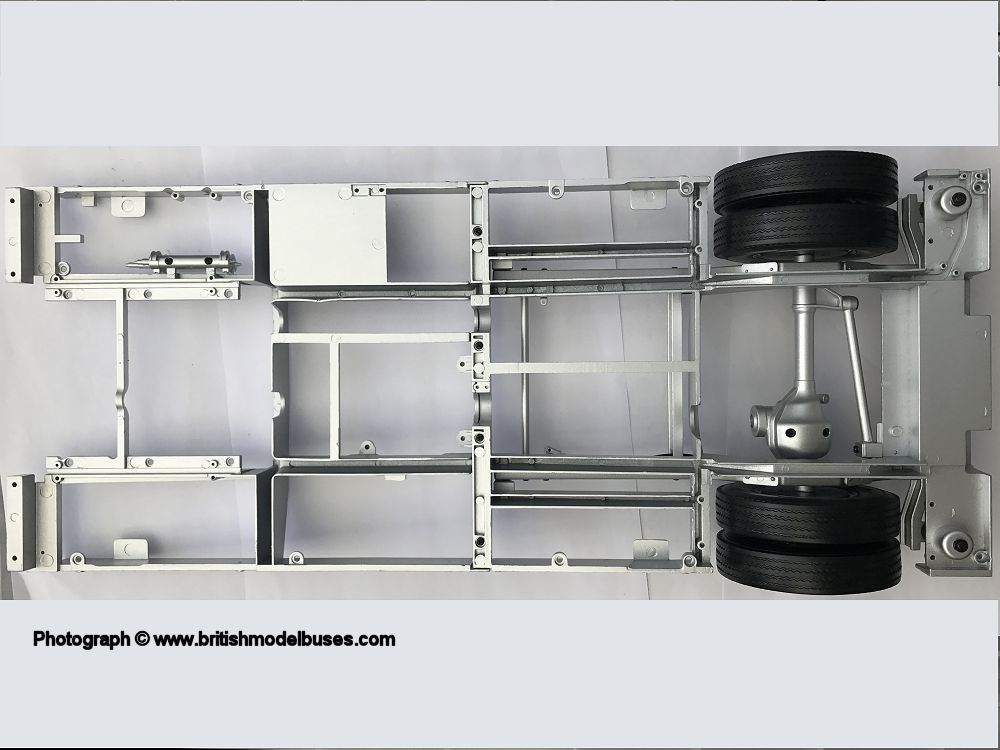
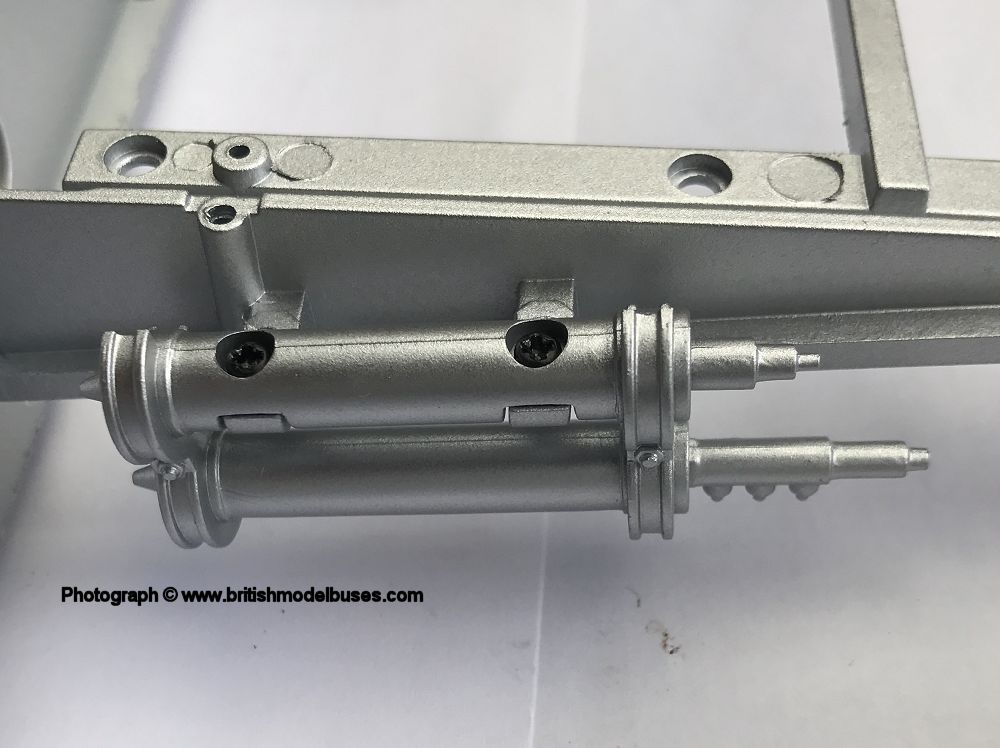
INSTRUCTIONS ISSUE 23 - HEADER TANK ASSEMBLY AND ROD FOR BRAKE SYSTEM

Click here for a higher resolution image Click here for a higher resolution image Click here for a higher resolution image Click here for a higher resolution image Click here for a higher resolution image

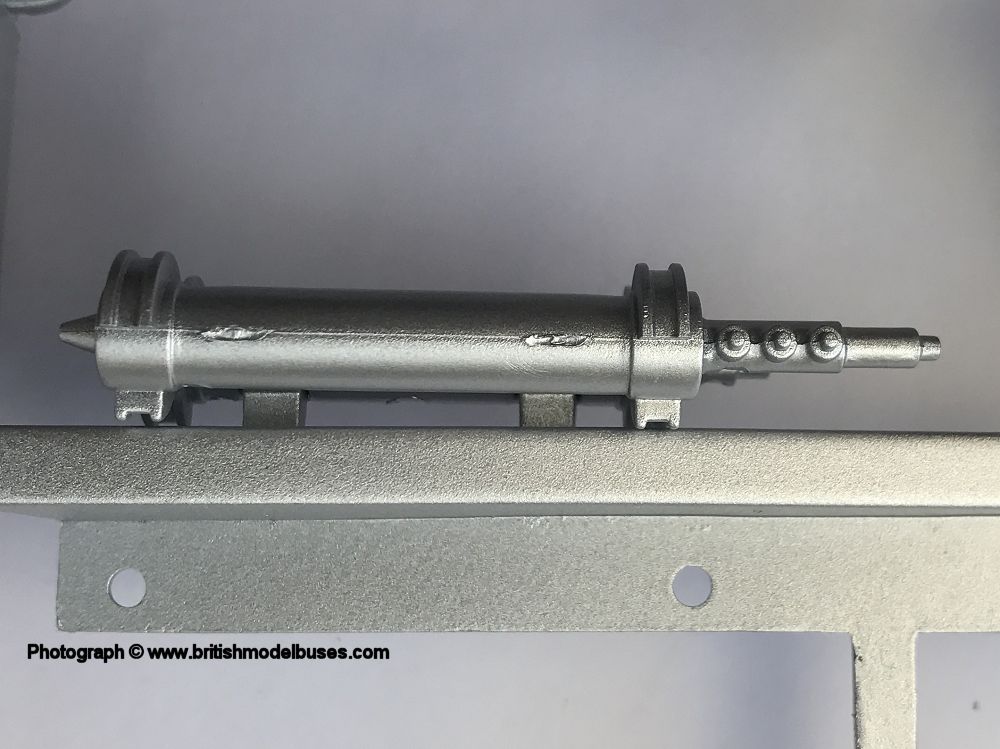
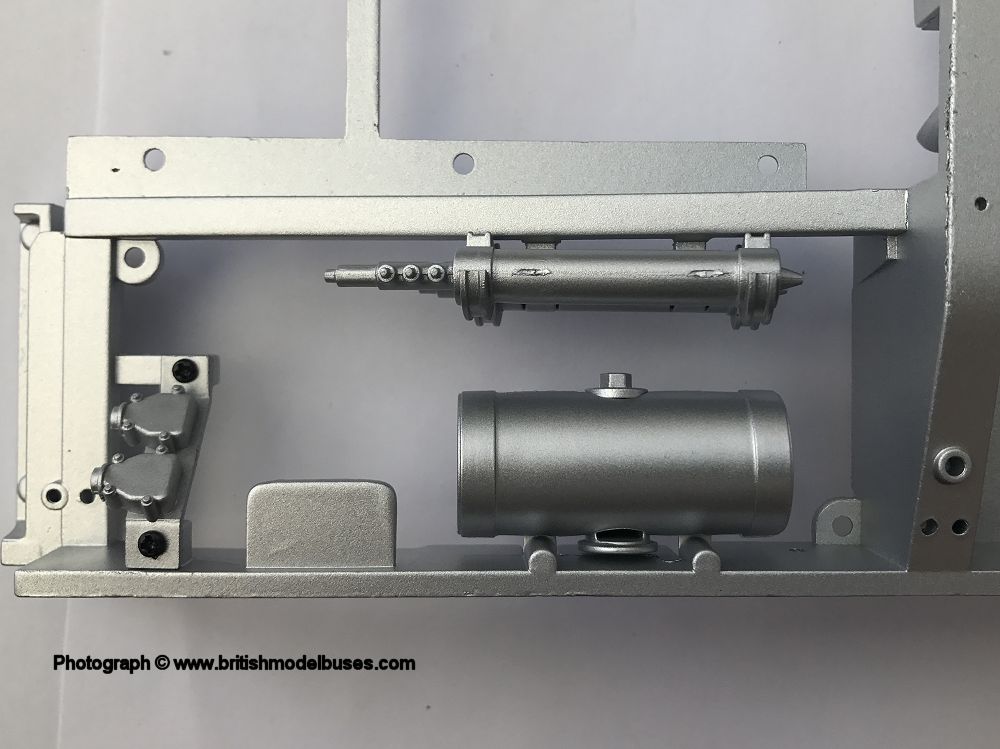
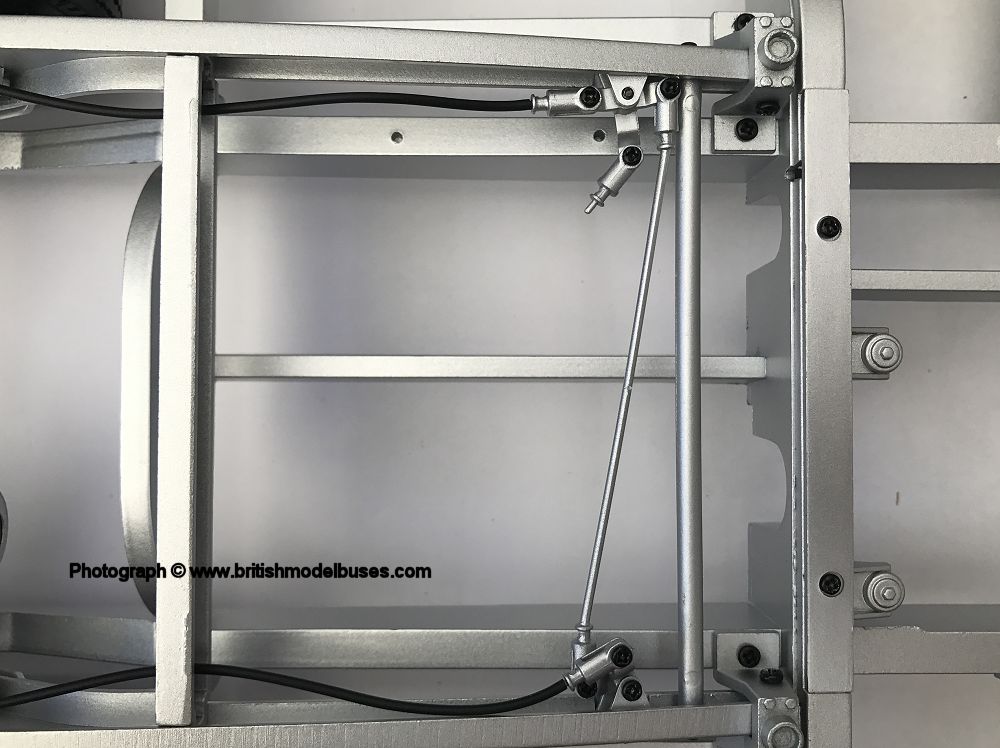
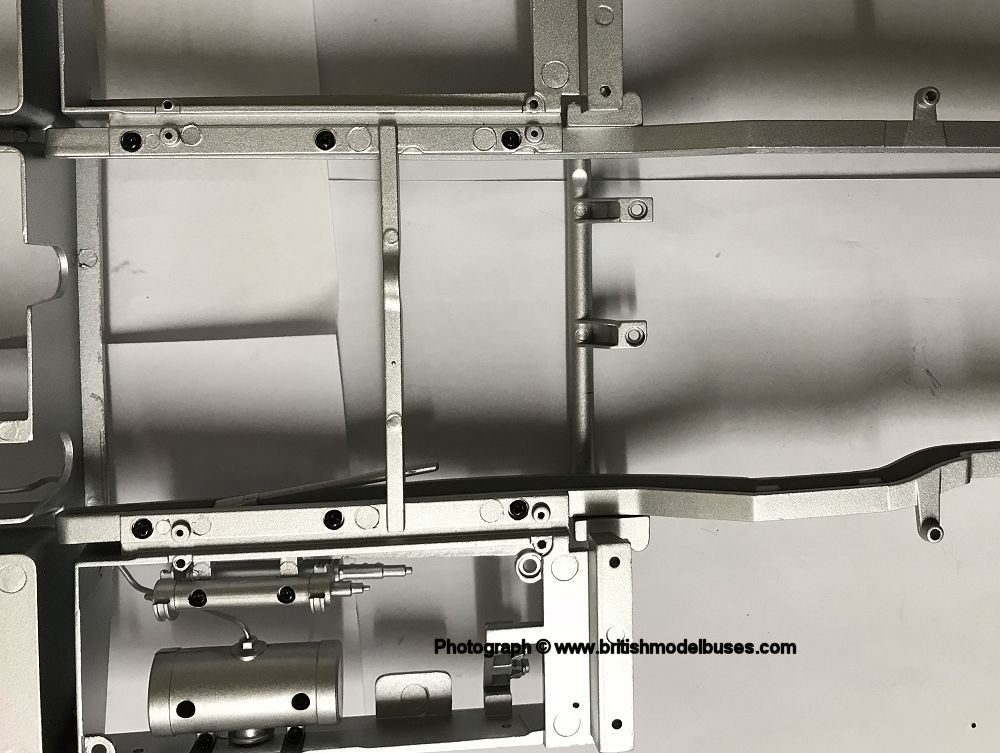
BUILD ISSUE 23 - HEADER TANK ASSEMBLY AND ROD FOR BRAKE SYSTEM

Click here for a higher resolution image Click here for a higher resolution image Click here for a higher resolution image Click here for a higher resolution image Click here for a higher resolution image Click here for a higher resolution image Click here for a higher resolution image Click here for a higher resolution image


MAGAZINE ISSUE 24 - GEARBOX CASING AND CONNECTIONS
There was a reasonable amount of work in this build which took me approximately 50 minutes. Nothing too difficult, although a little fiddly in a couple of places. It is good being able to add parts to chassis and seeing it grow.  The magazine article on route 159 continues with the area of Lambeth. The know your London fact describes how the site of today's Imperial War Museum was originally part of the Bethlem Royal Hospital which contained a wing for patients described as criminally insane. The hospital was given the nickname of Bedlam and the word is now in common usage to describe chaos and uproar. The second article describes features of the Routemaster designed to increase comfort such as the hand-wound quarter-drop windows.

Click here for a higher resolution image Click here for a higher resolution image Click here for a higher resolution image

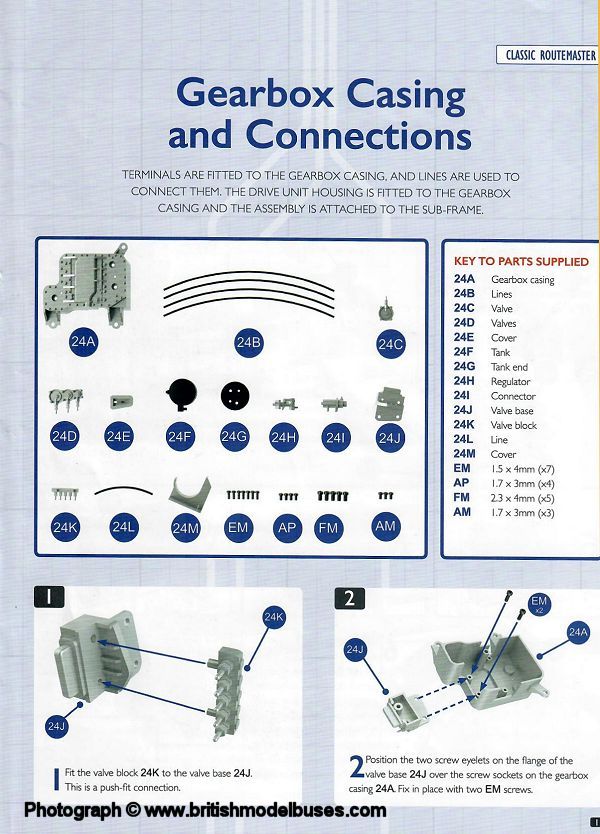
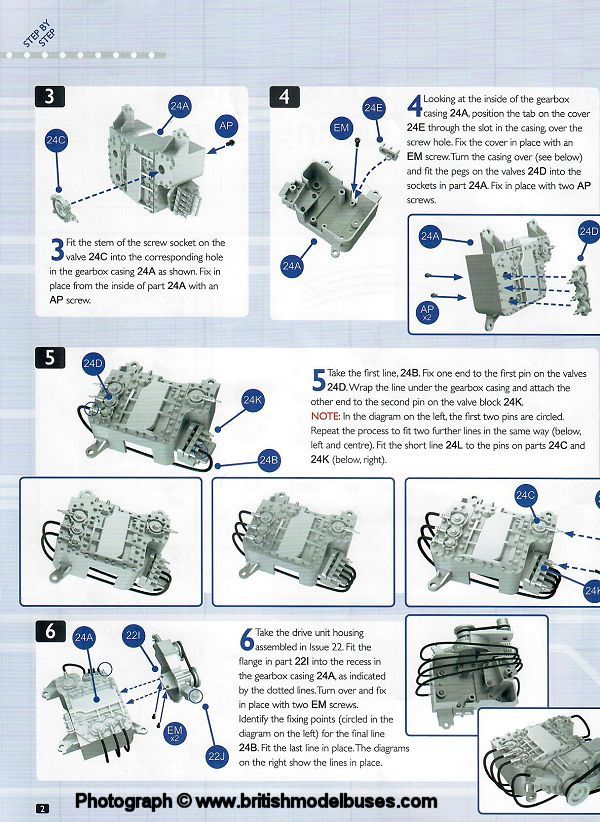
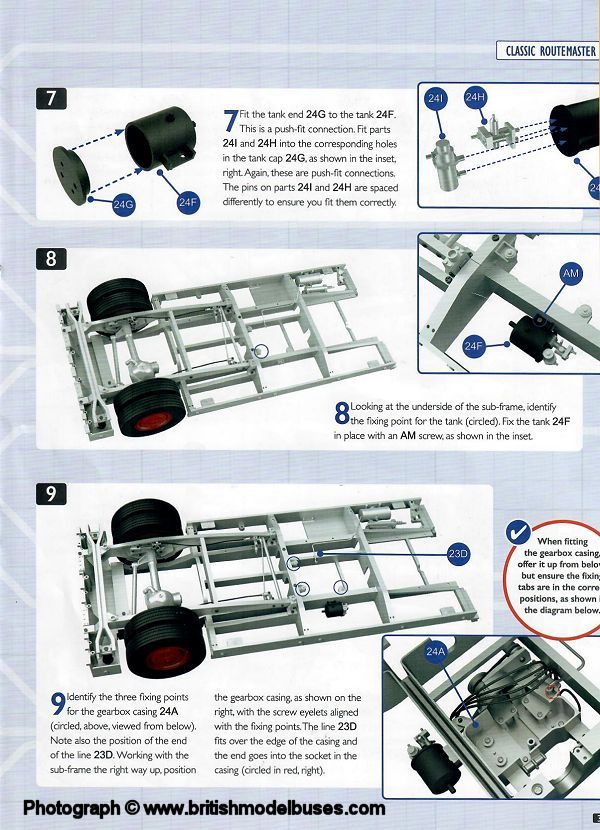
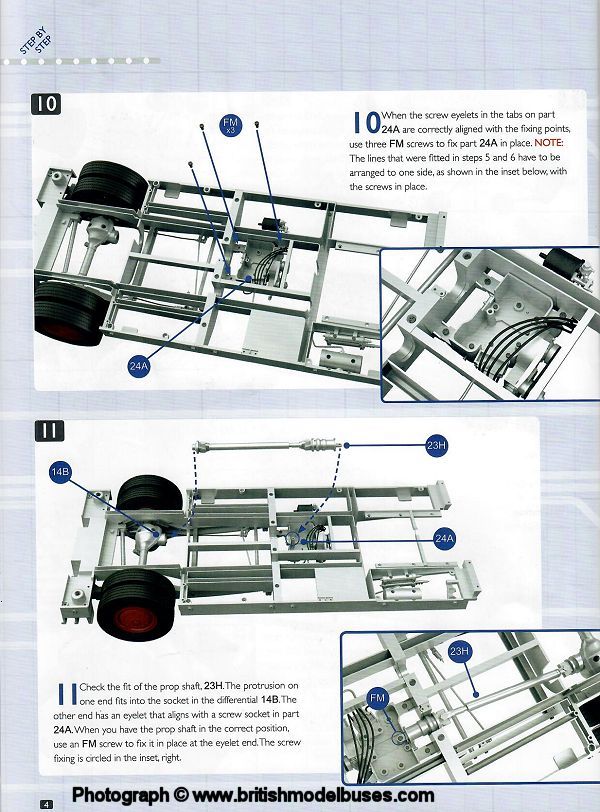
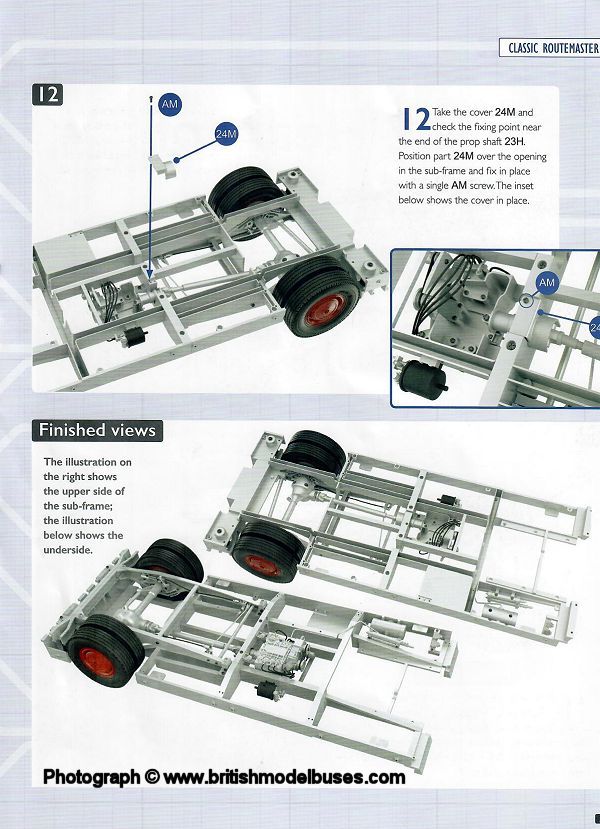
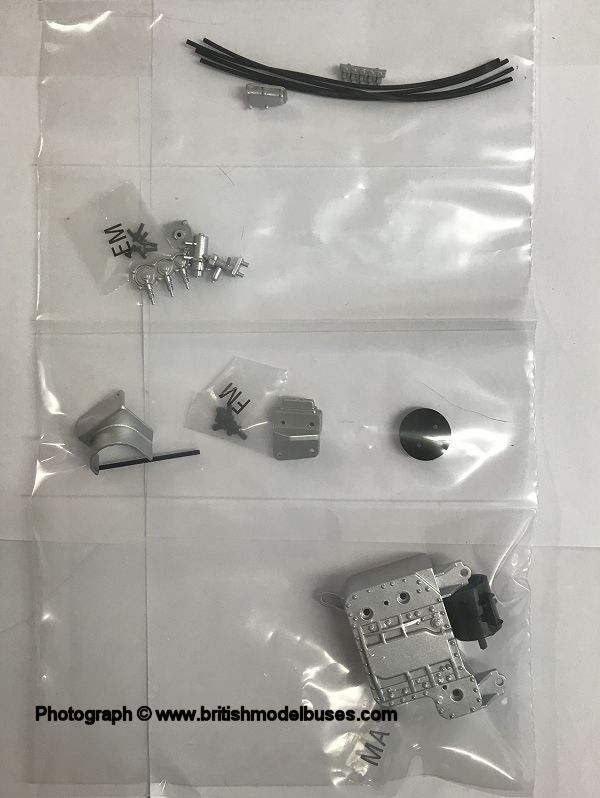
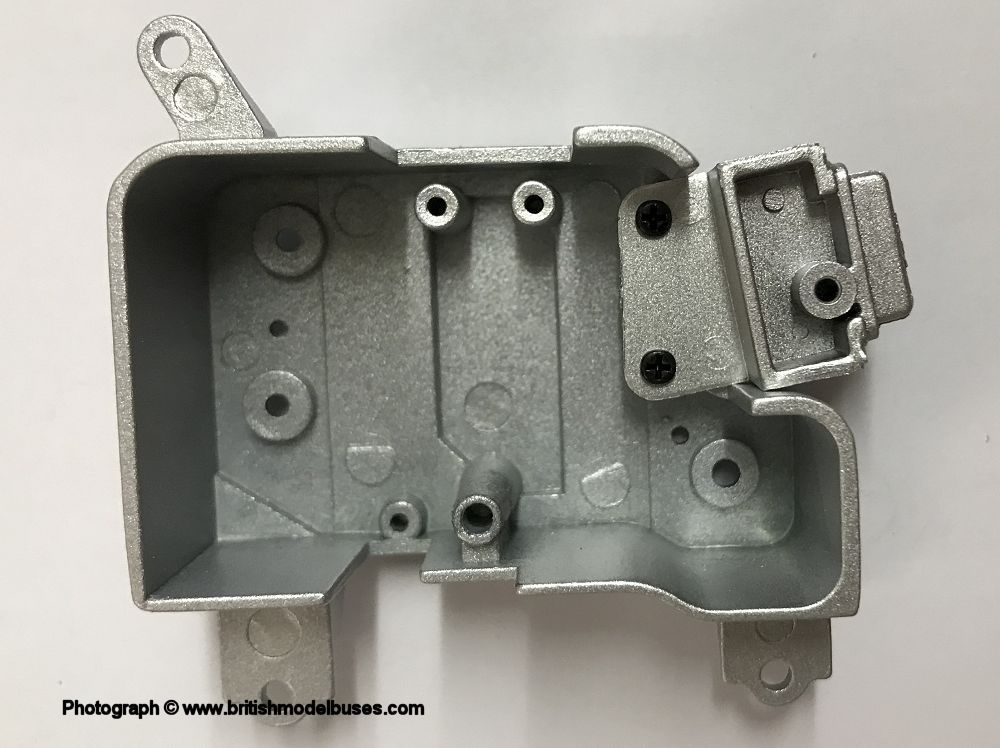
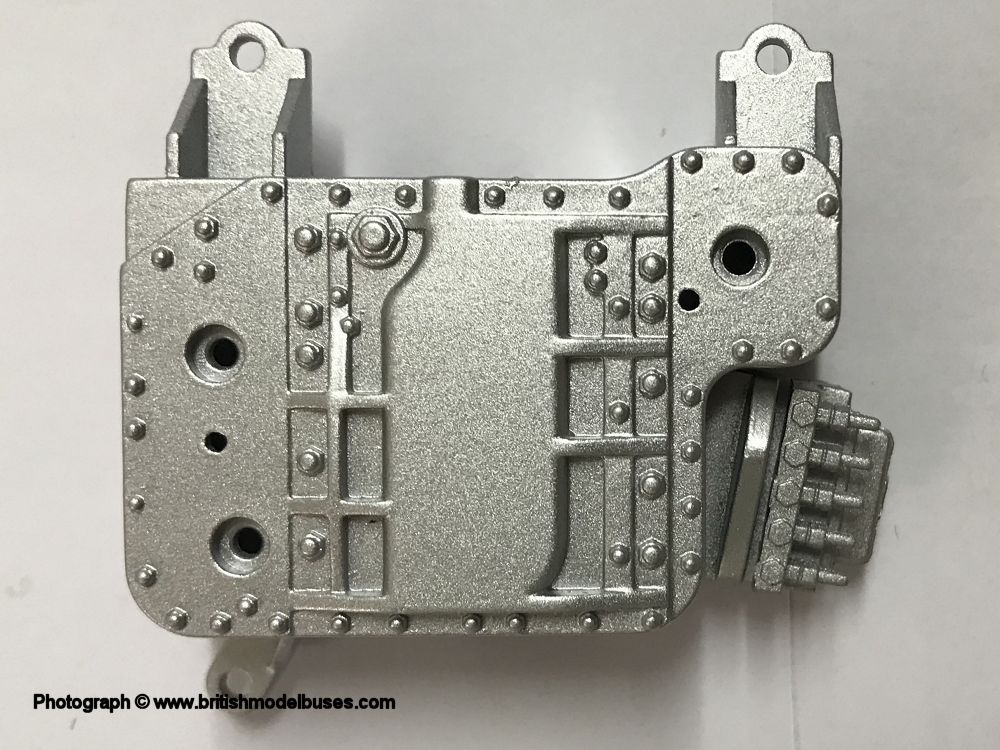
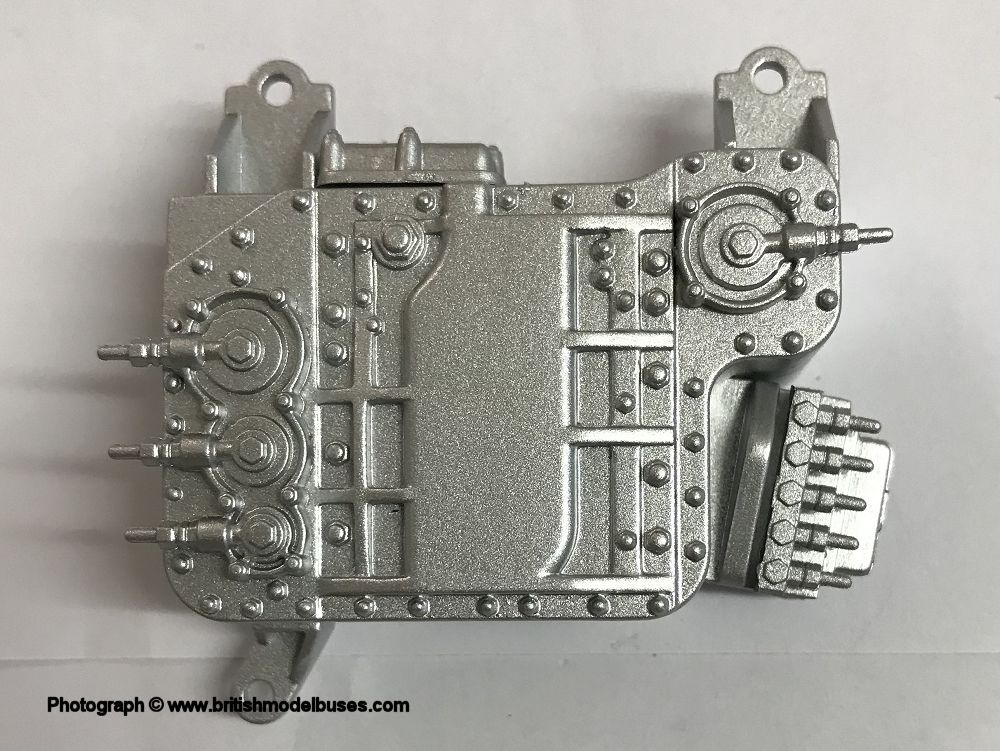
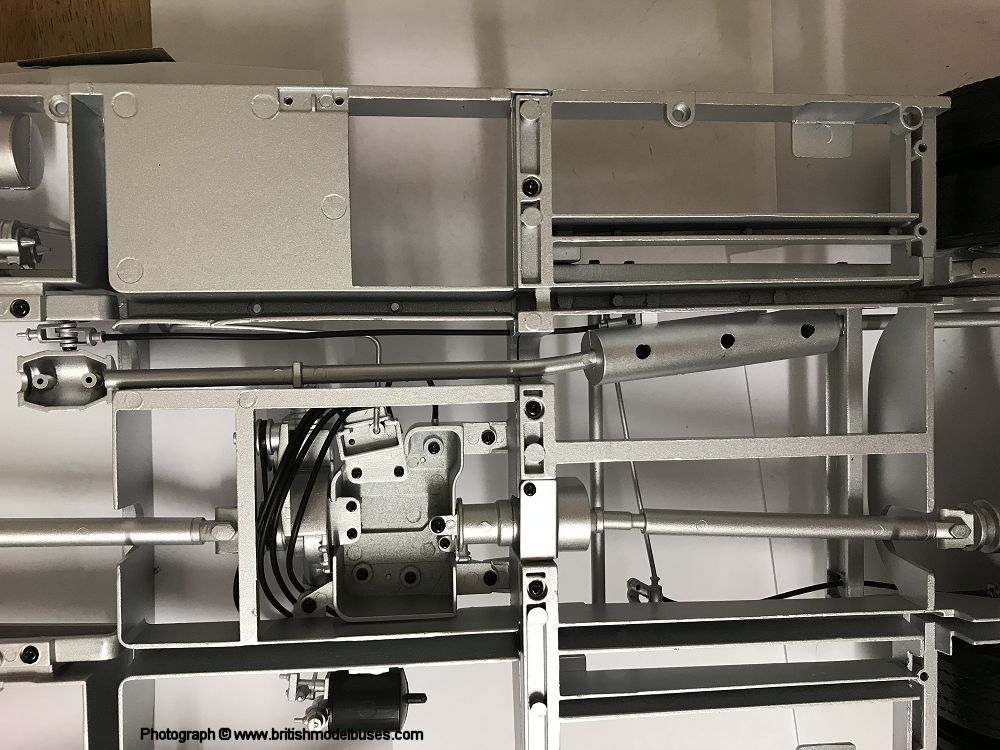
INSTRUCTIONS ISSUE 24 - GEARBOX CASING AND CONNECTIONS

Click here for a higher resolution image Click here for a higher resolution image Click here for a higher resolution image Click here for a higher resolution image Click here for a higher resolution image

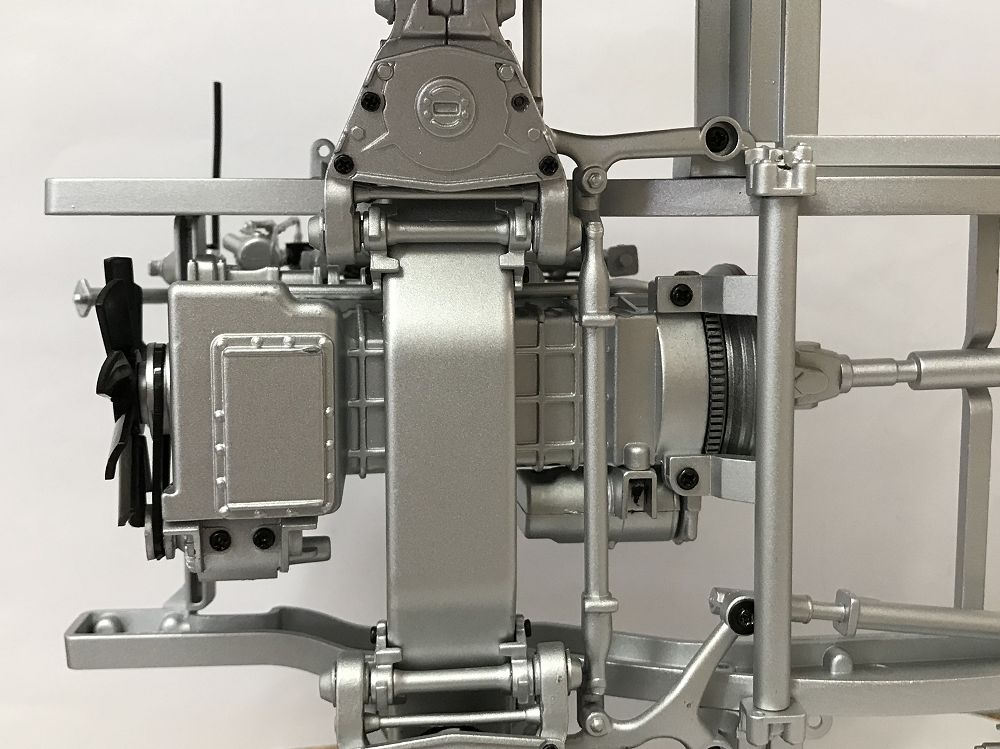
BUILD ISSUE 24 - GEARBOX CASING AND CONNECTIONS

Click here for a higher resolution image Click here for a higher resolution image Click here for a higher resolution image Click here for a higher resolution image Click here for a higher resolution image
Click here for a higher resolution image Click here for a higher resolution image Click here for a higher resolution image Click here for a higher resolution image  


MAGAZINE ISSUE 25 - EXHAUST MANIFOLD, CRANKCASE AND OIL SUMP
Again no great difficulty for me on this build. This took me approximately 30 minutes to put together. NOTE: I strongly recommend not fitting the Power Steering Fluid Pipe until the end of Issue 29 (see 29 below). The description of route 159 passes through Westminster and includes articles on the Palace of Westminster and the Churchill War Rooms. The second magazine article is about the Home Front in World War 1 and describes working on the buses during the war, there is a great photograph of 4 ladies cleaning B-Type B1940 in Willesden Garage during the war.

Click here for a higher resolution image Click here for a higher resolution image Click here for a higher resolution image

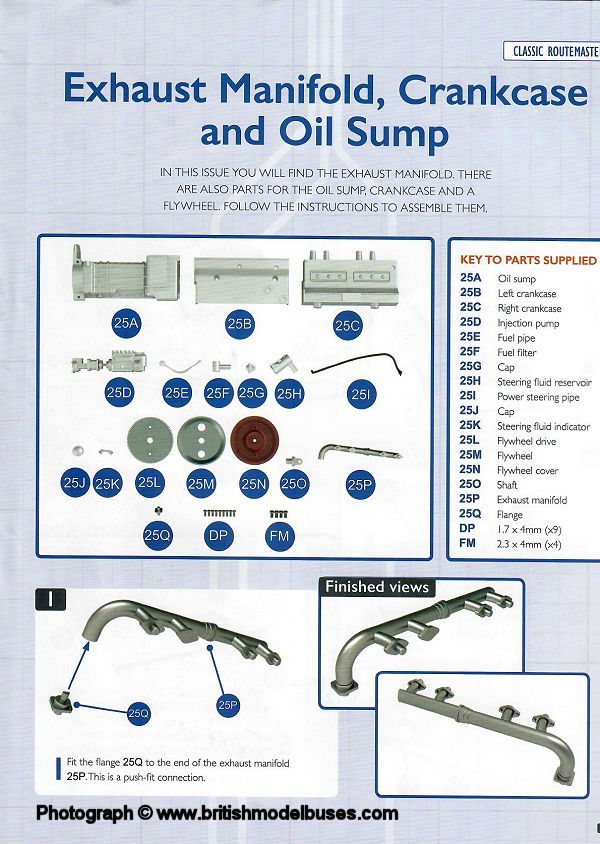
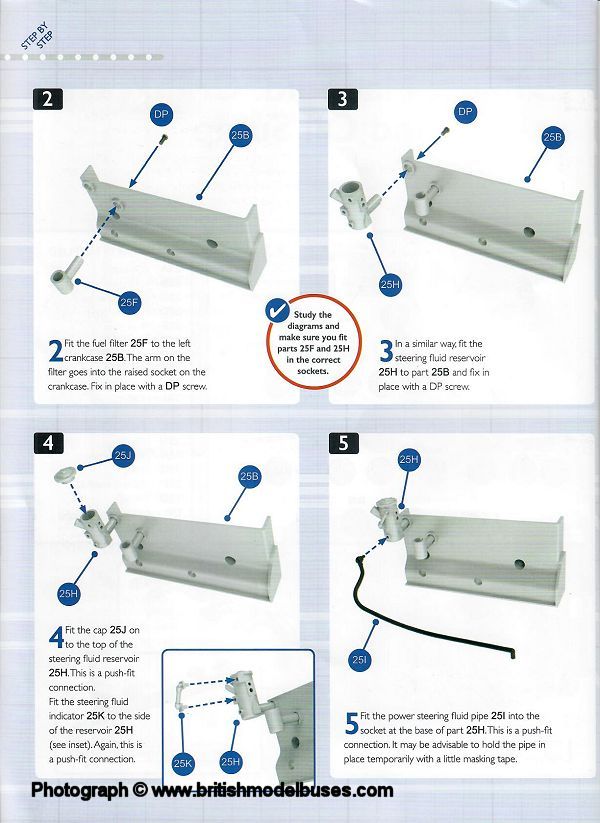
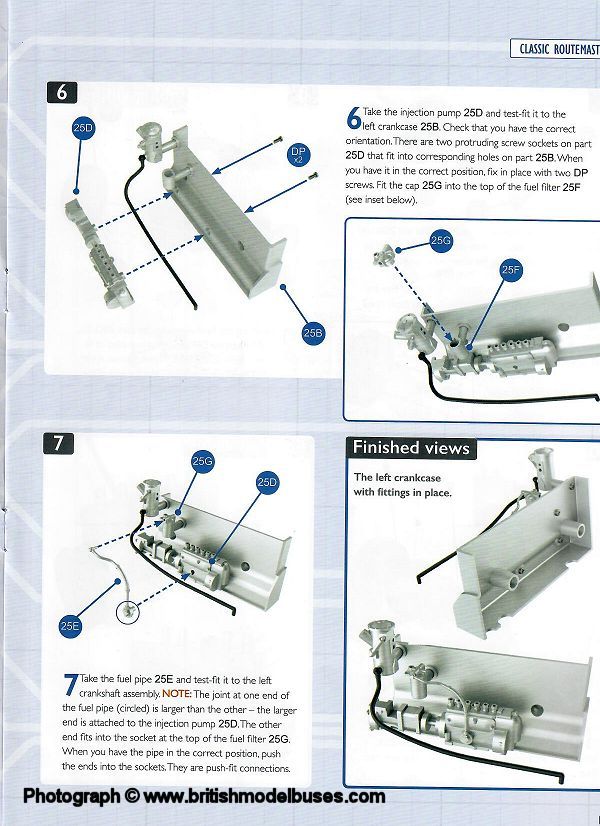
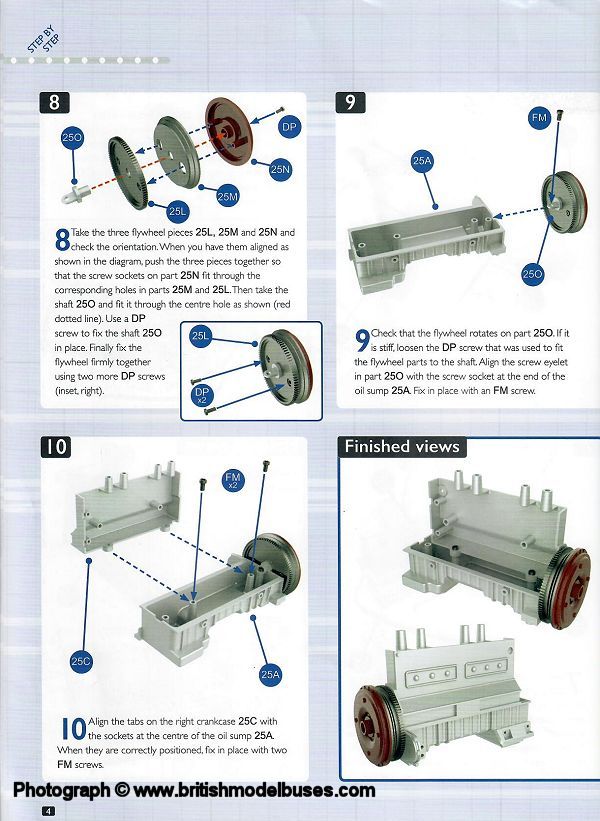
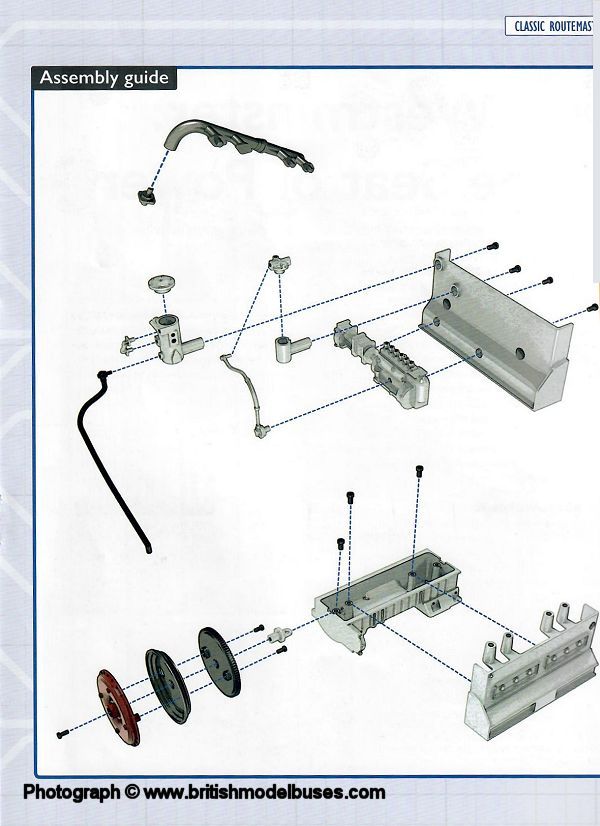
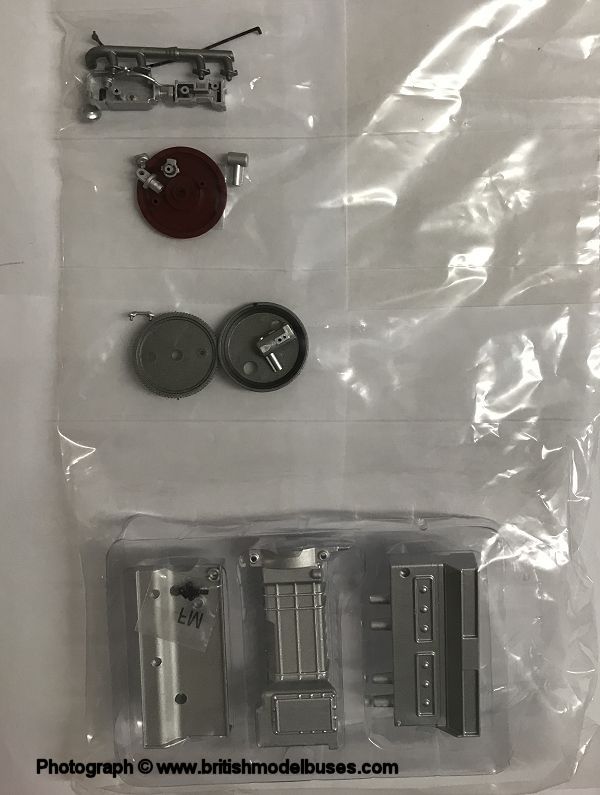
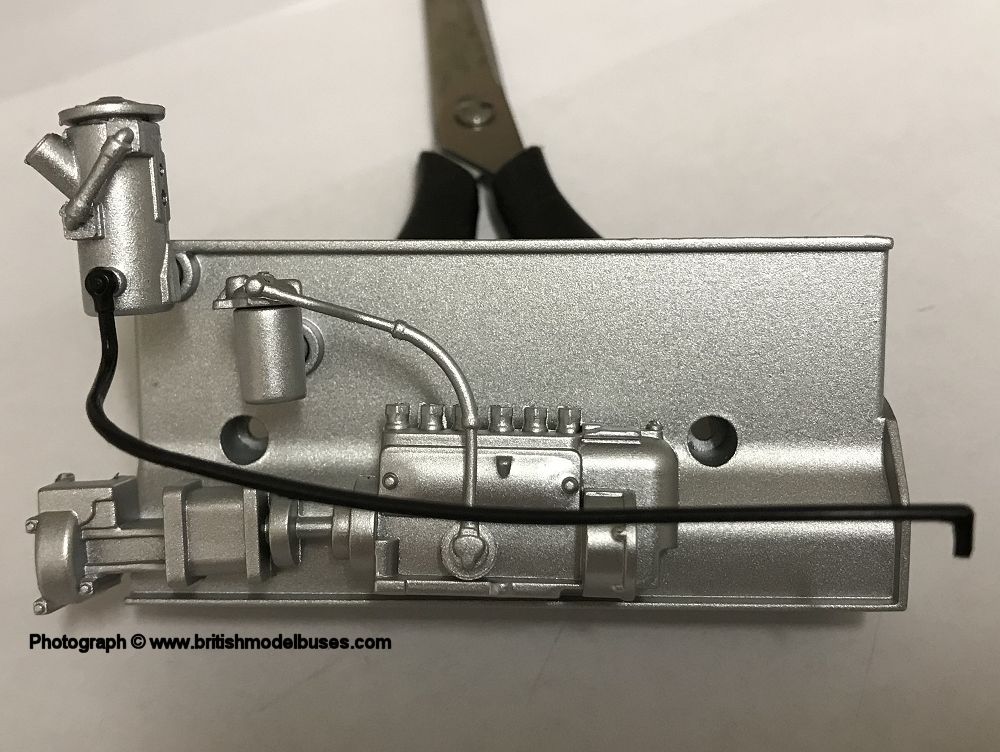
INSTRUCTIONS ISSUE 25 - EXHAUST MANIFOLD, CRANKCASE AND OIL SUMP

Click here for a higher resolution image Click here for a higher resolution image Click here for a higher resolution image Click here for a higher resolution image Click here for a higher resolution image

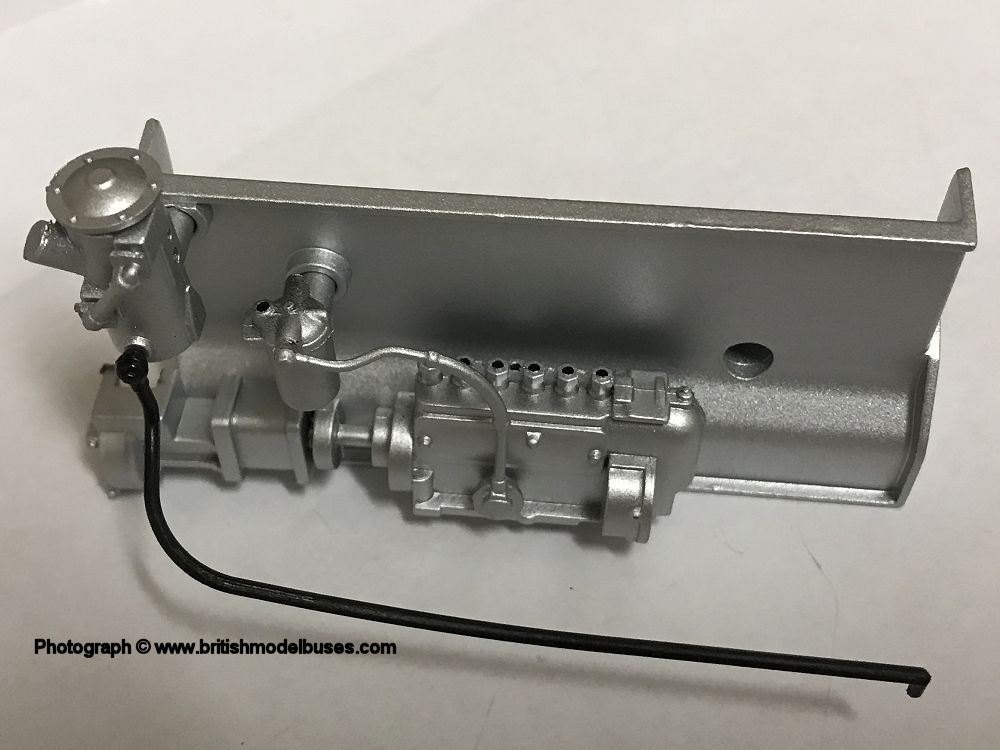
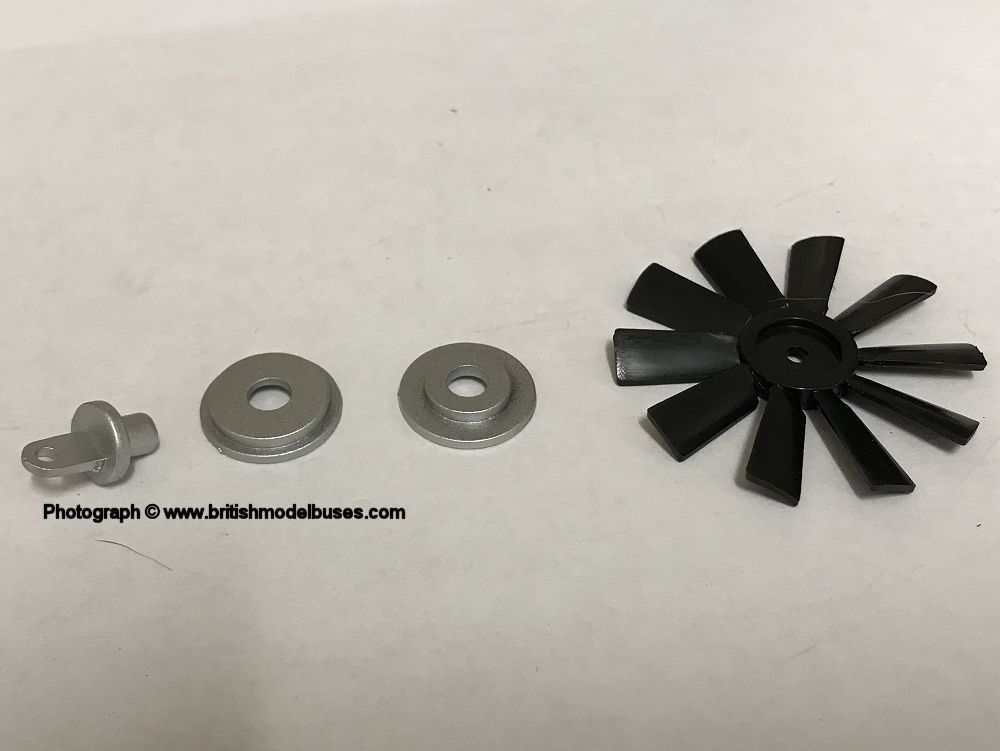
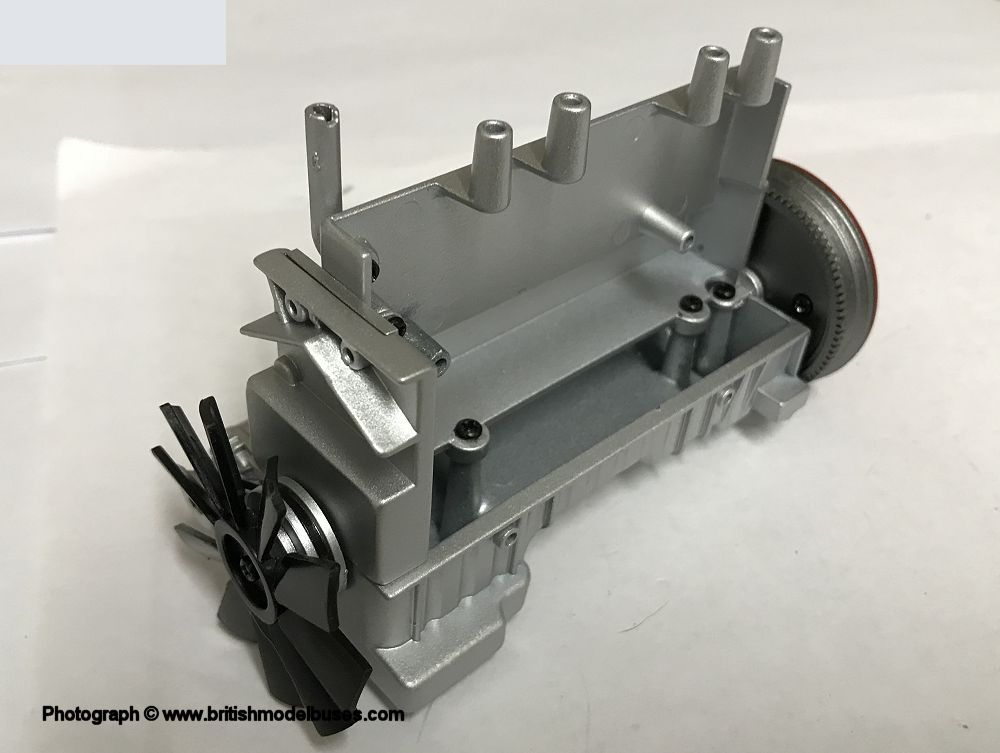
BUILD ISSUE 25 - EXHAUST MANIFOLD, CRANKCASE AND OIL SUMP

Click here for a higher resolution image Click here for a higher resolution image Click here for a higher resolution image Click here for a higher resolution image Click here for a higher resolution image


MAGAZINE ISSUE 26 - ASSEMBLING THE CRANKCASE
I enjoyed this build and it was good to see a couple of builds coming together to form a substantial part. In total it took me approximately 30 minutes to complete. The description of route 159 passes through Whitehall on its way to Marble Arch. An interesting fact I was not aware of is that the Horse Guards parade, is the site of the former "tiltyard" at the Palace of Whitehall and was used by King Henry VIII to organise jousting competitions! It also describes how Pall Mall took its name from the name of a ball game "Pelemele or pell mell", an early form of croquet played there in the 17th century. The second article discusses the A-frame and the engine of the Routemaster bus.

Click here for a higher resolution image Click here for a higher resolution image Click here for a higher resolution image

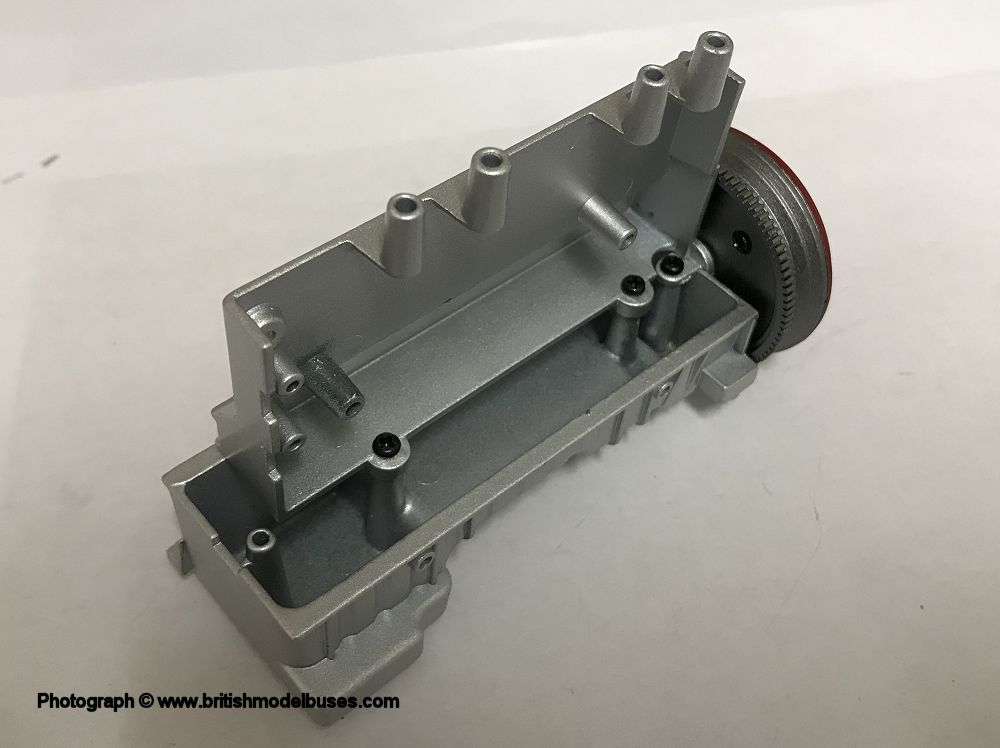
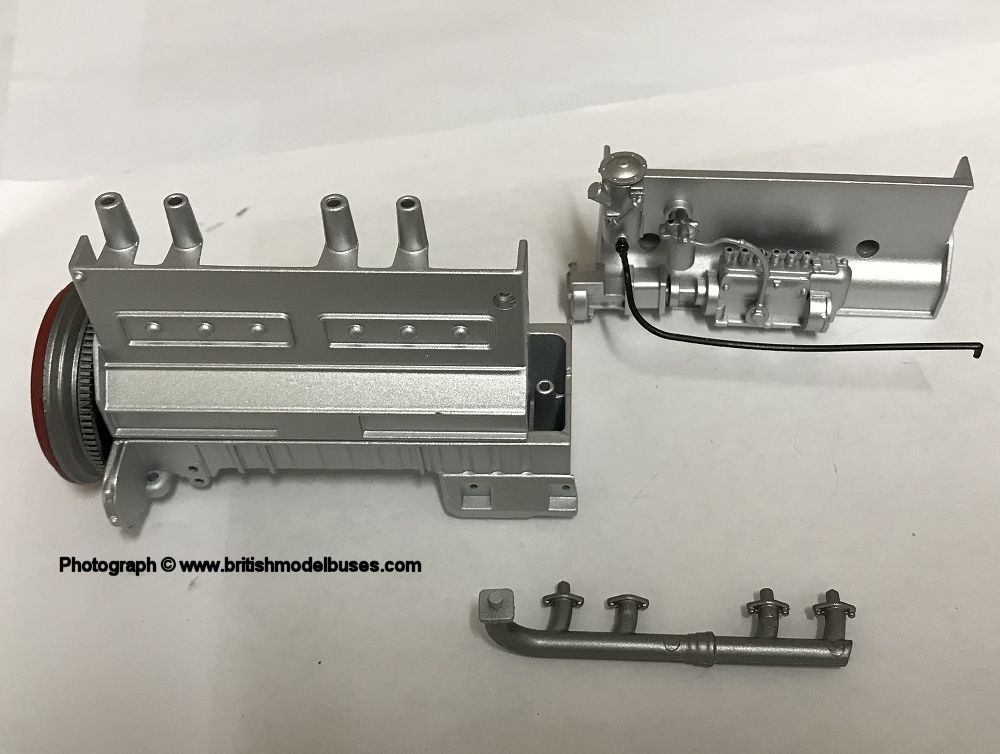
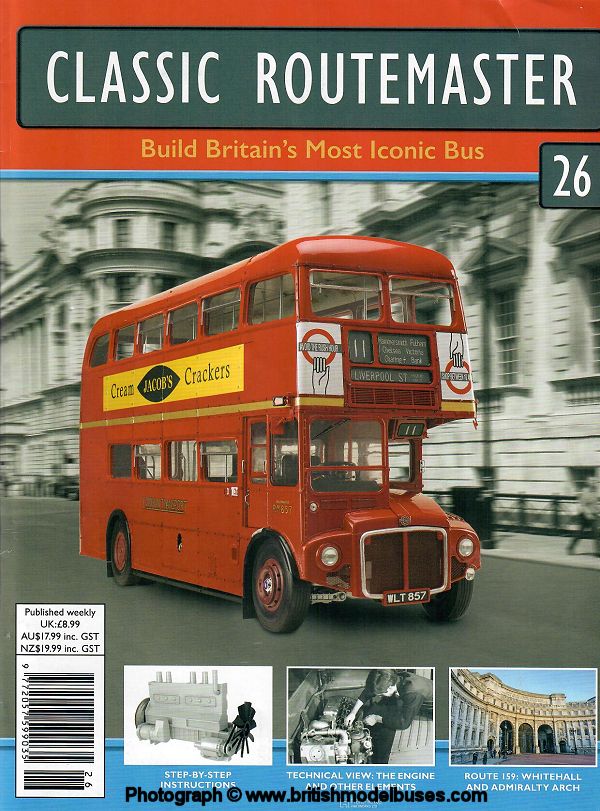
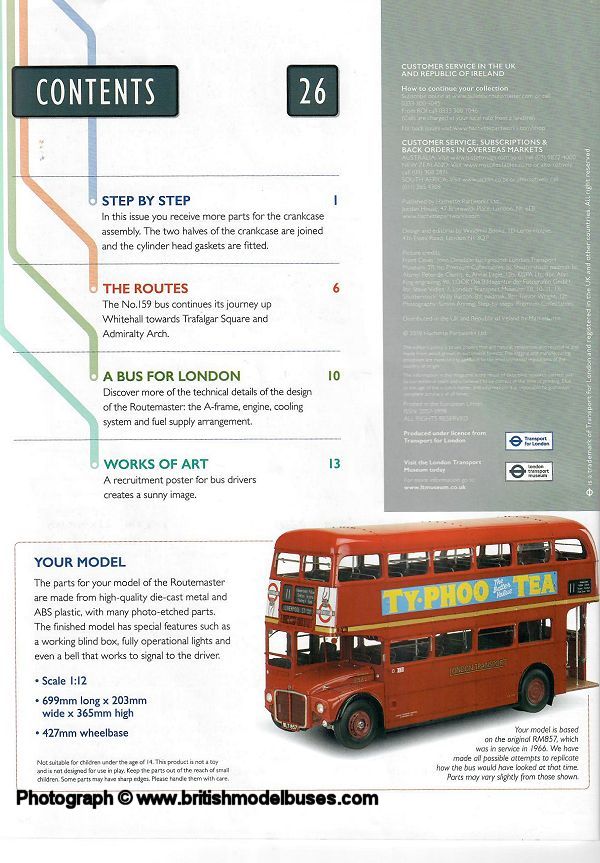
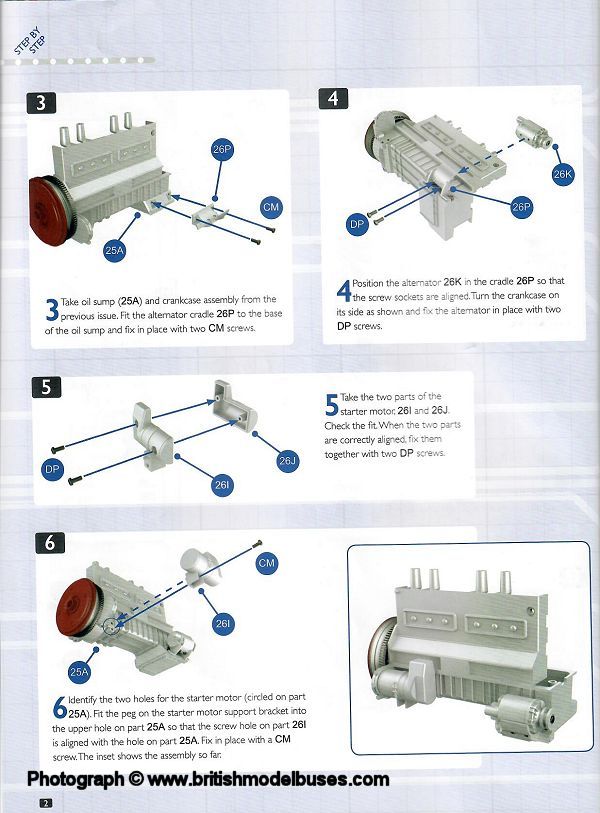
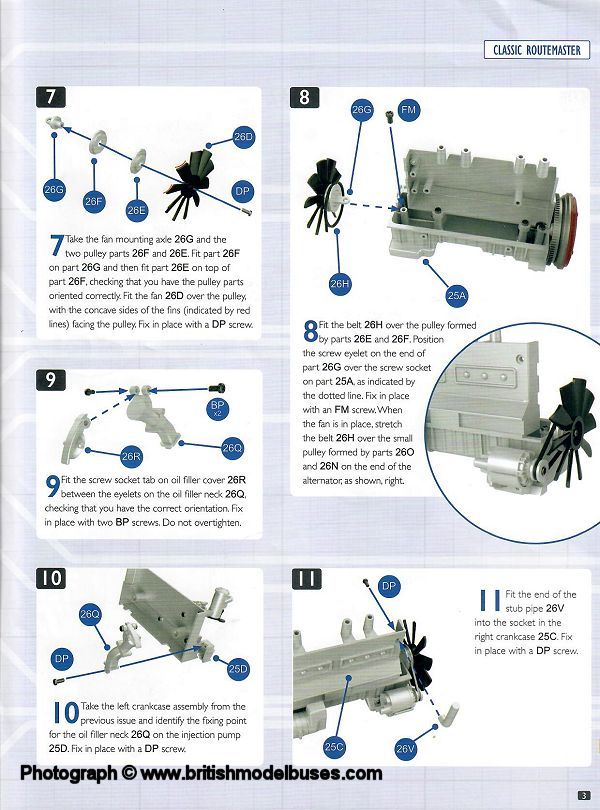
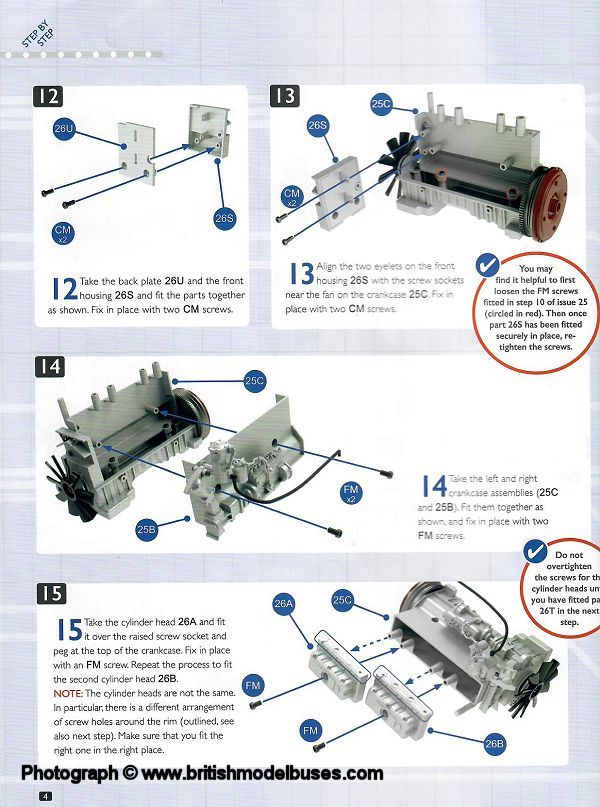
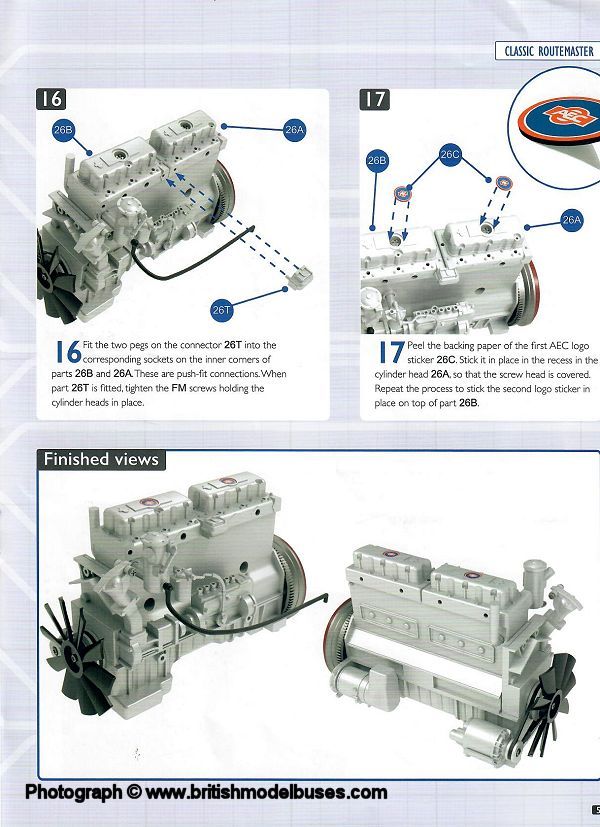
INSTRUCTIONS ISSUE 26 - ASSEMBLING THE CRANKCASE

Click here for a higher resolution image Click here for a higher resolution image Click here for a higher resolution image Click here for a higher resolution image Click here for a higher resolution image

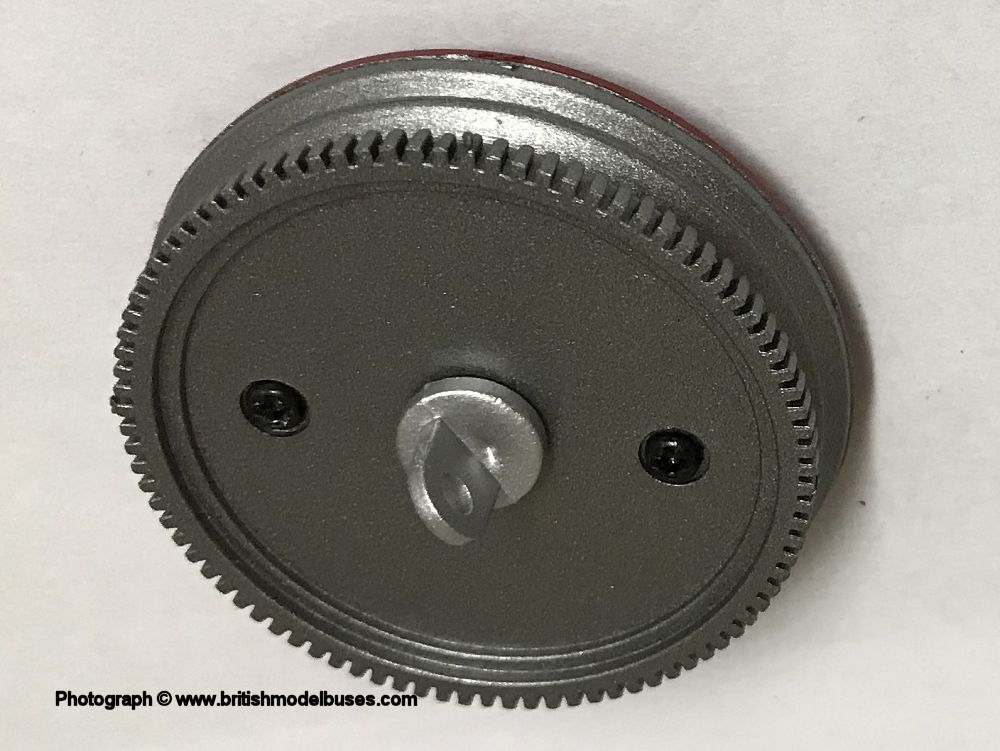
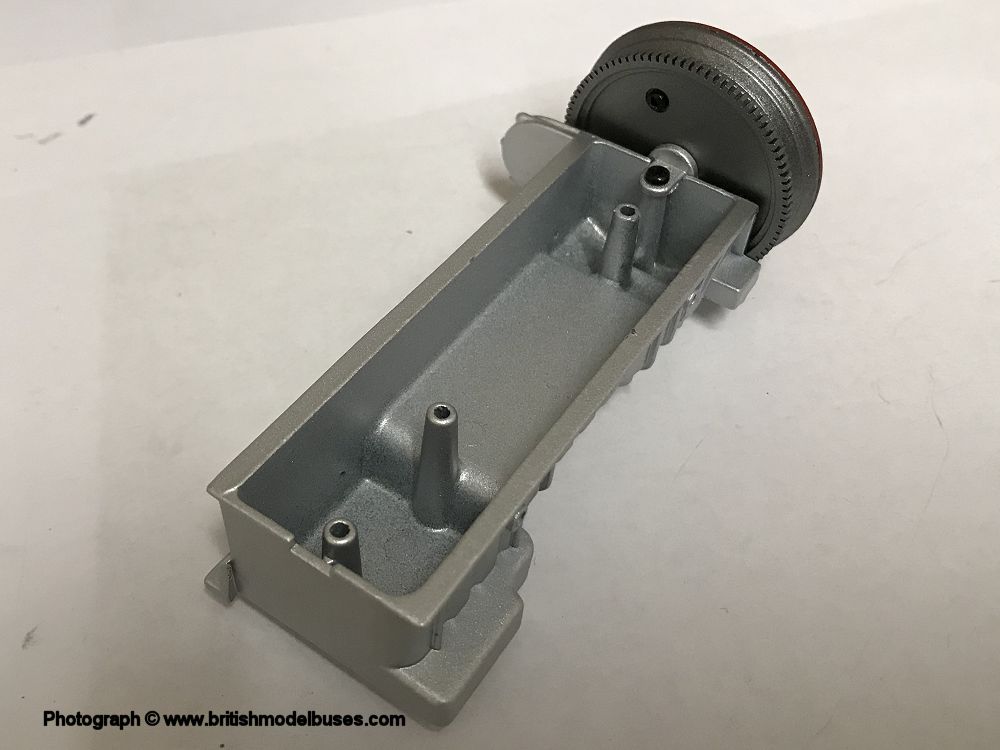
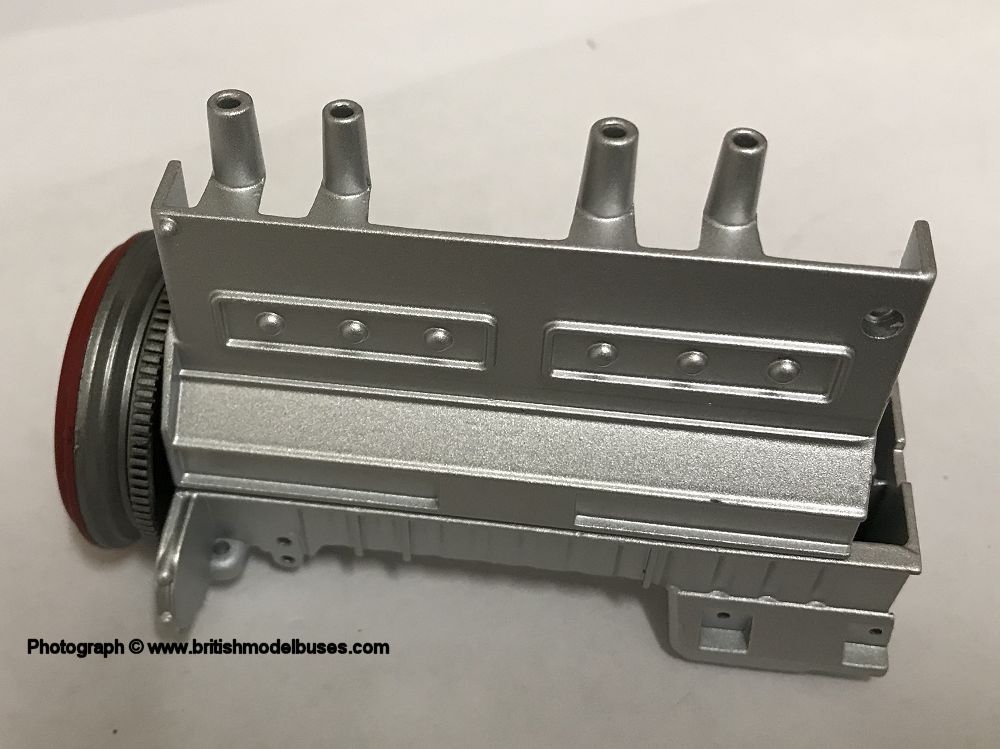
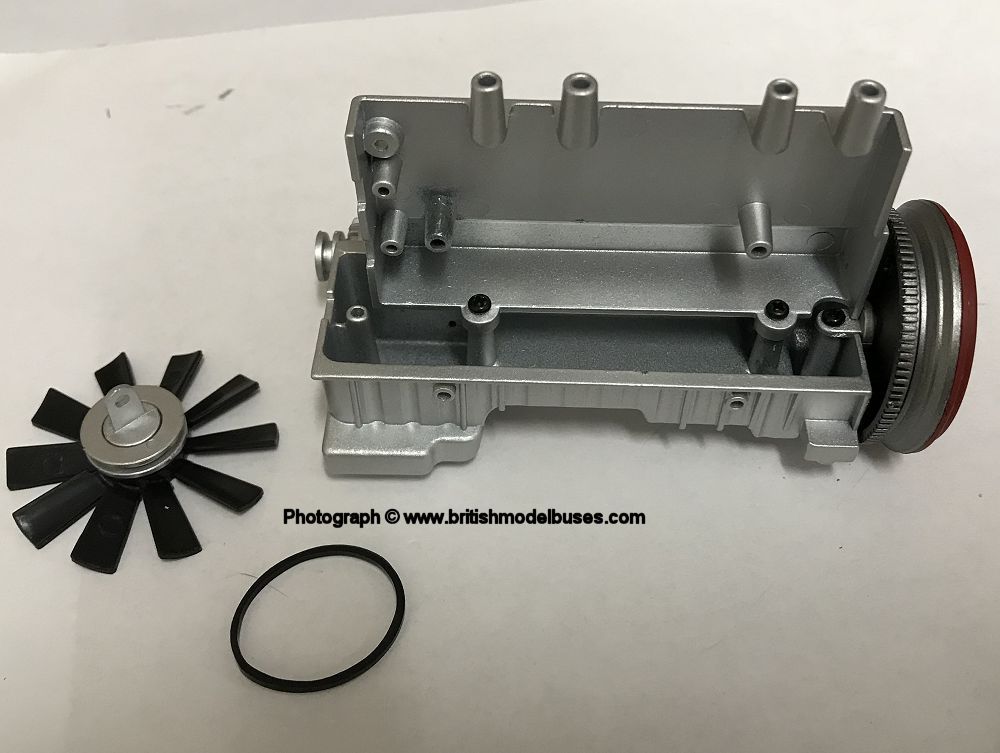
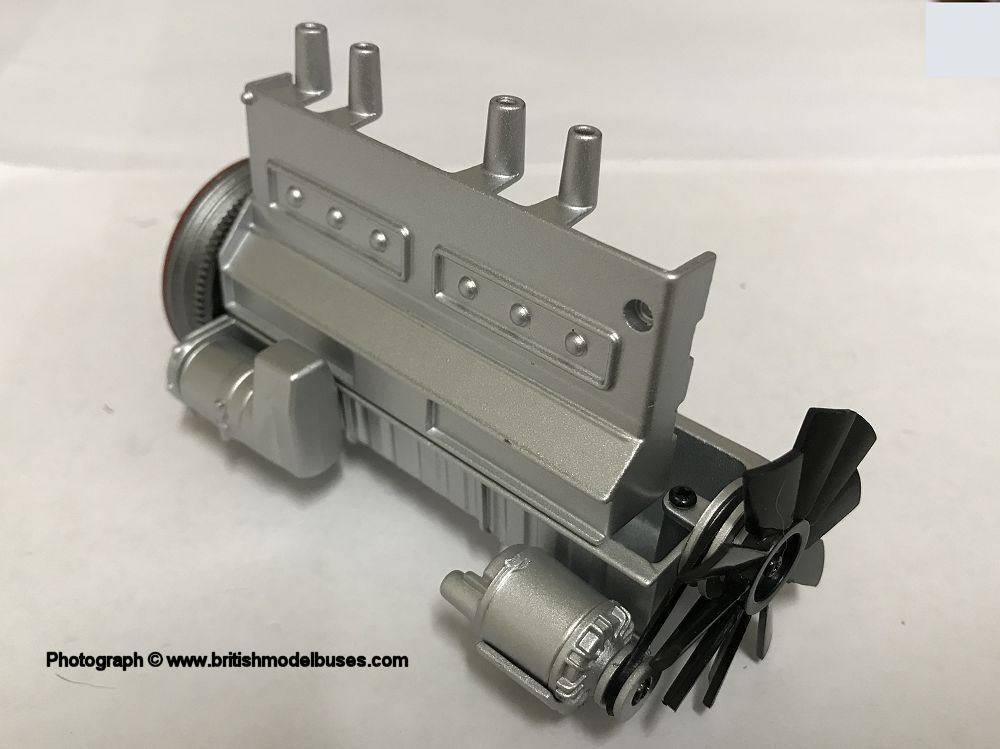
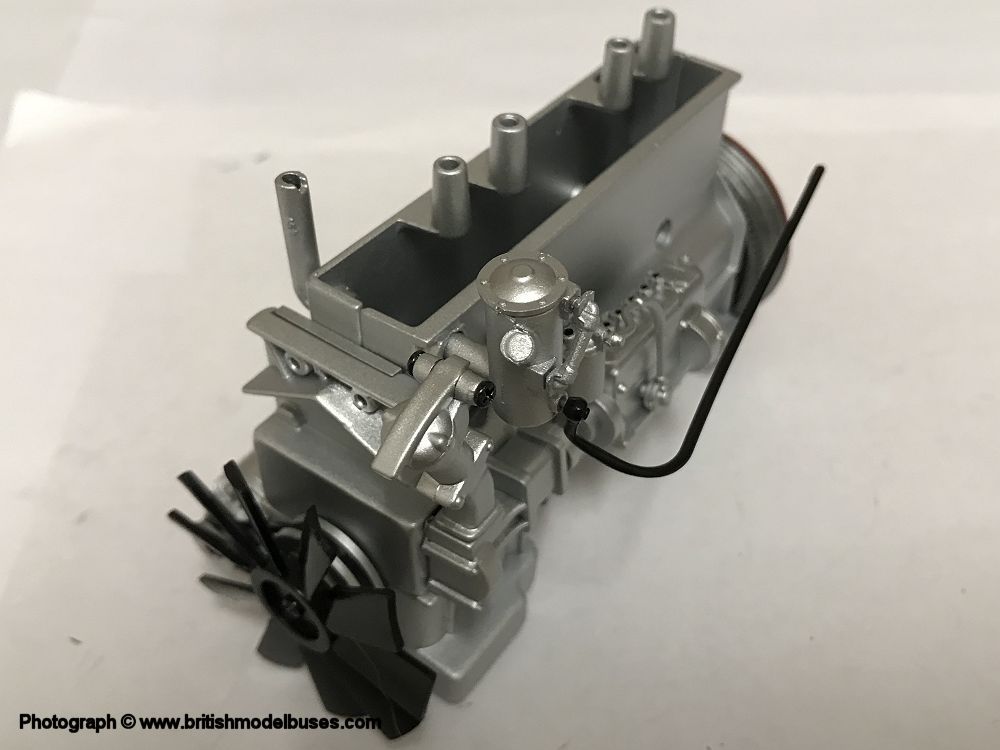
BUILD ISSUE 26 - ASSEMBLING THE CRANKCASE

Click here for a higher resolution image Click here for a higher resolution image Click here for a higher resolution image Click here for a higher resolution image Click here for a higher resolution image Click here for a higher resolution image Click here for a higher resolution image
Click here for a higher resolution image Click here for a higher resolution image Click here for a higher resolution image Click here for a higher resolution image Click here for a higher resolution image Click here for a higher resolution image  


MAGAZINE ISSUE 27 - FITTING THE FRONT SUB-FRAME AND FRONT AXLE
This build really added some weight to the model and allowed the fitting of the front axle, which had been completed many issues ago. It was not overly complicated, but took me approximately 45 minutes to complete. My bus now has front and rear wheels and measures 22.5 inches nose to tail! The final part of route 159 passing through the West End to Marble Arch is described. I did not realise that Oxford Street was originally named Tyburn Road in the middle ages and that the River Tyburn still runs beneath the street. The name was changed to the current Oxford Street in the early 18th century. the second article in the magazine discusses buses in London after WWI.

Click here for a higher resolution image Click here for a higher resolution image Click here for a higher resolution image

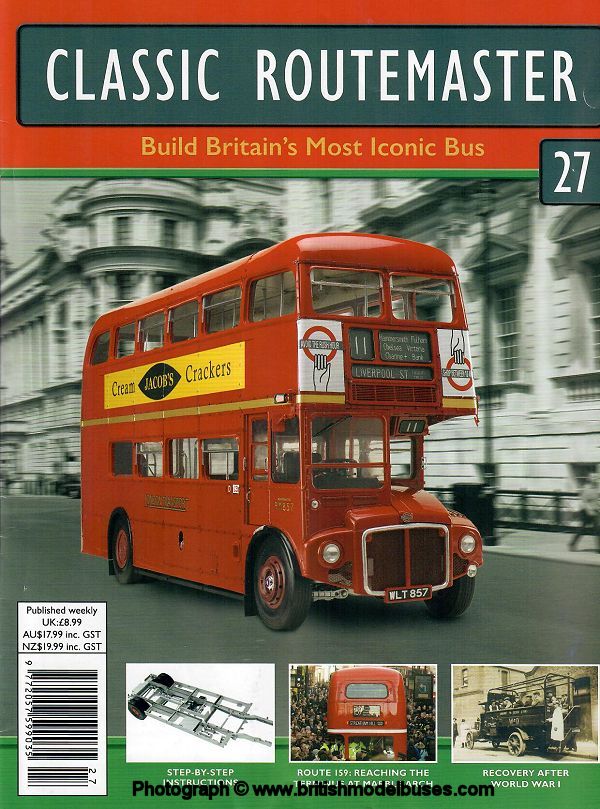
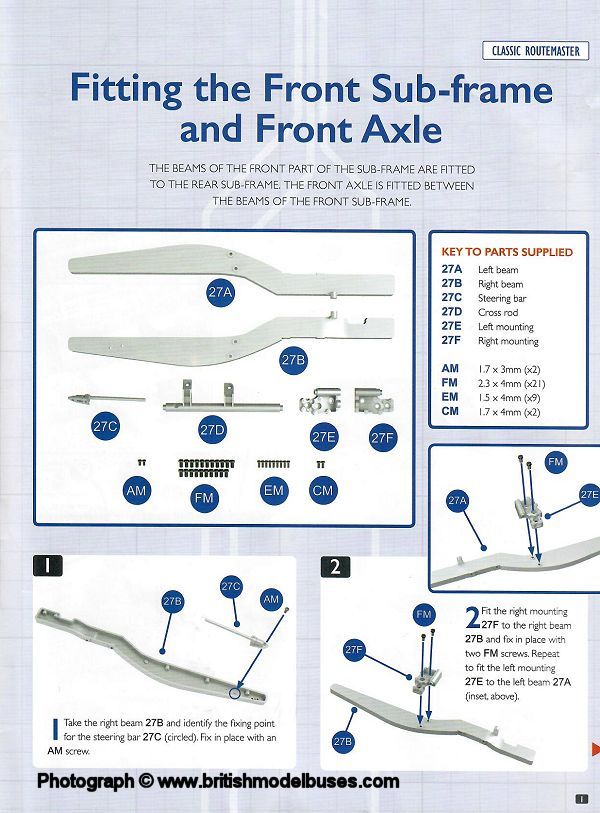
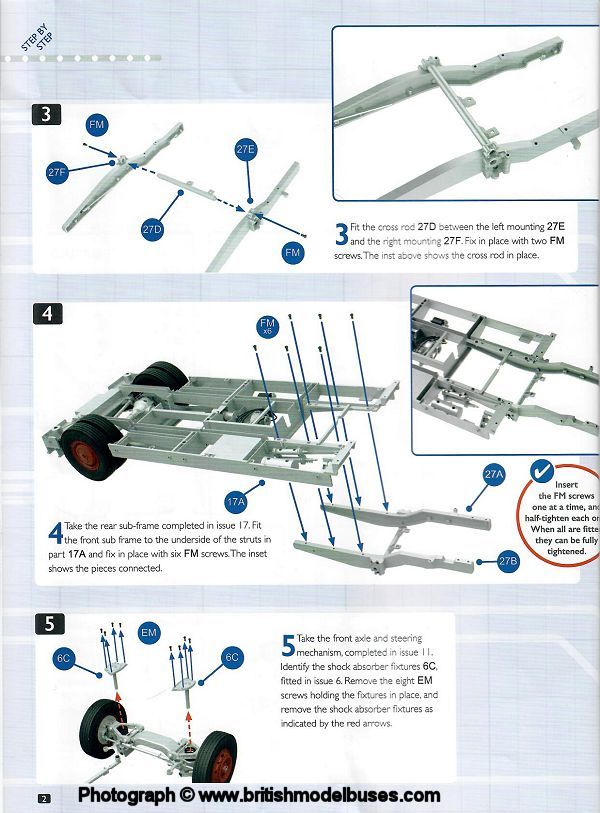
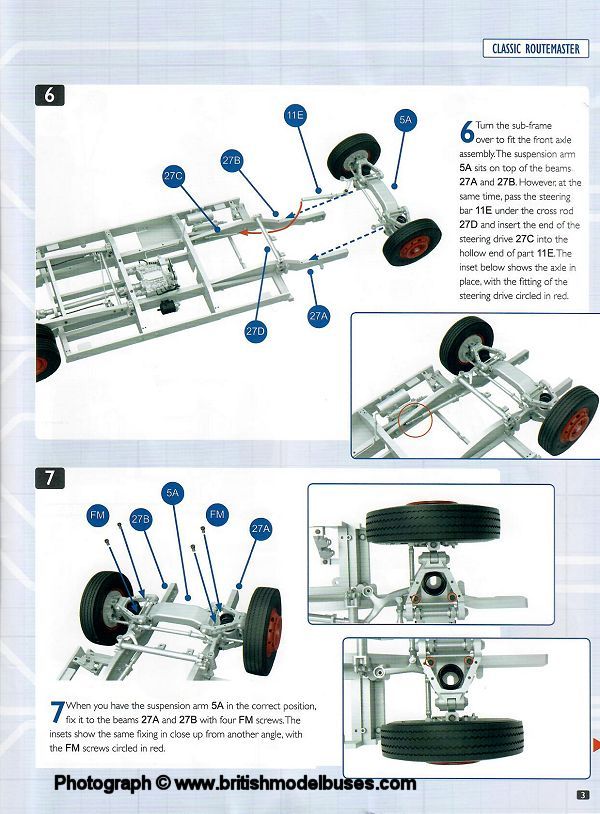
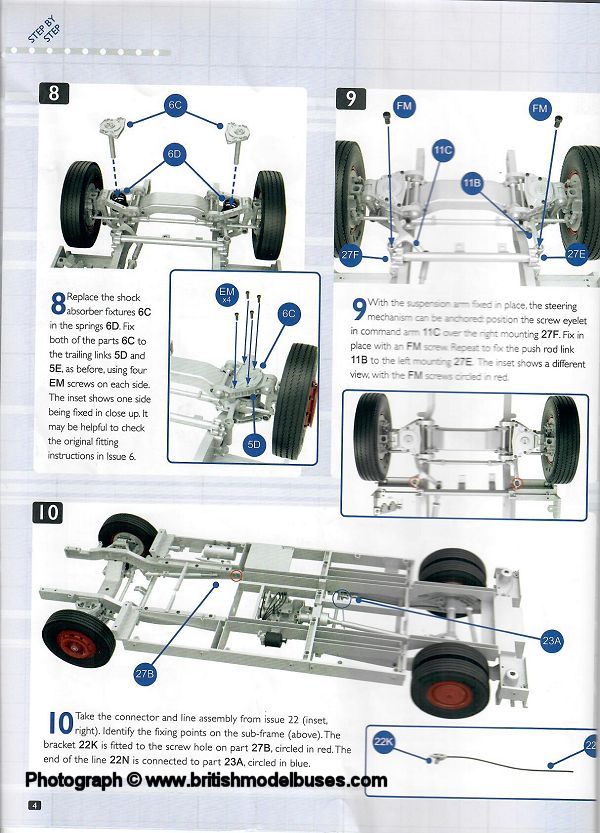
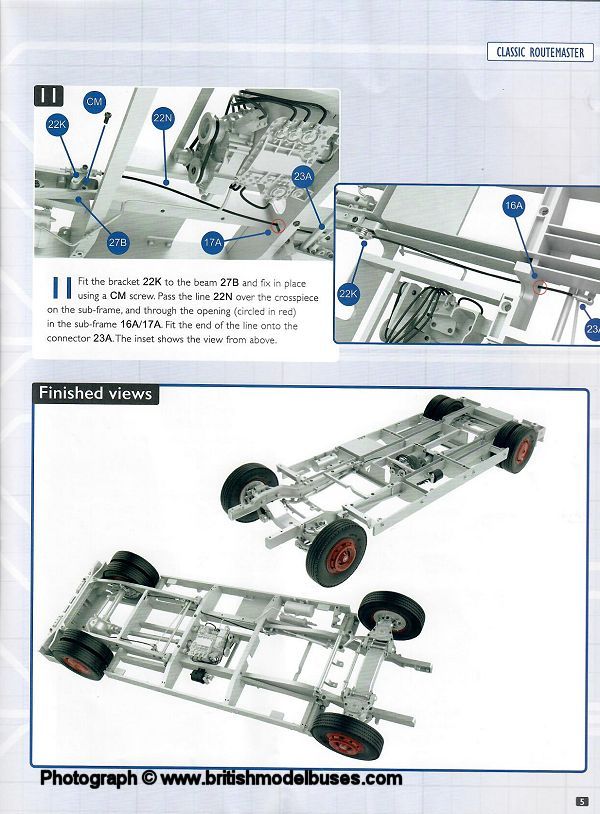
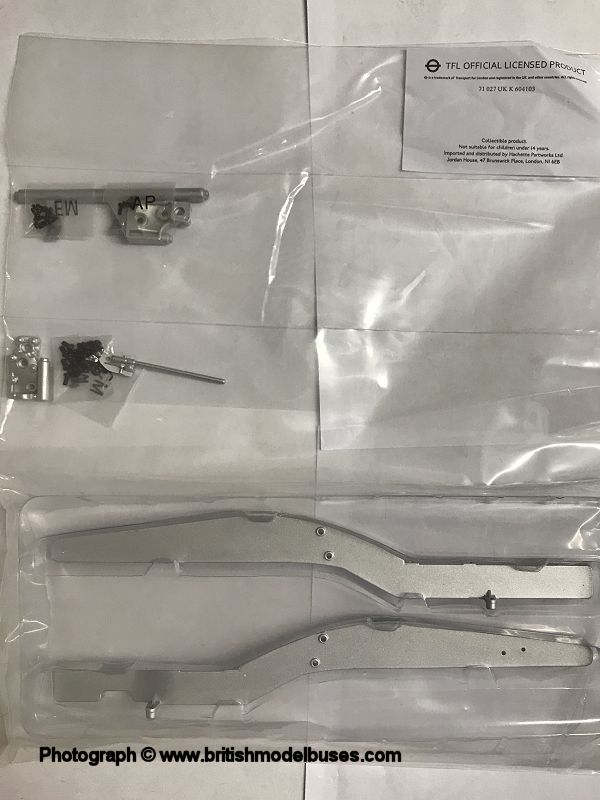
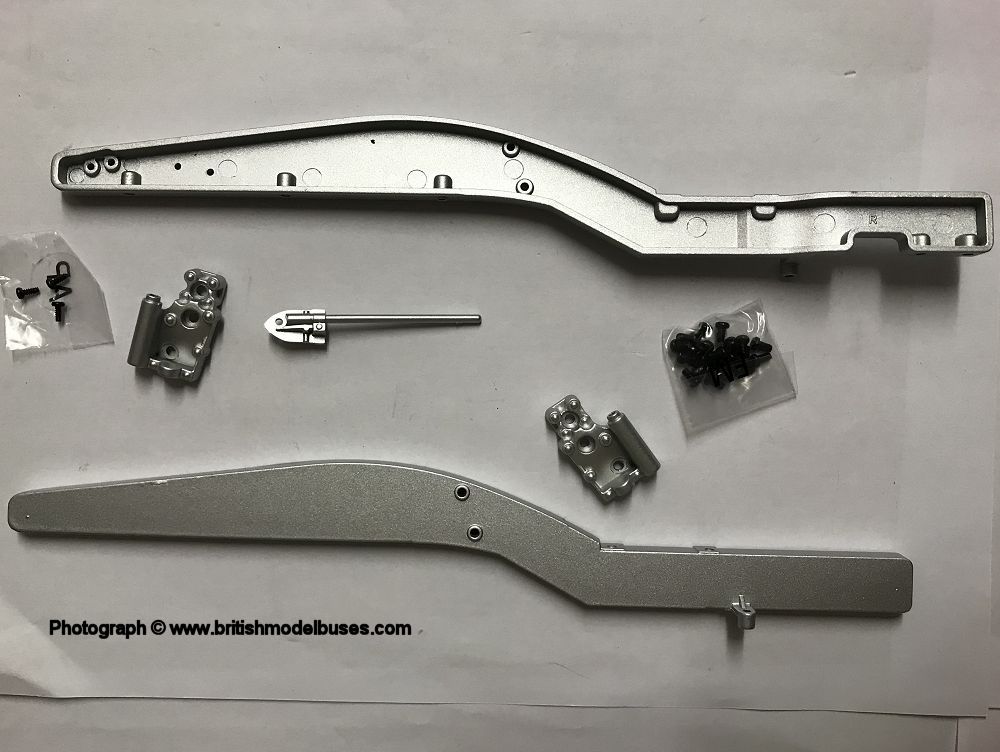
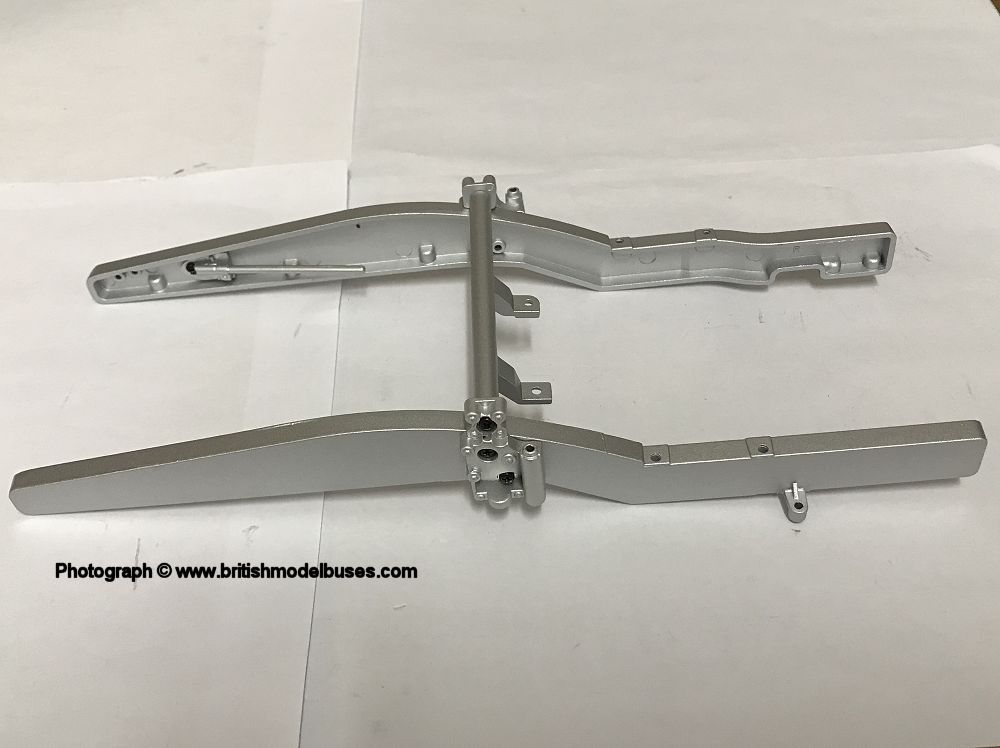
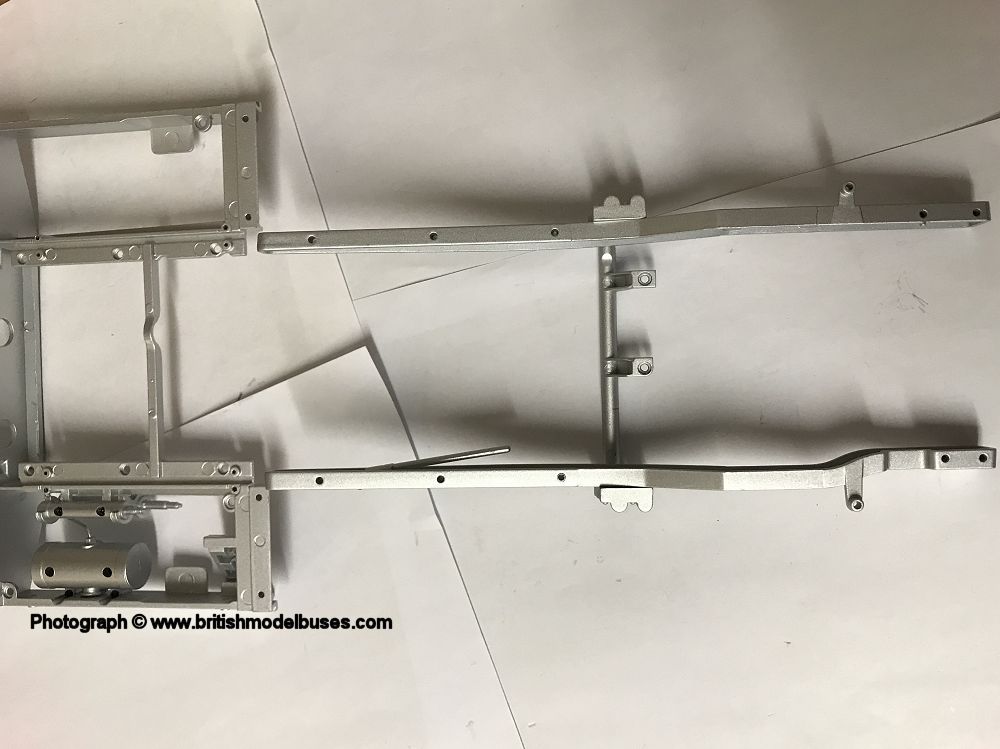
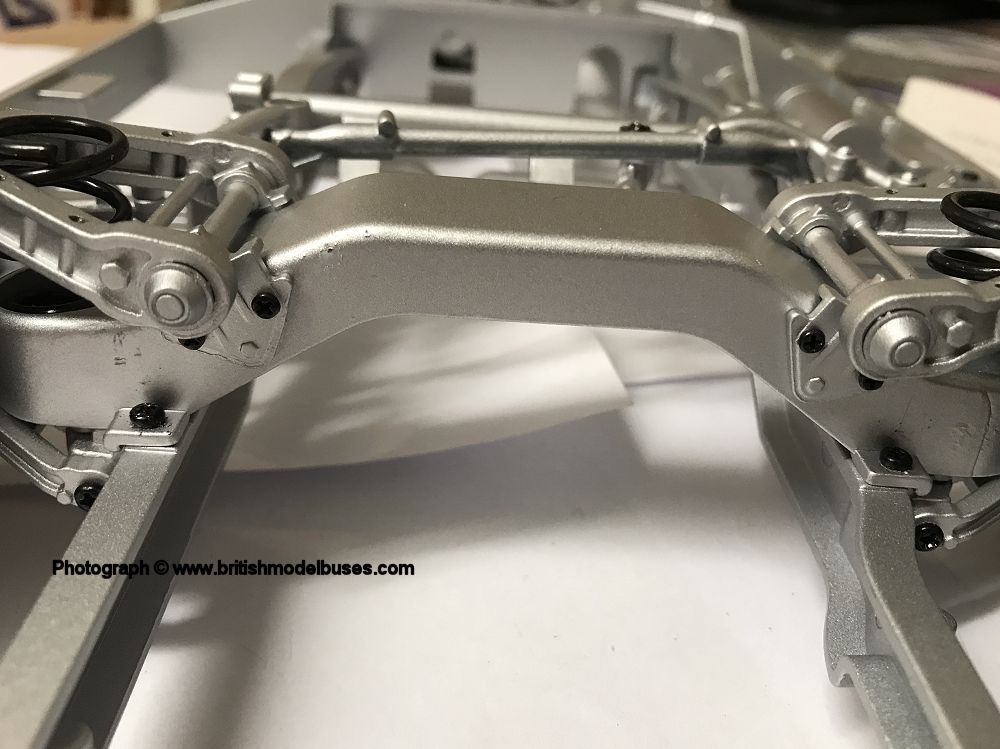
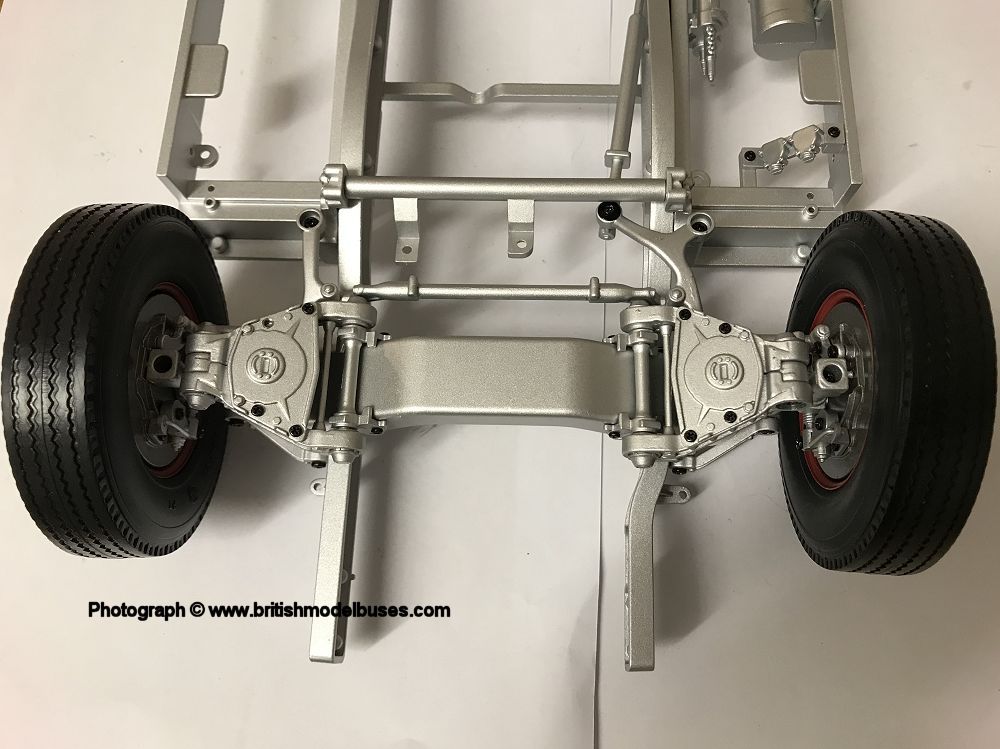
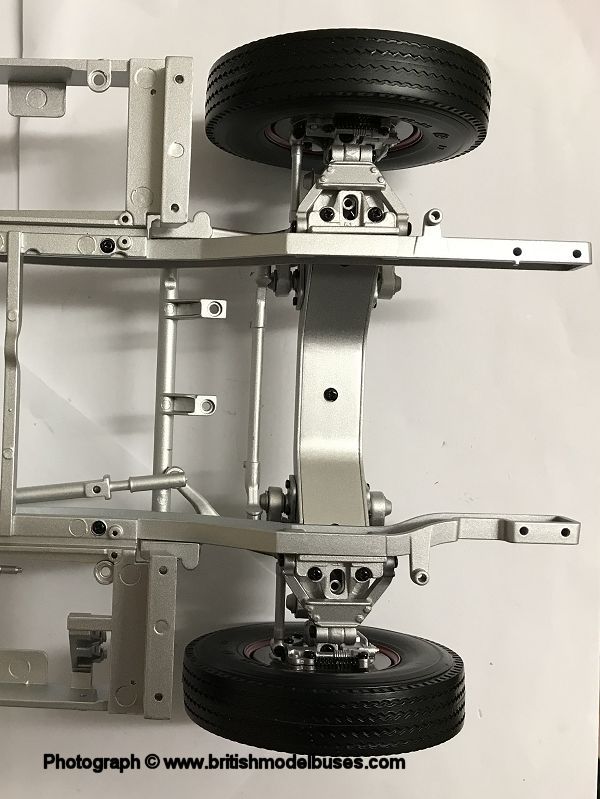
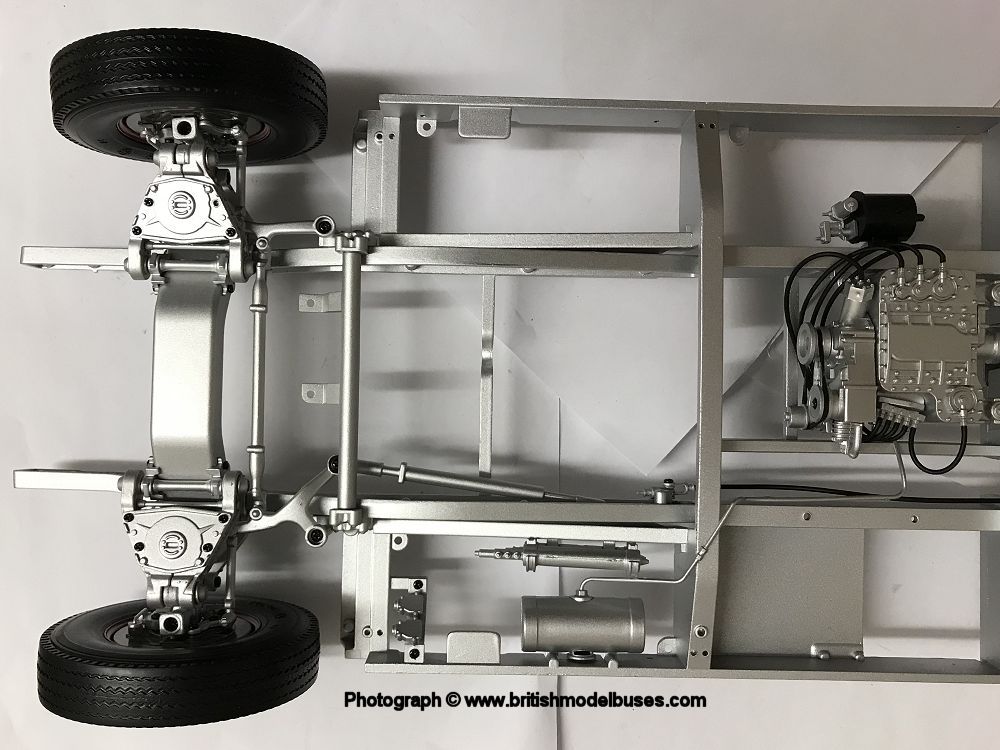
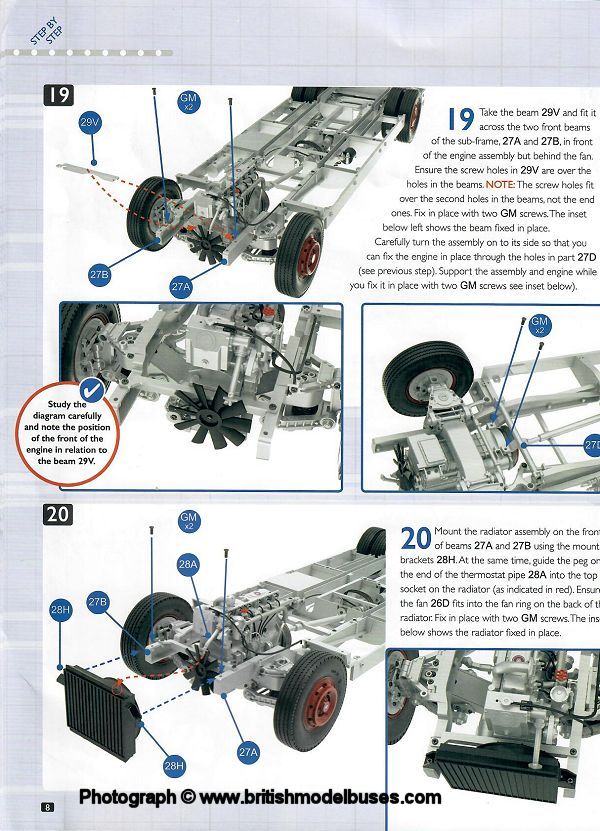
INSTRUCTIONS ISSUE 27 - FITTING THE FRONT SUB-FRAME AND FRONT AXLE
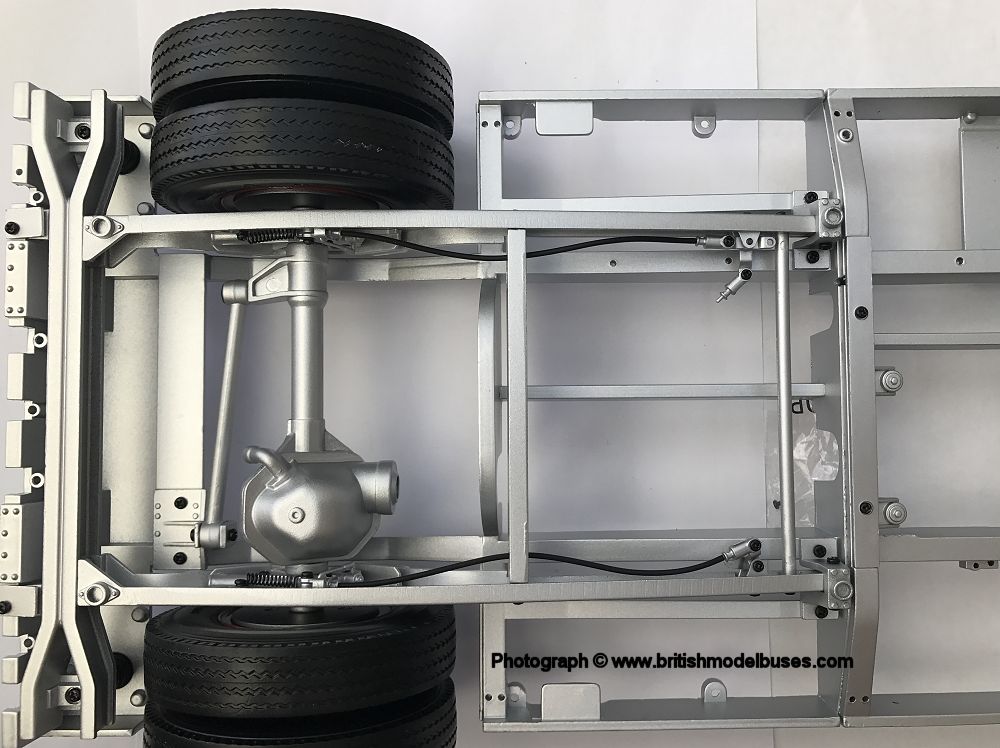
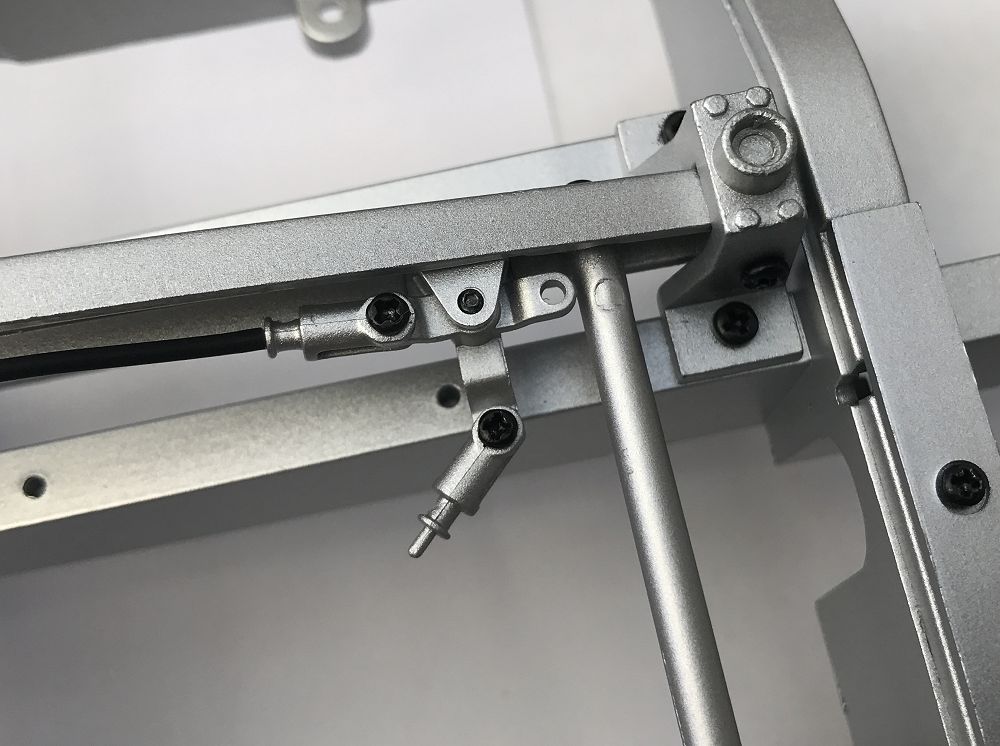
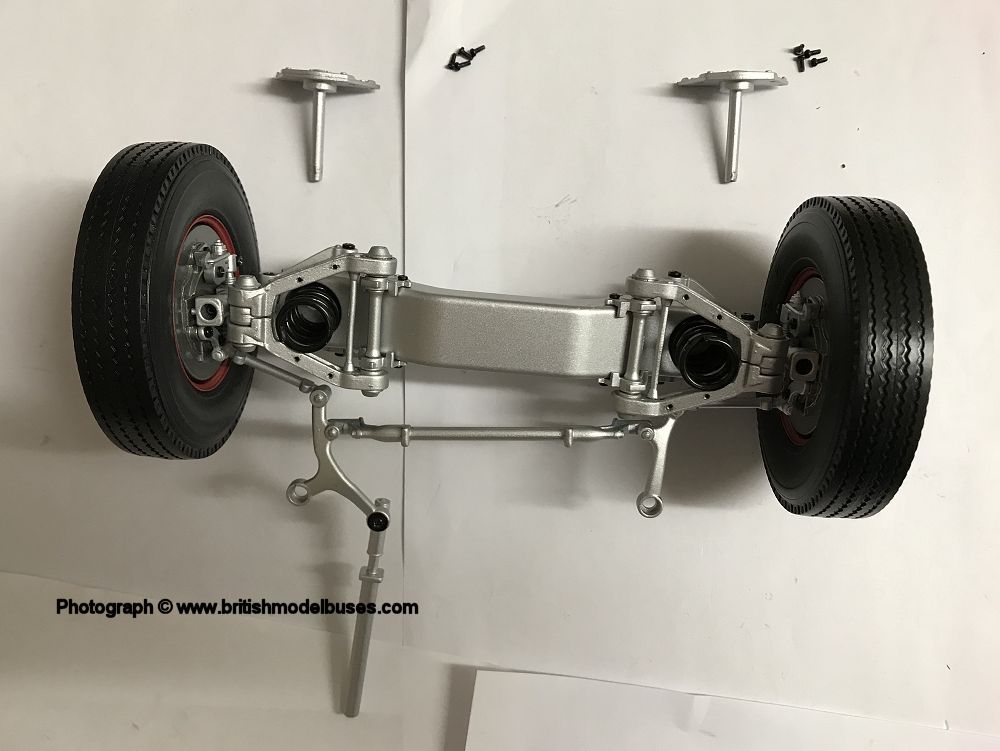
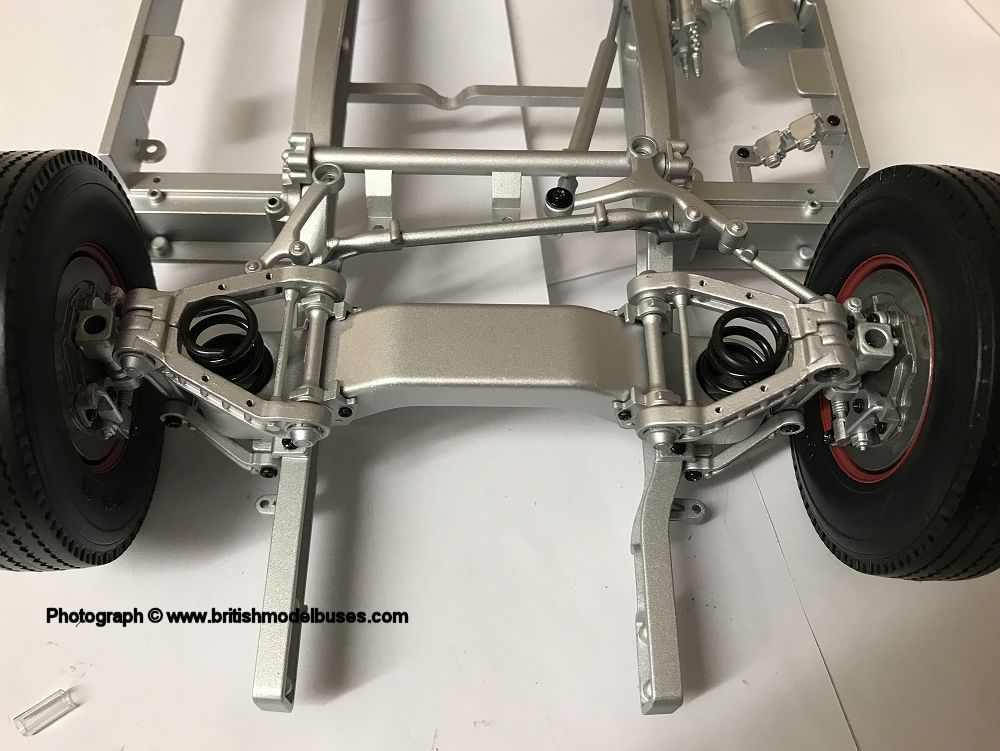
Click here for a higher resolution image Click here for a higher resolution image Click here for a higher resolution image Click here for a higher resolution image Click here for a higher resolution image

BUILD ISSUE 27 - FITTING THE FRONT SUB-FRAME AND FRONT AXLE

Click here for a higher resolution image Click here for a higher resolution image Click here for a higher resolution image Click here for a higher resolution image Click here for a higher resolution image Click here for a higher resolution image Click here for a higher resolution image
Click here for a higher resolution image Click here for a higher resolution image Click here for a higher resolution image Click here for a higher resolution image Click here for a higher resolution image Click here for a higher resolution image  


MAGAZINE ISSUE 28 - ASSEMBLING THE RADIATOR
No issues with this build once I had worked out which way around things went. In total it took me approximately 20 minutes to complete. The magazine article on route 73 starts with route 73 in the area of Stoke Newington. A did you know fact tells about a very early pedestrian controlled crossing light being installed in Stoke Newington in the 1930's. The idea was not taken up nationally until the Pelican crossing was introduced in the 60's. Another interesting fact is that Stoke Newington was the location of the first ever bomb dropped on London by a Zeppelin airship on the night of 31st May 1915. The incendiary bomb was dropped on 16 Alkham Road, the family escaped without serious injury and the fire was quickly put out. Issue 29 will see me fitting the radiator completed in this issue and the engine to the chassis.

Click here for a higher resolution image Click here for a higher resolution image Click here for a higher resolution image

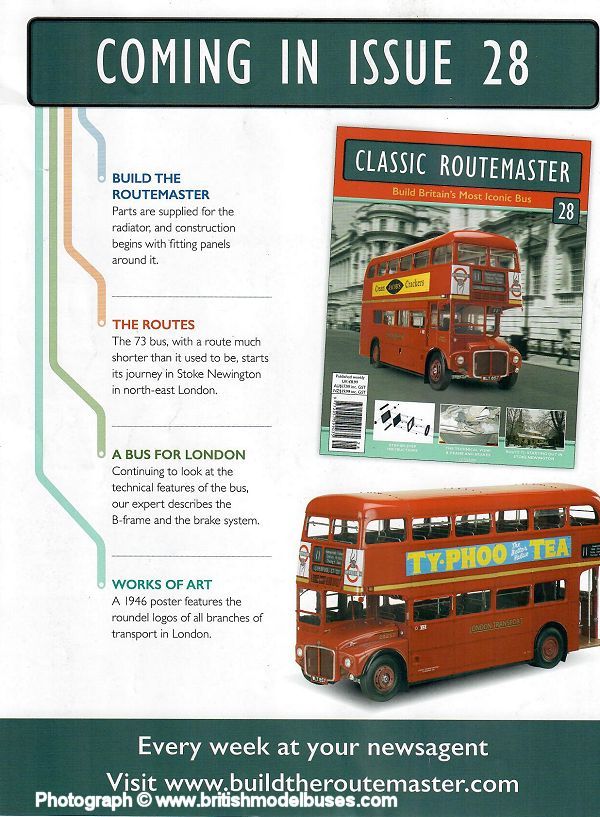
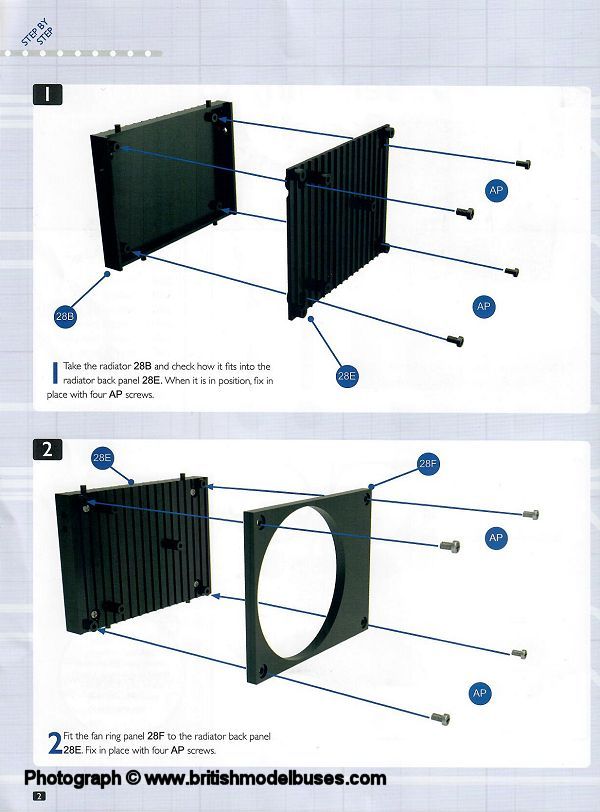
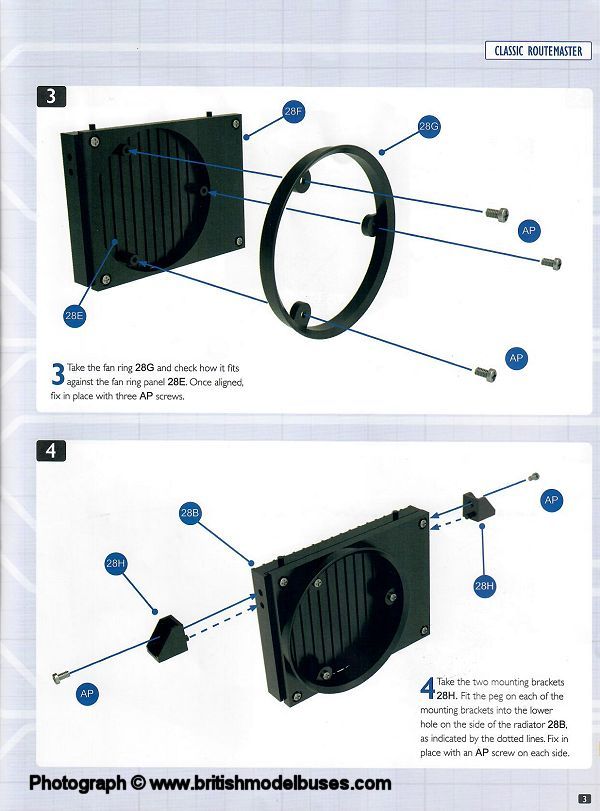
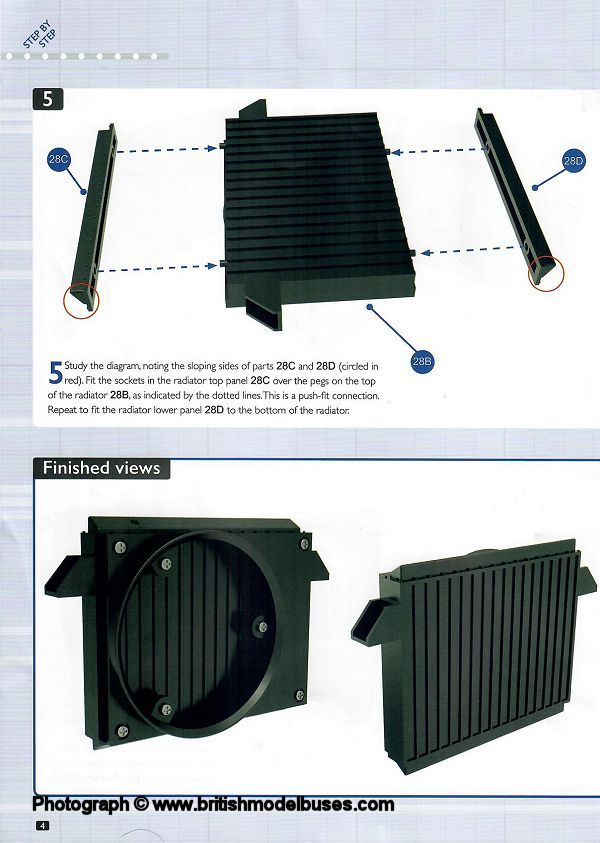
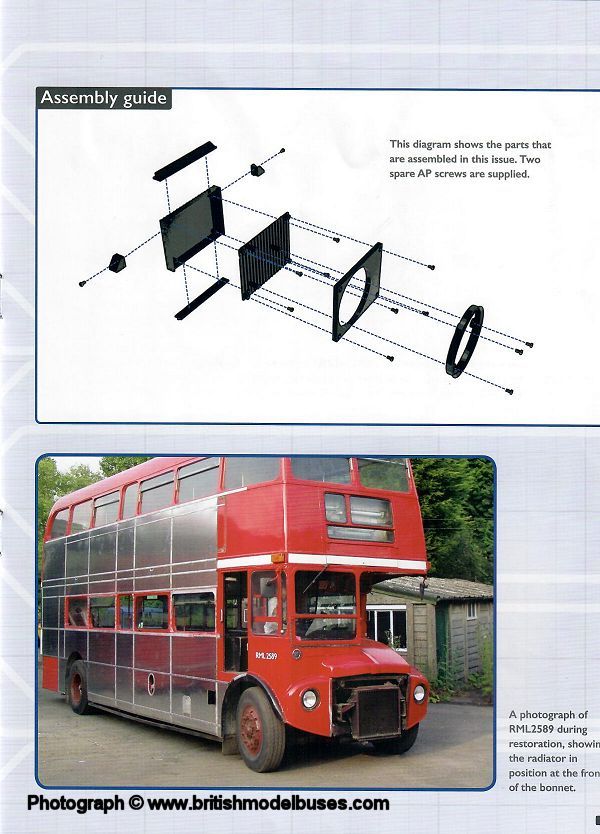
INSTRUCTIONS ISSUE 28 - ASSEMBLING THE RADIATOR

Click here for a higher resolution image Click here for a higher resolution image Click here for a higher resolution image Click here for a higher resolution image Click here for a higher resolution image

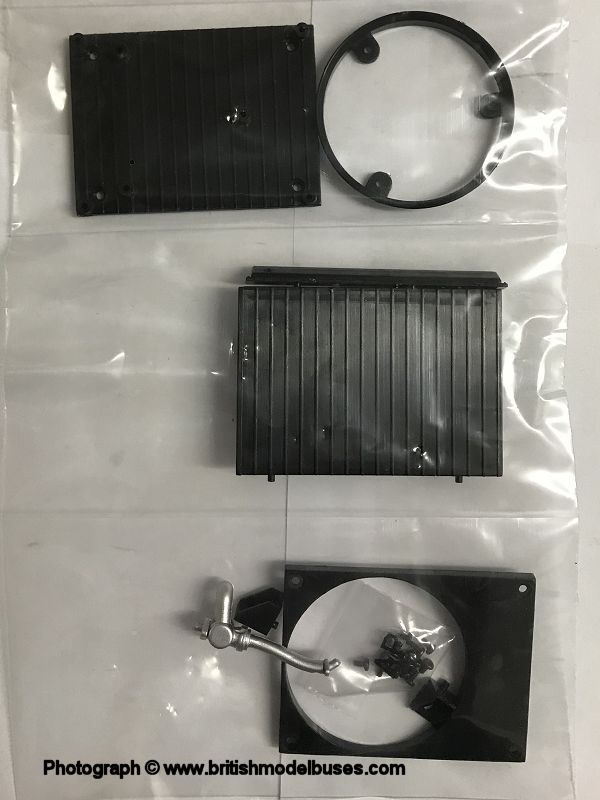
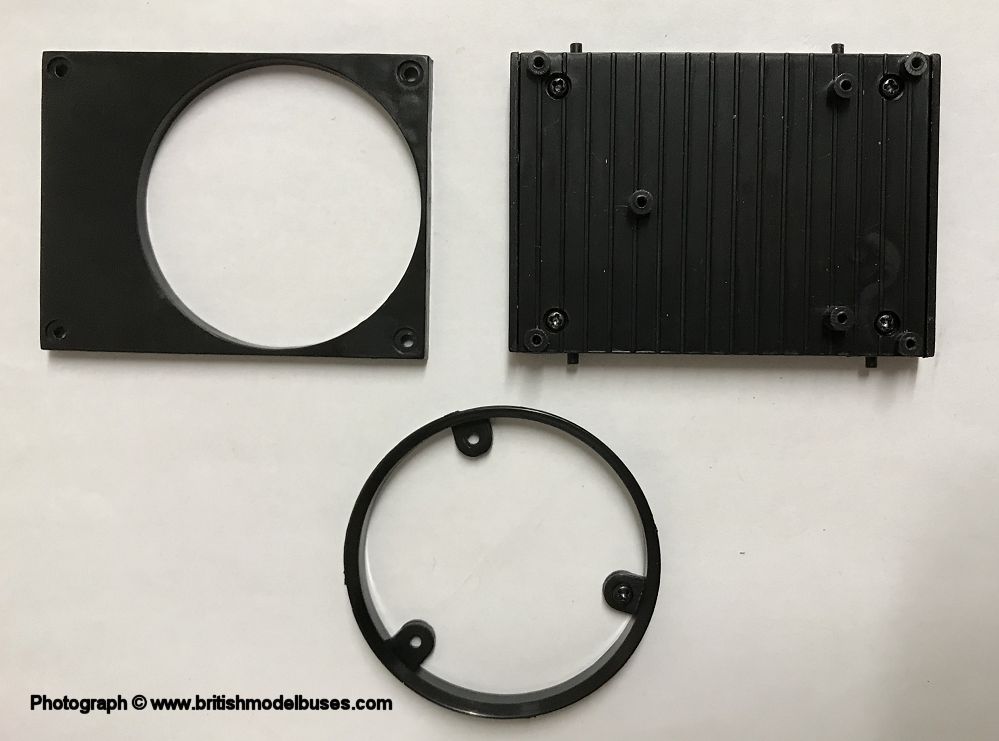
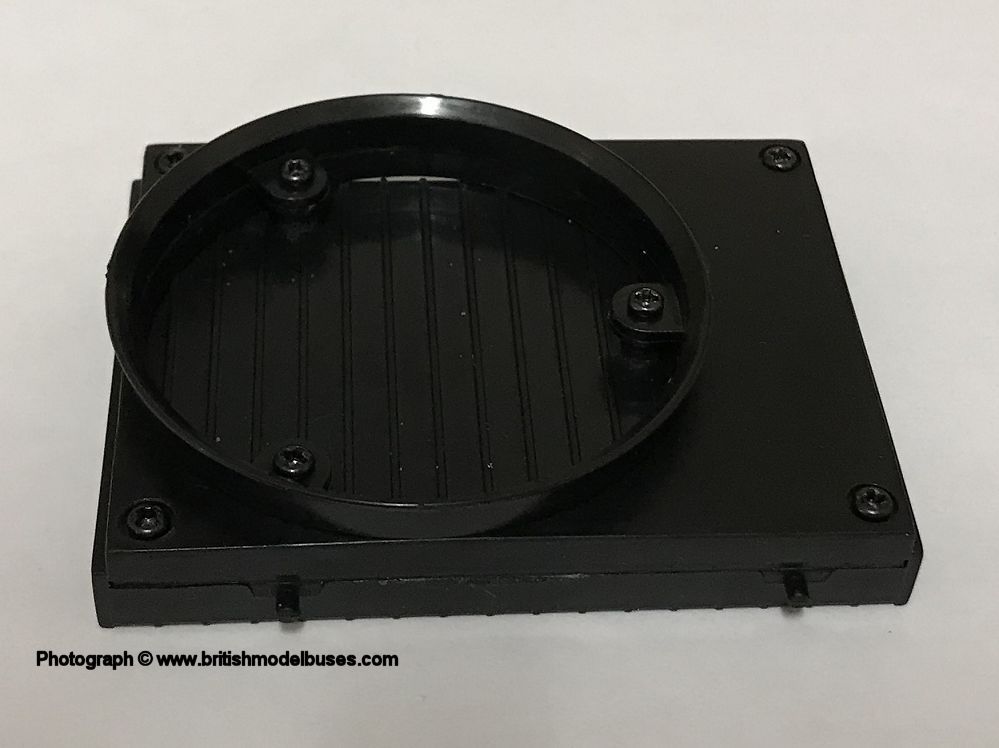
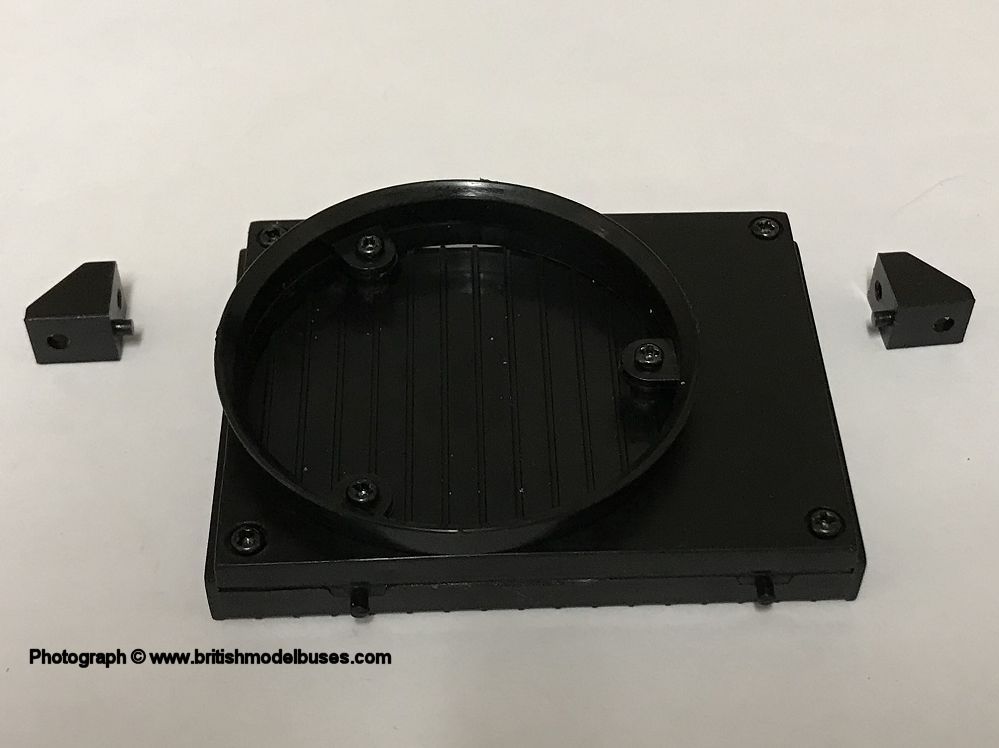
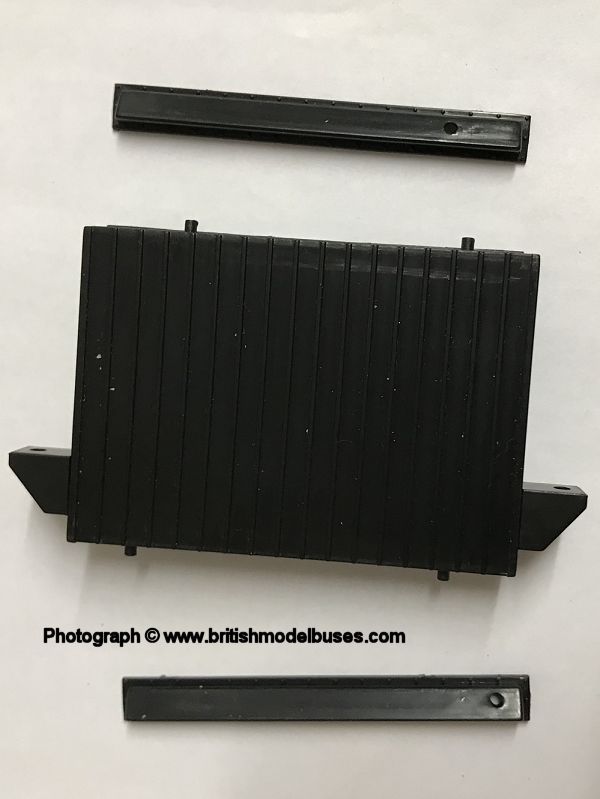
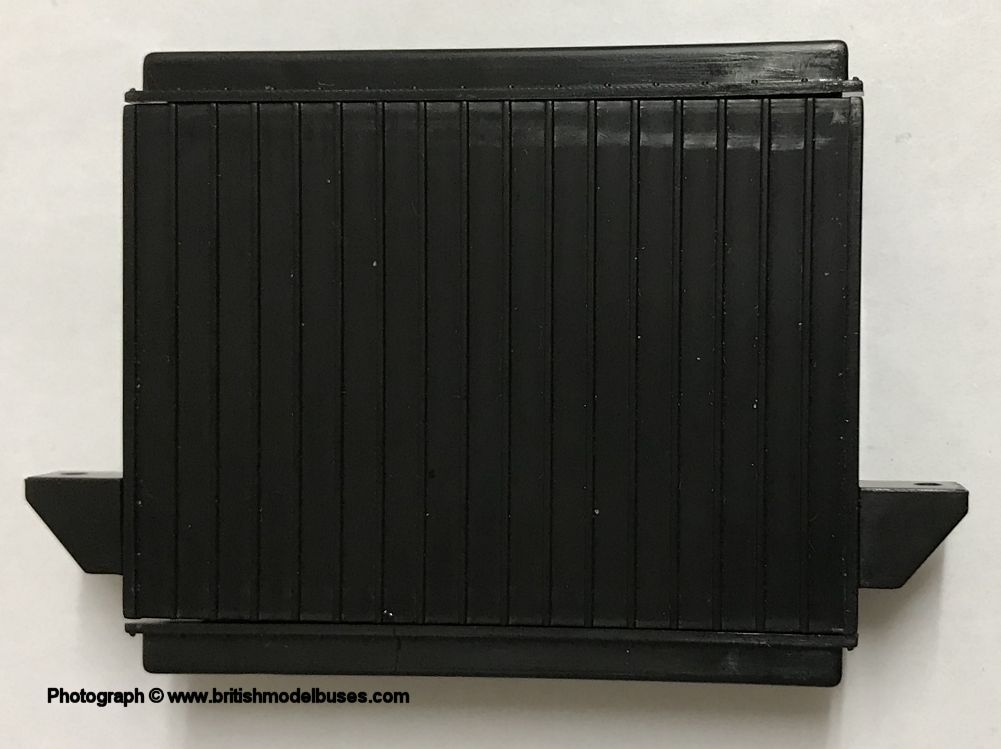
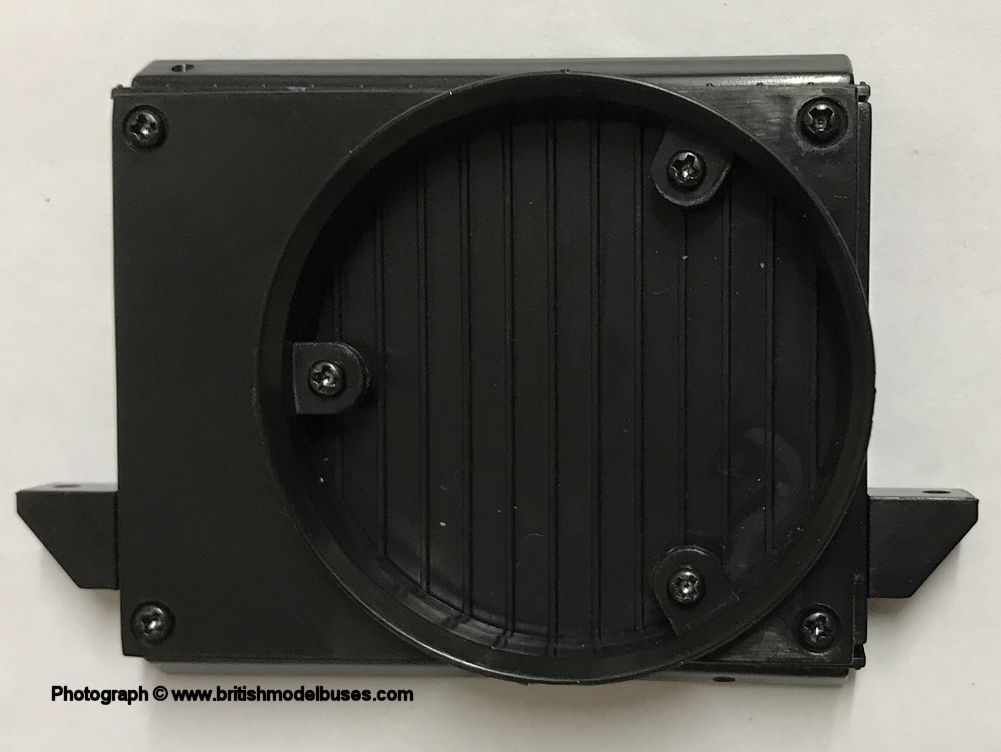
BUILD ISSUE 28 - ASSEMBLING THE RADIATOR


MAGAZINE ISSUE 29 - FINISHING AND FITTING THE ENGINE
For me this was by far the most difficult build to date and took me over 4 hours. I do strongly advise if you have a cat keeping it locked out of the room whilst you complete this build. Unfortunately mine suddenly landed in amongst all my carefully laid out pipes etc, the result was not pretty and it went downhill at that point! I found the tweezers supplied were too fat ended and would have preferred a pair of fine nosed tweezers. I also got fed up with the fuel lines which kept falling out, so resorted to using small dabs of G-S Hypo Cement glue to secure them. Whilst in the process of securing the engine to the chassis, I managed to inadvertently snap off the Power Steering Fluid Pipe. I can see no point in fitting it during issue 26, and wish now I had not fitted it, but left it to the end of this build when the locating point for it was still clearly accessible. I shall leave it until the time comes to secure the other end of it and then make a repair at that point. You do need to make sure that the engine is located properly otherwise the radiator does not fit. The instructions do tell you to carefully check the position of the engine in step 19. Due to a much larger set of instructions in this issue, there is only one magazine article which is about the K and S Type buses after World War I.

Click here for a higher resolution image Click here for a higher resolution image Click here for a higher resolution image

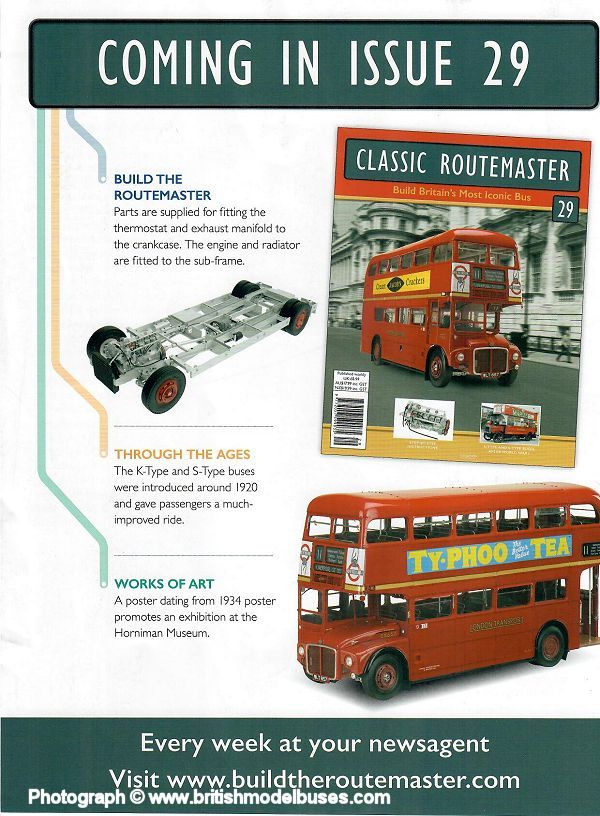
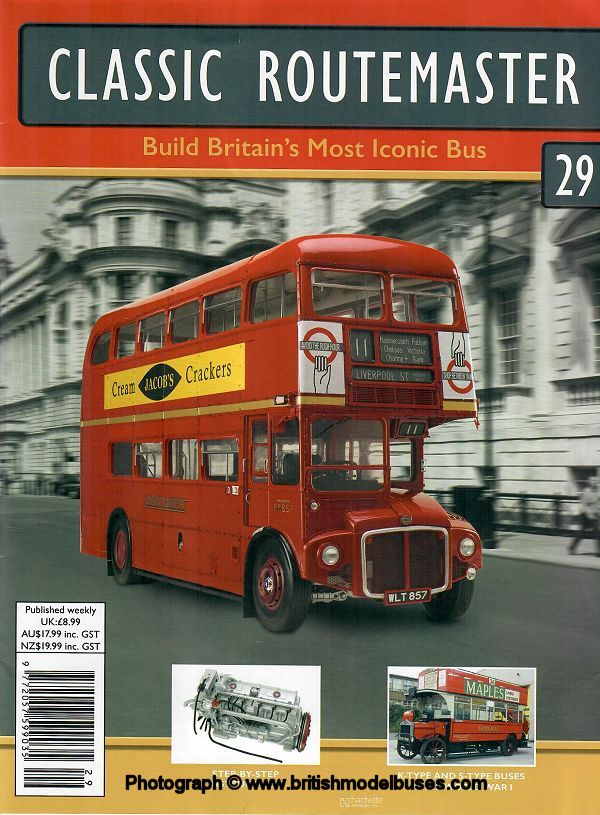
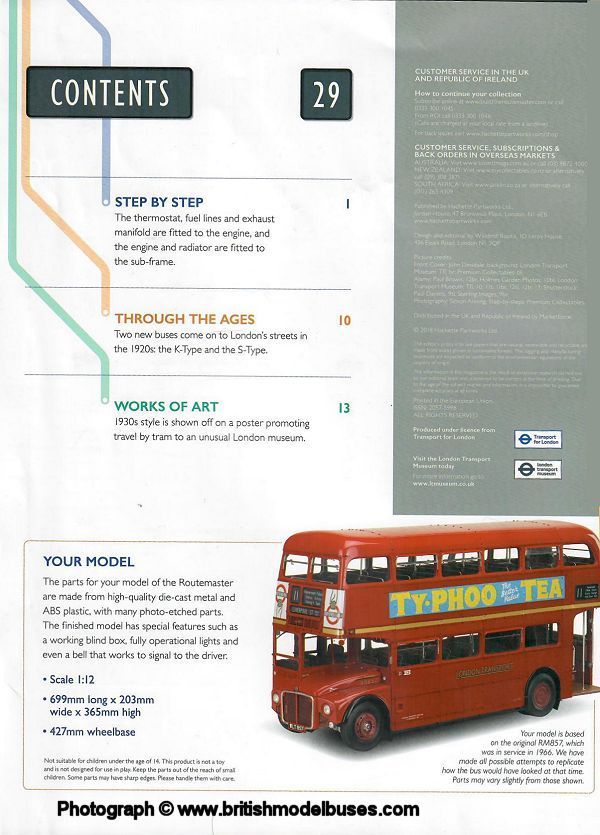
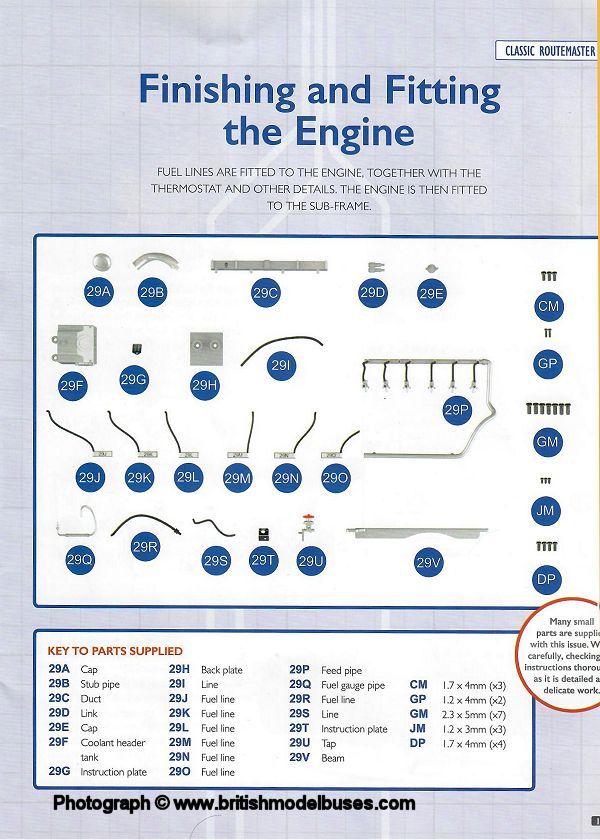
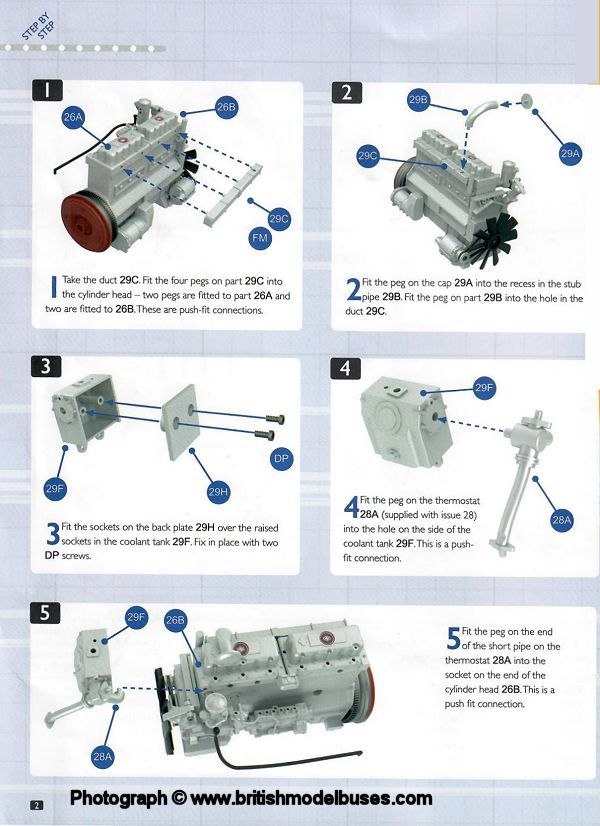
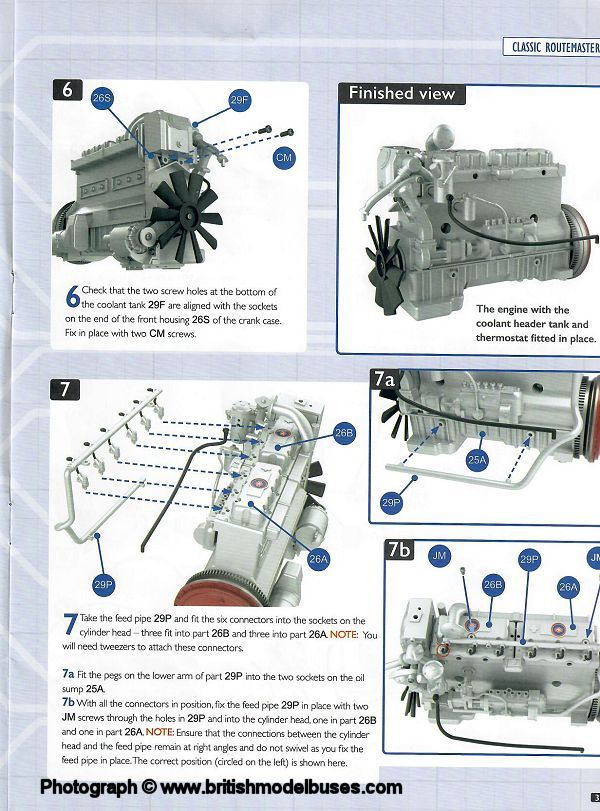
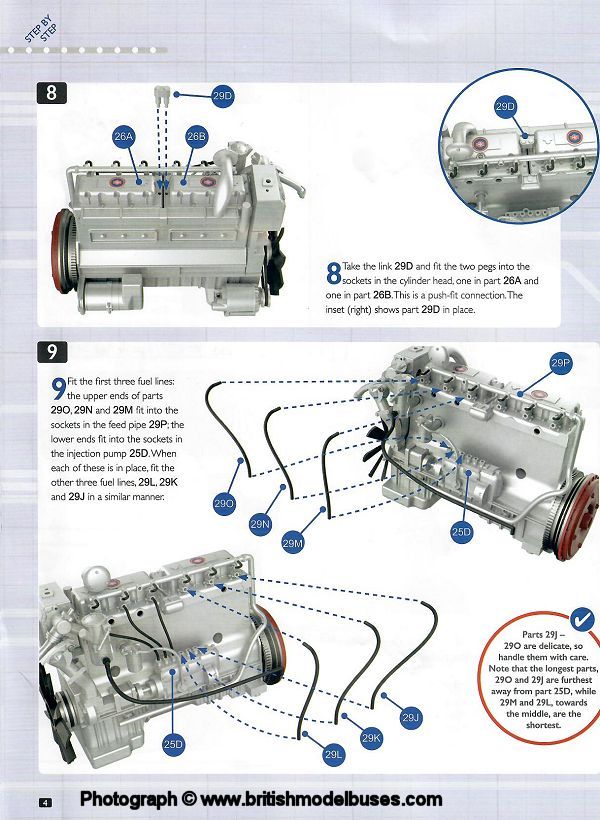
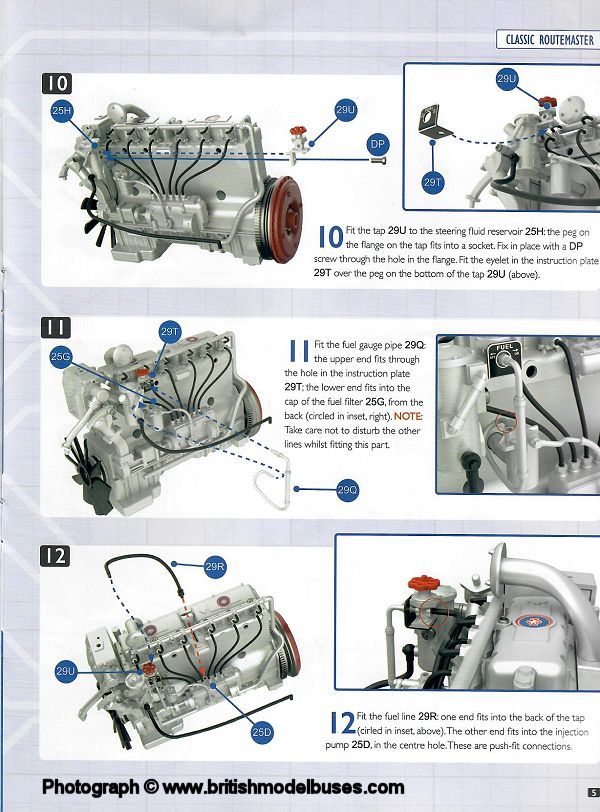
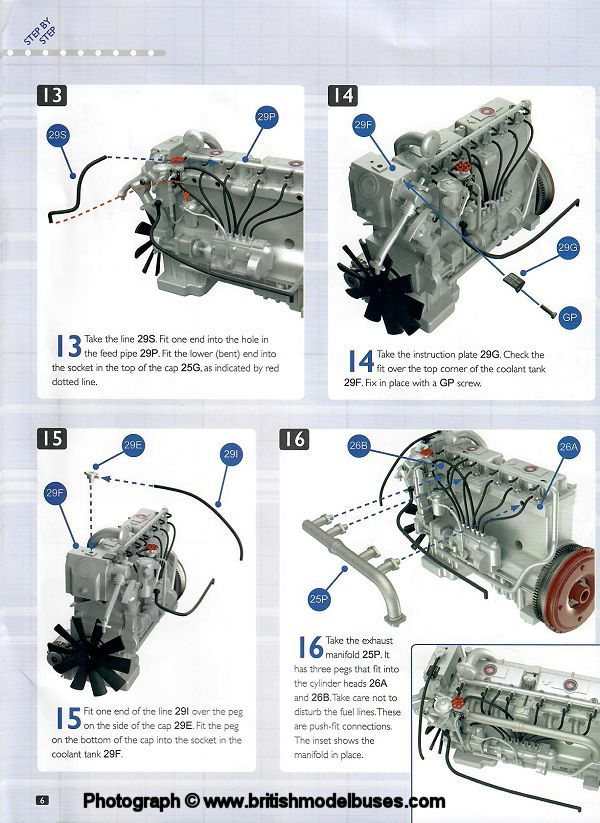
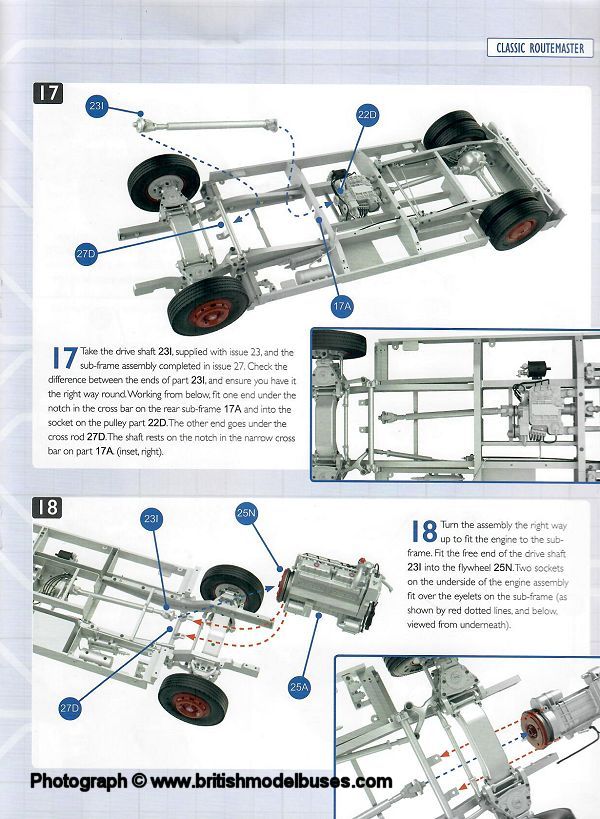
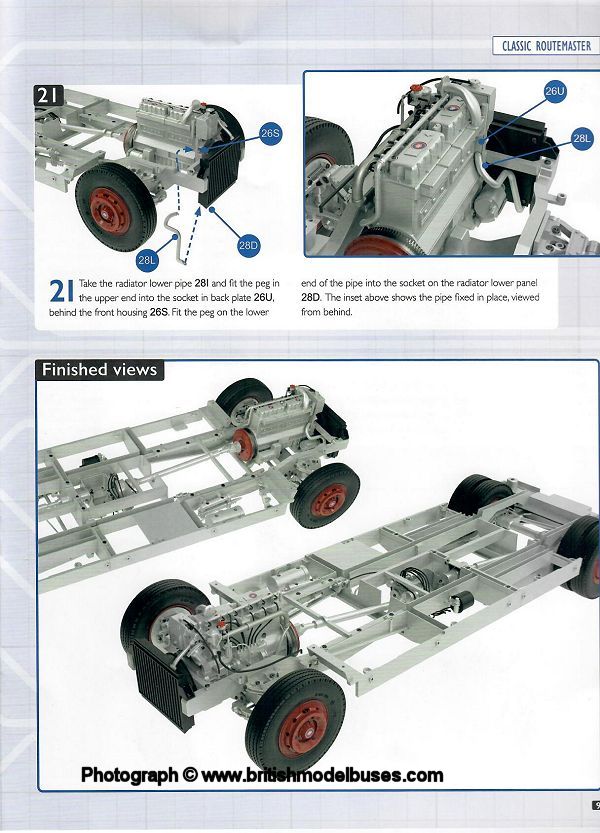
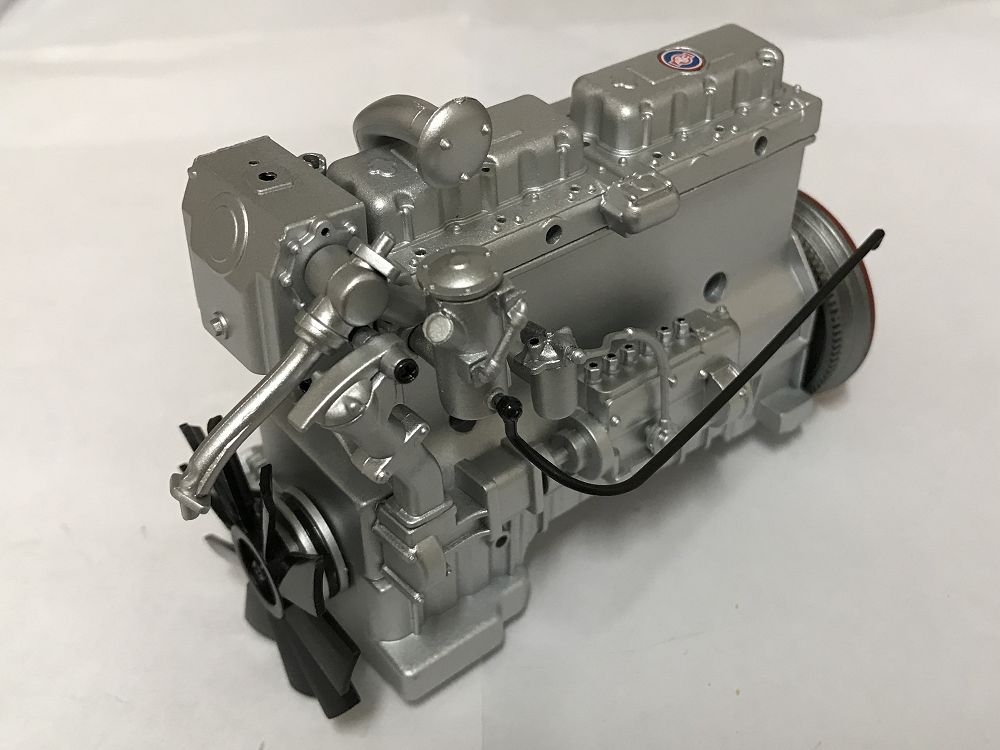
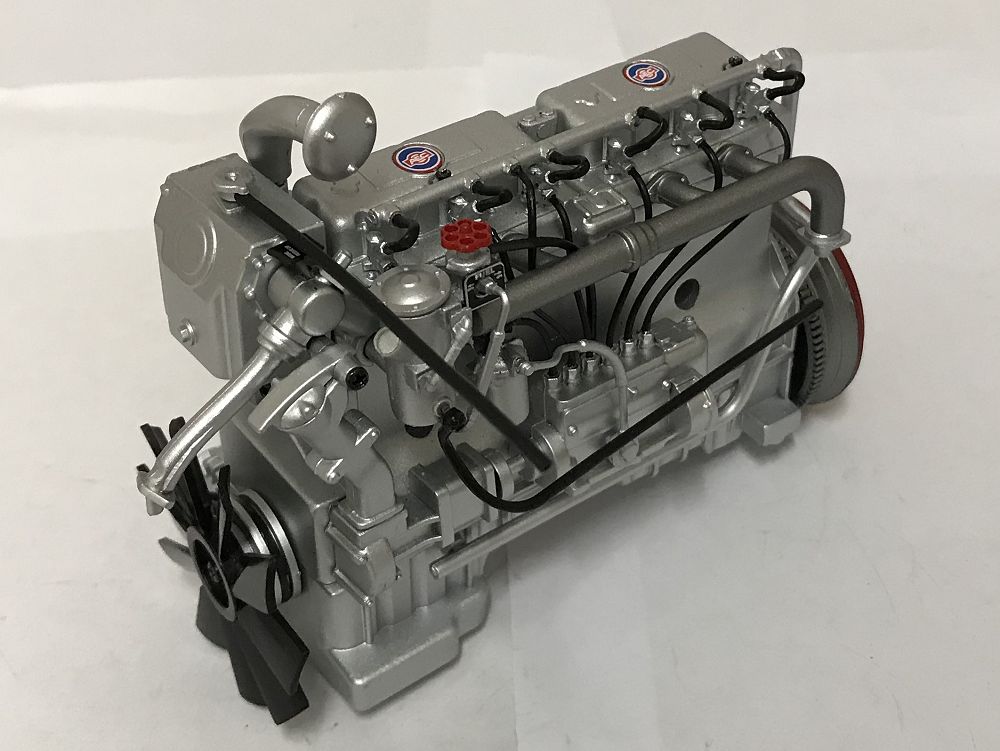
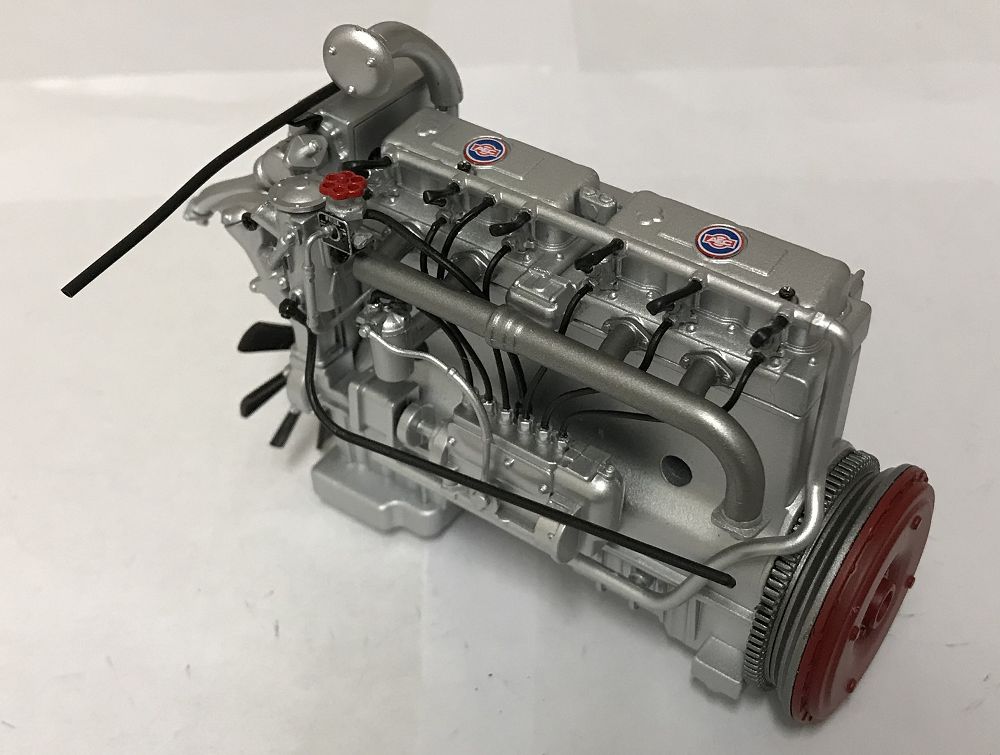
INSTRUCTIONS ISSUE 29 - FINISHING AND FITTING THE ENGINE

Click here for a higher resolution image Click here for a higher resolution image Click here for a higher resolution image Click here for a higher resolution image Click here for a higher resolution image Click here for a higher resolution image Click here for a higher resolution image Click here for a higher resolution image Click here for a higher resolution image

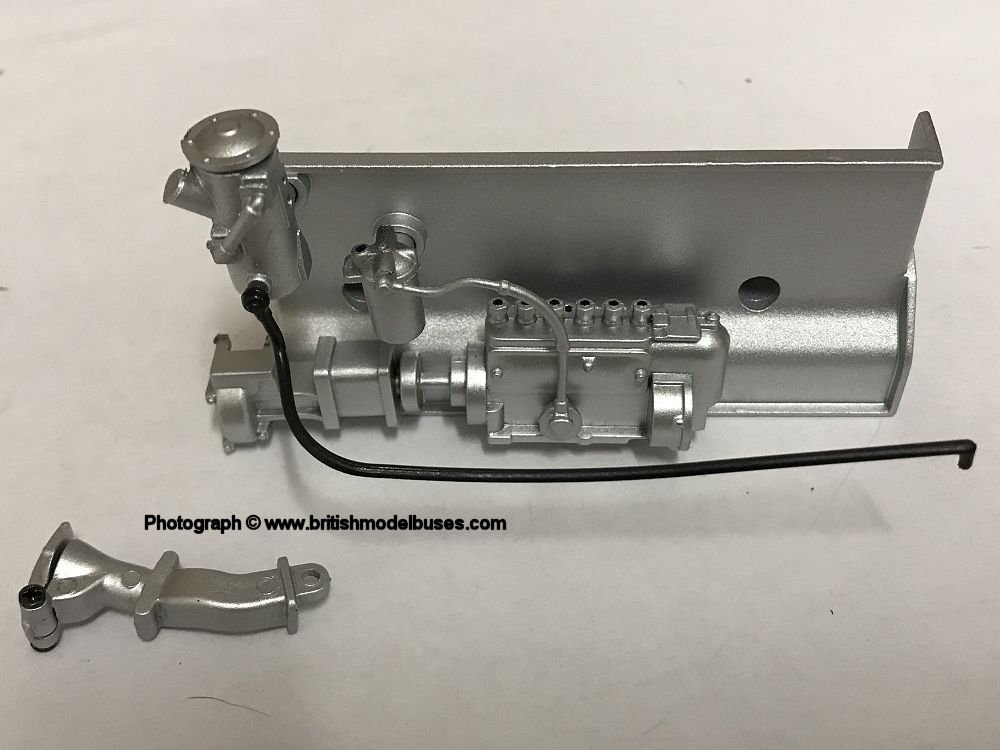
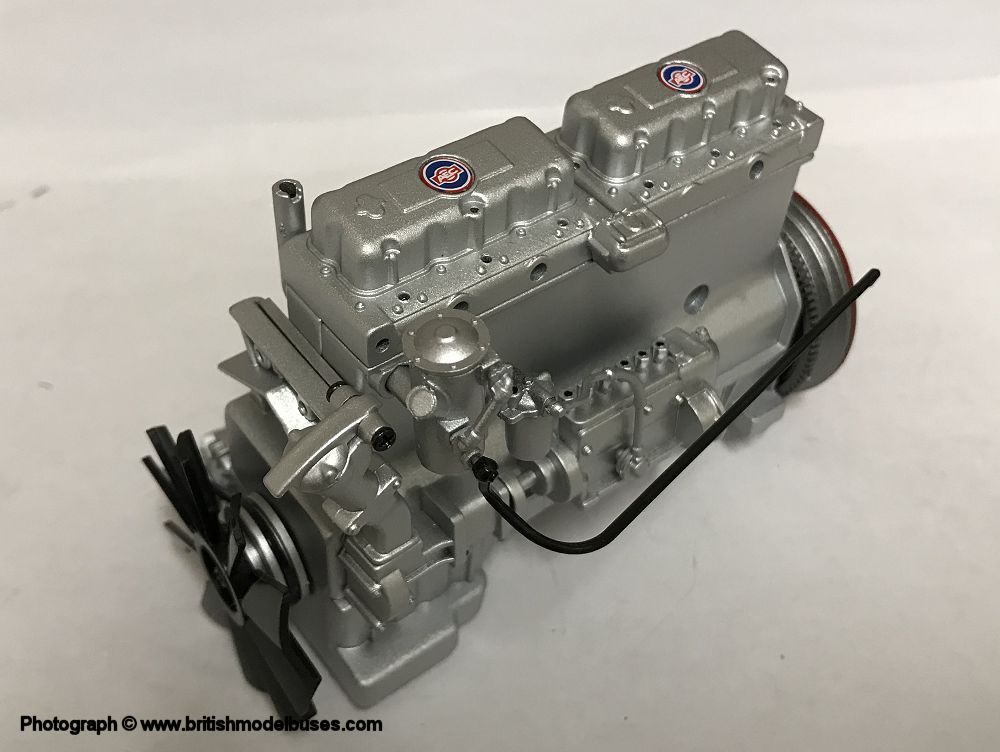
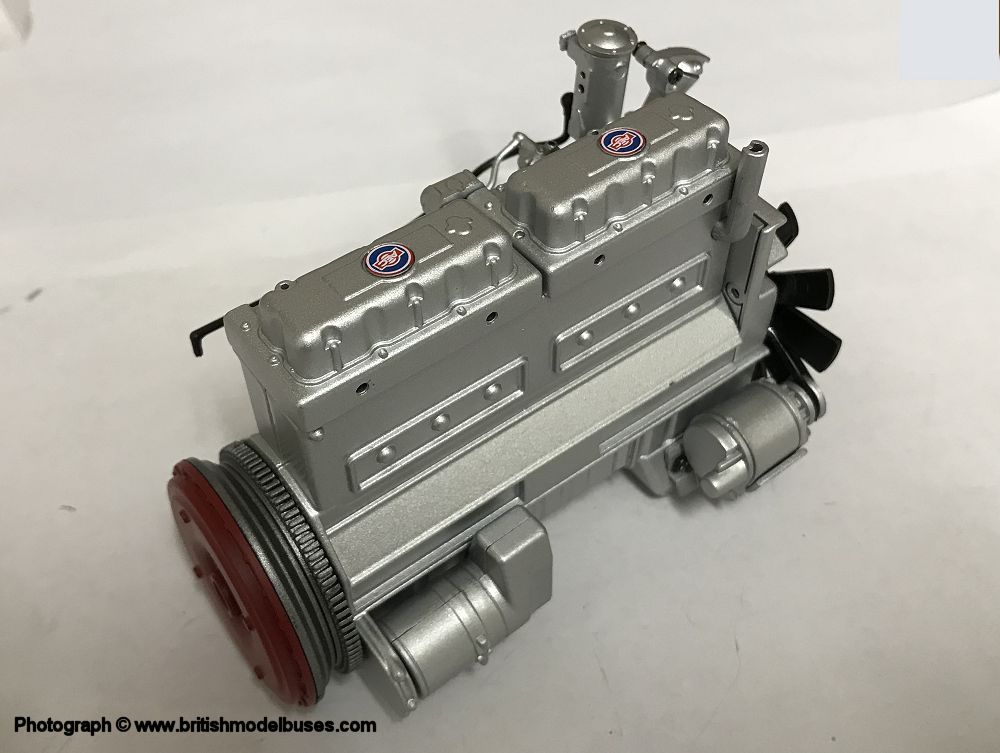
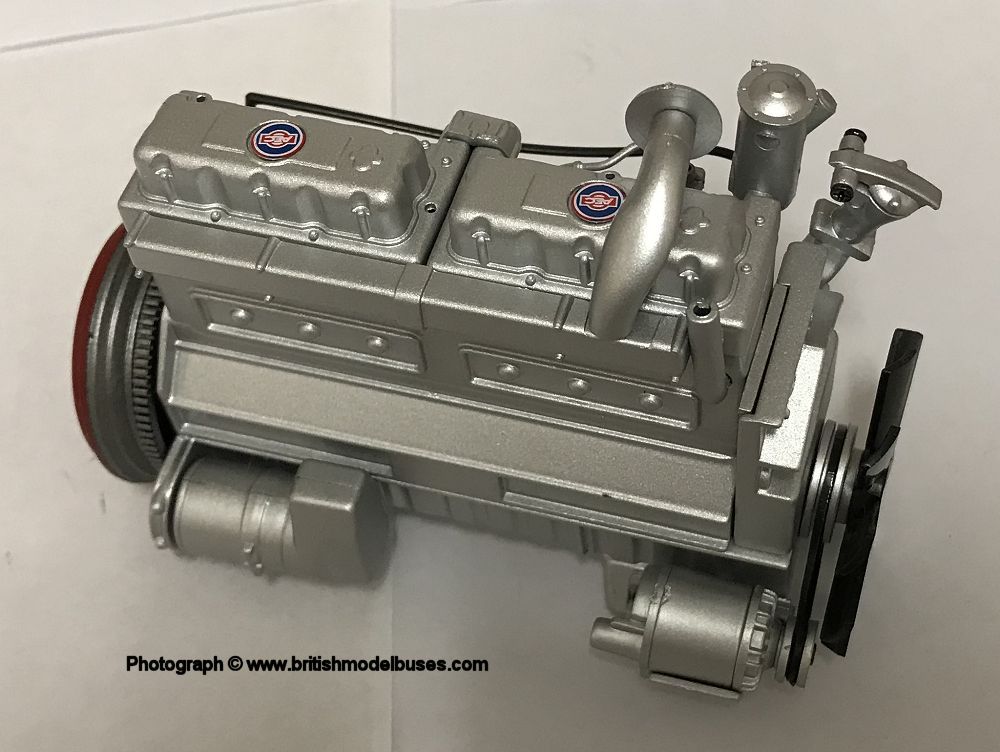
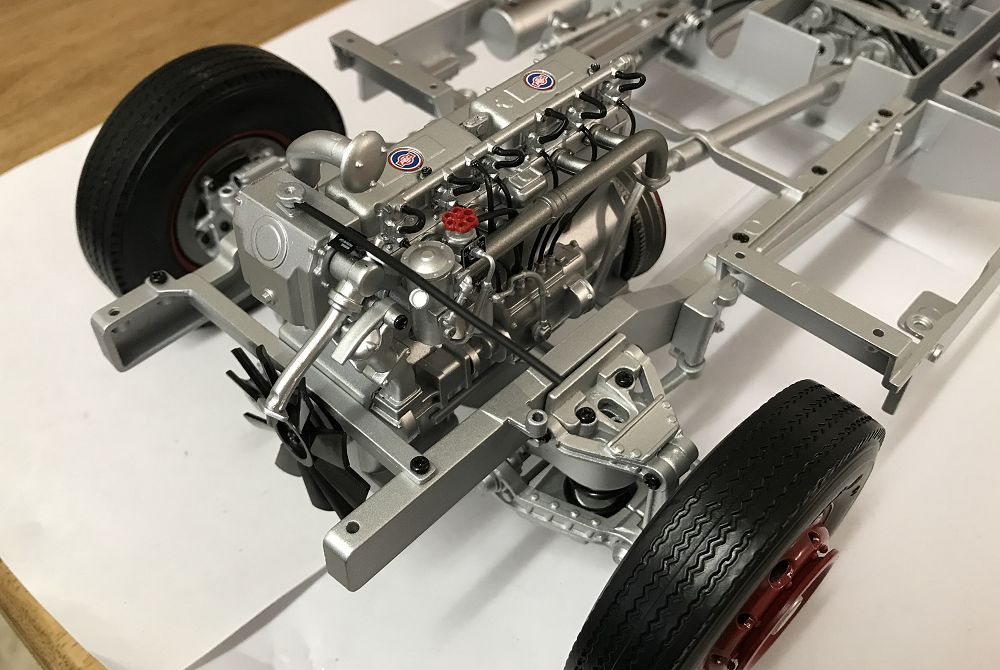
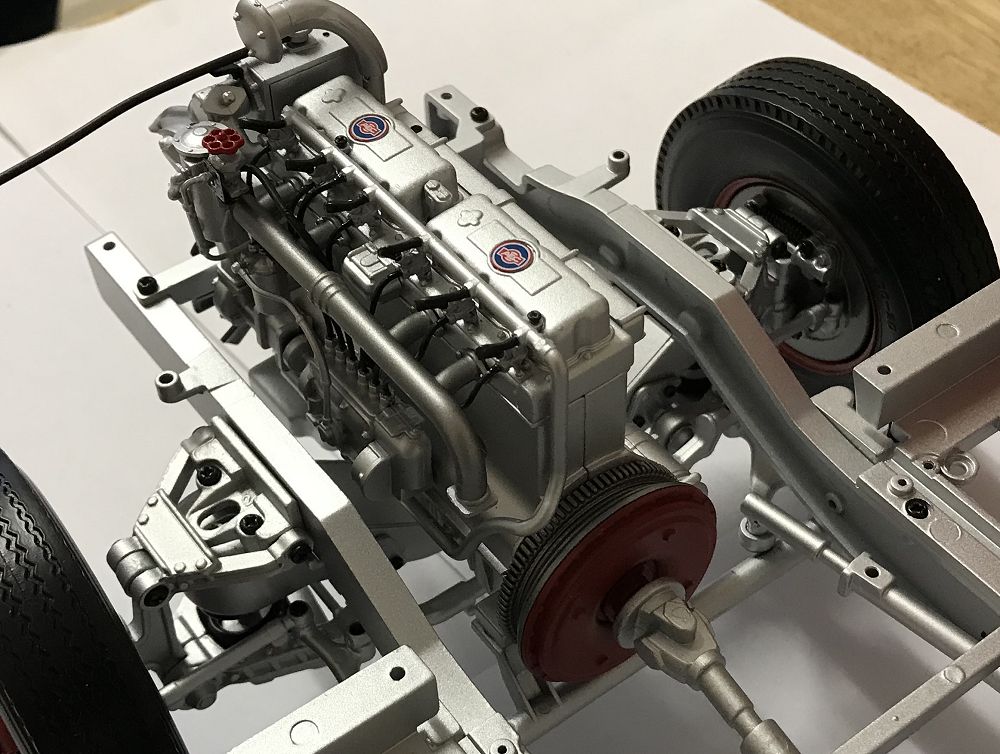
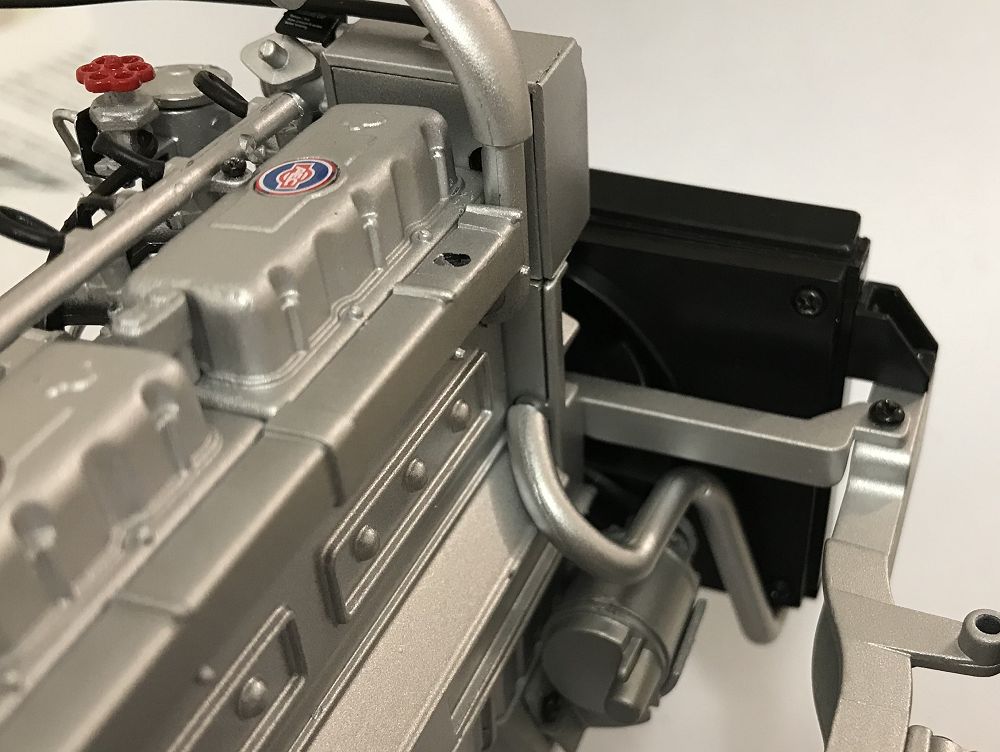
BUILD ISSUE 29 - FINISHING AND FITTING THE ENGINE


MAGAZINE ISSUE 30 - FITTING THE EXHAUST PIPE
After issue 29, this was a very simple build and took me approximately 20 minutes, with no issues at all. In the magazine Route 73 continues through Islington, I did not know that the Pink Floyd had their original recording studio's in Britannia Row, Islington and that the children who did the backing vocals for Another Brick in the Wall were recruited from the local Islington Green School. Another fact I did not know, was that Essex Road Station used to be part of the underground until 1975. When the tunnels were built by the Great Northern and City Railway in the early 1900's, they were build to a larger diameter than normal tube tunnels which allowed them to be converted for use by mainline engines and rolling stock. The second article is a technical view of the drivers cab which makes interesting reading to someone like me who has never sat in one (I have driven an STL, but never a Routemaster).

Click here for a higher resolution image Click here for a higher resolution image Click here for a higher resolution image

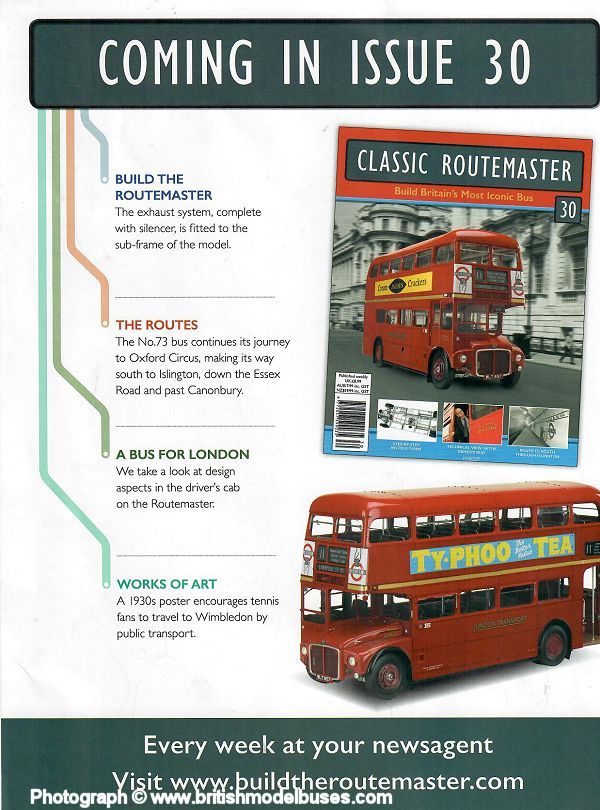
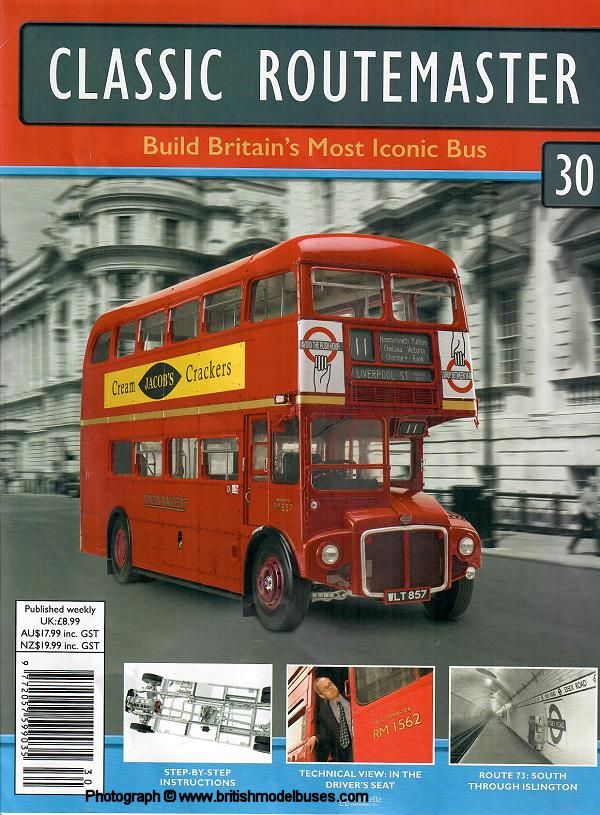
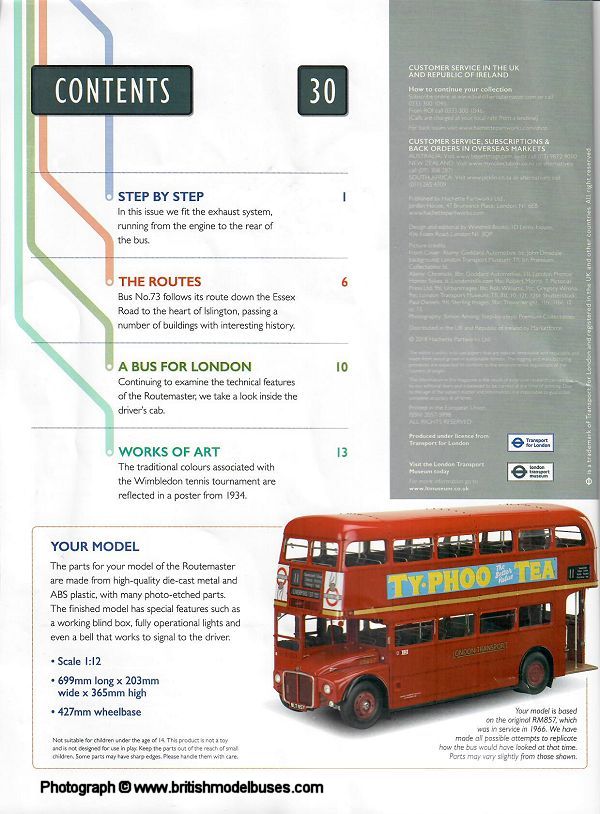
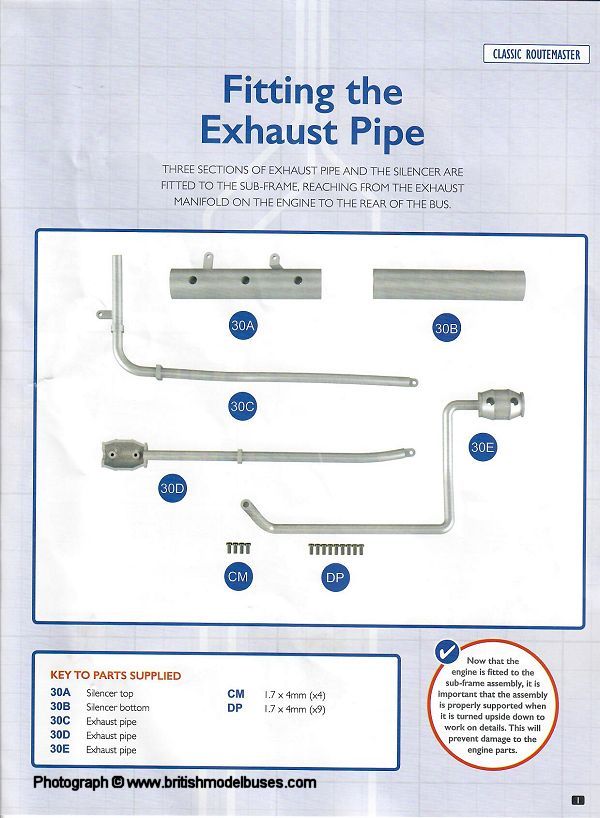
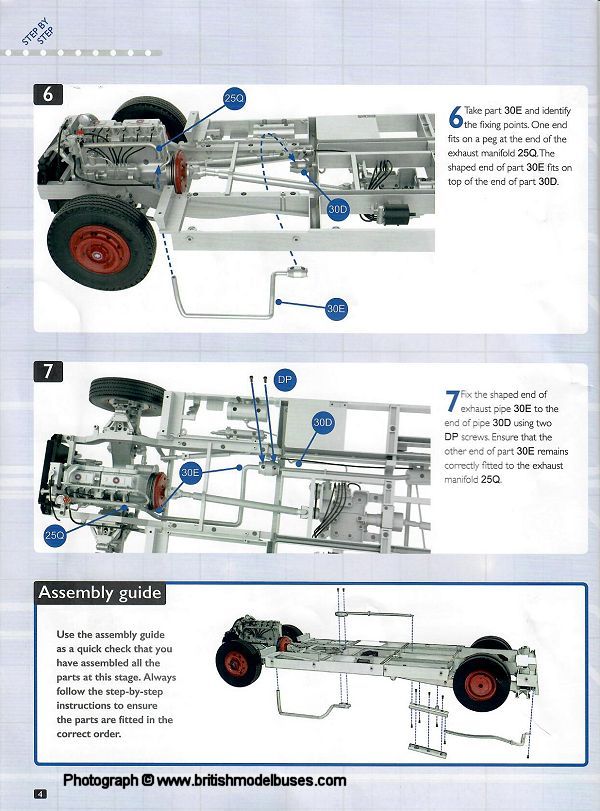
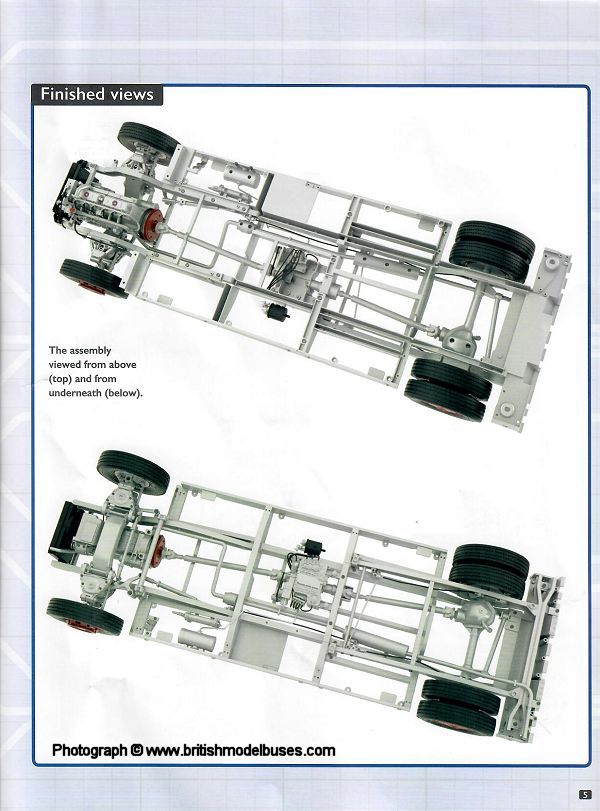
INSTRUCTIONS ISSUE 30 - FITTING THE EXHAUST PIPE

Click here for a higher resolution image Click here for a higher resolution image Click here for a higher resolution image Click here for a higher resolution image Click here for a higher resolution image

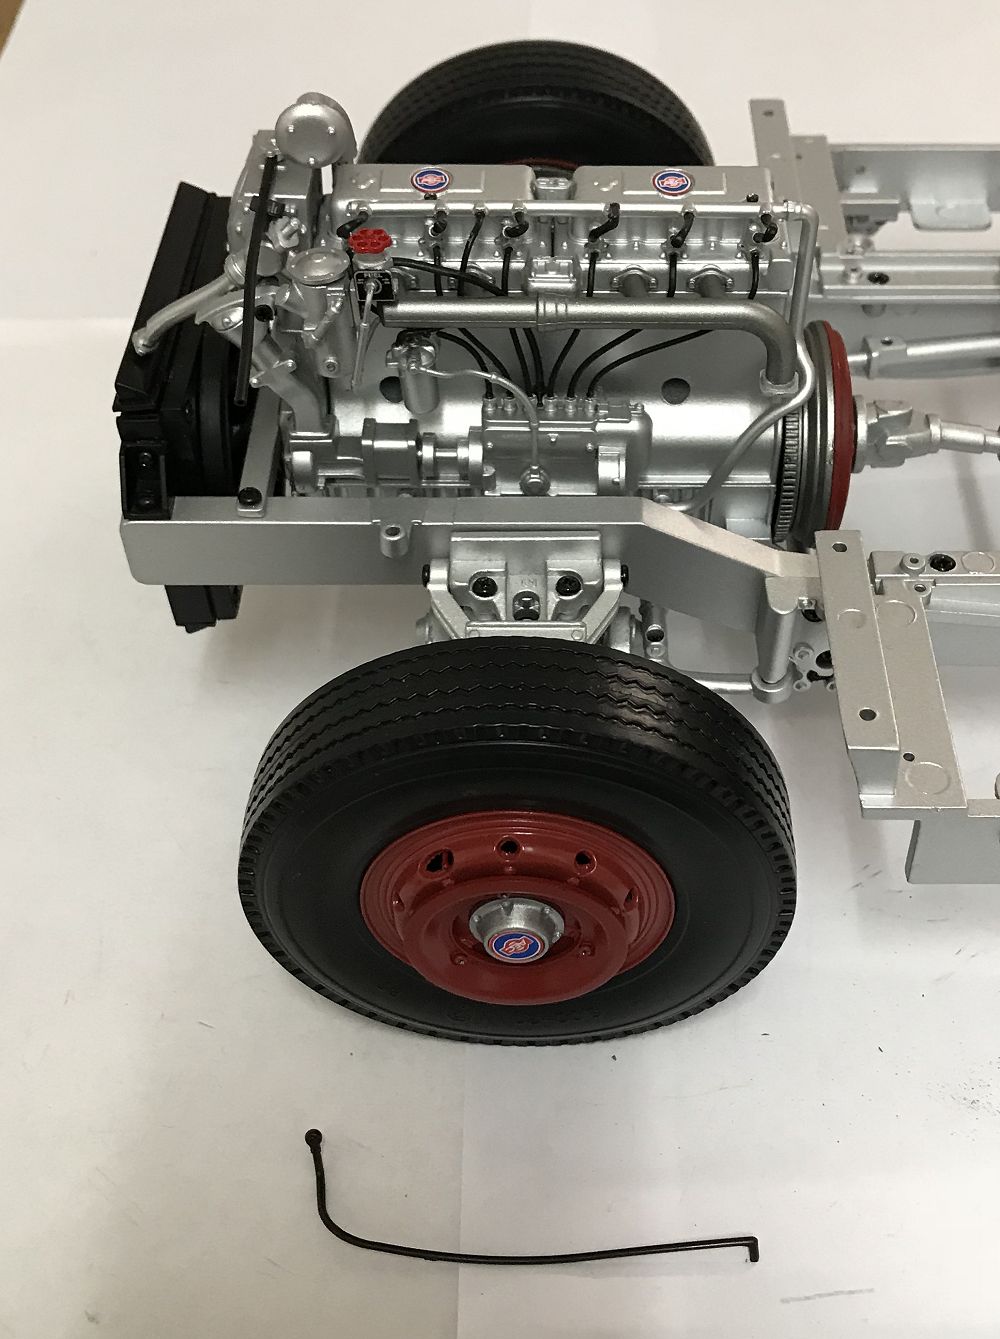
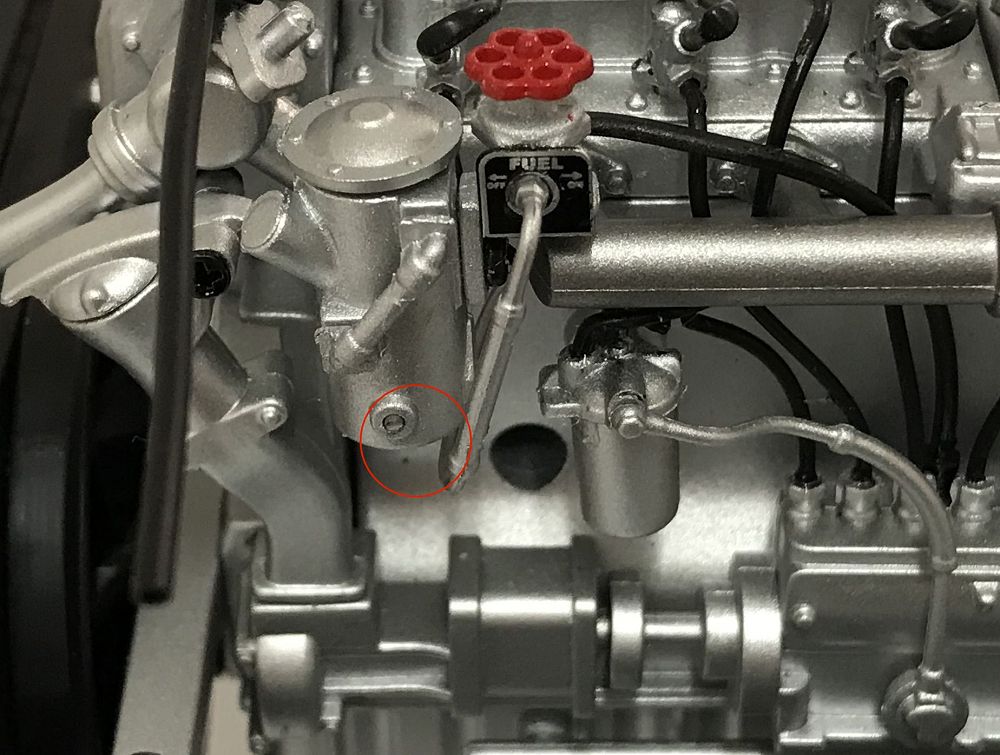
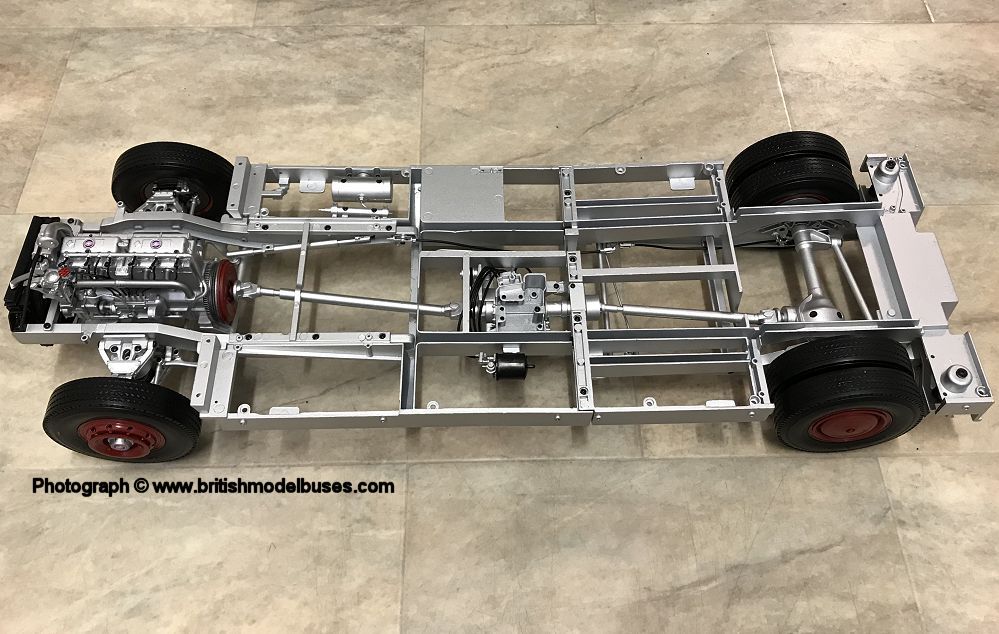
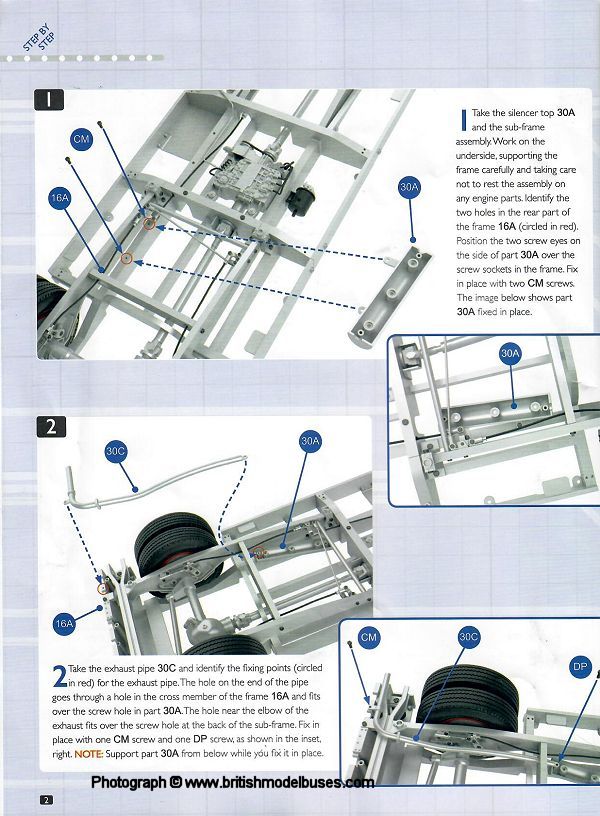
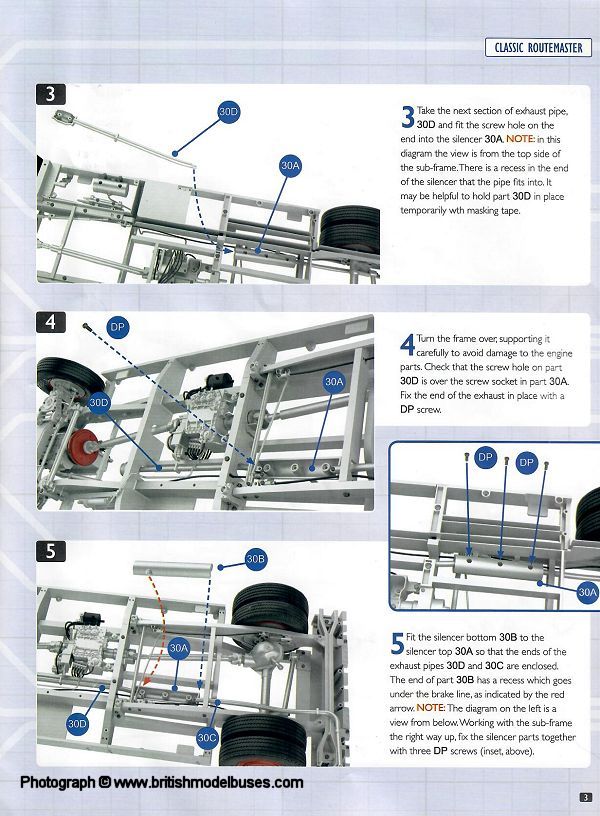
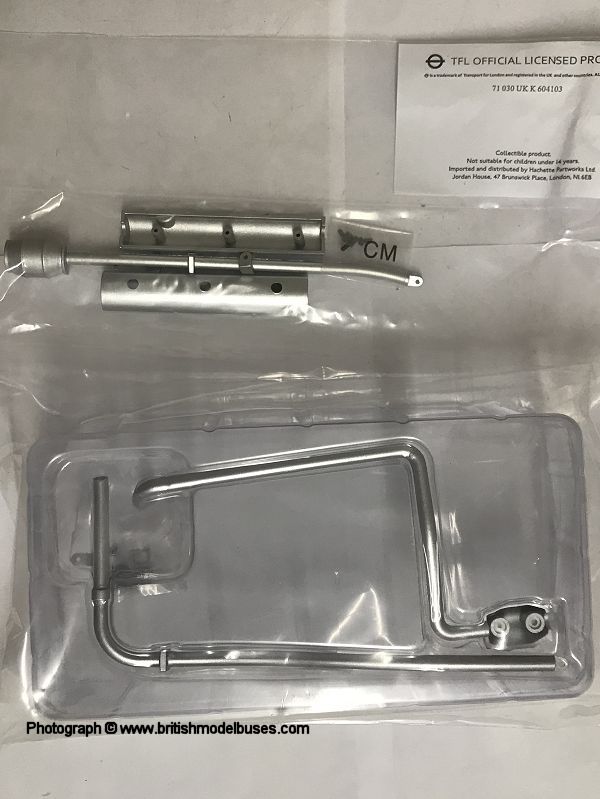
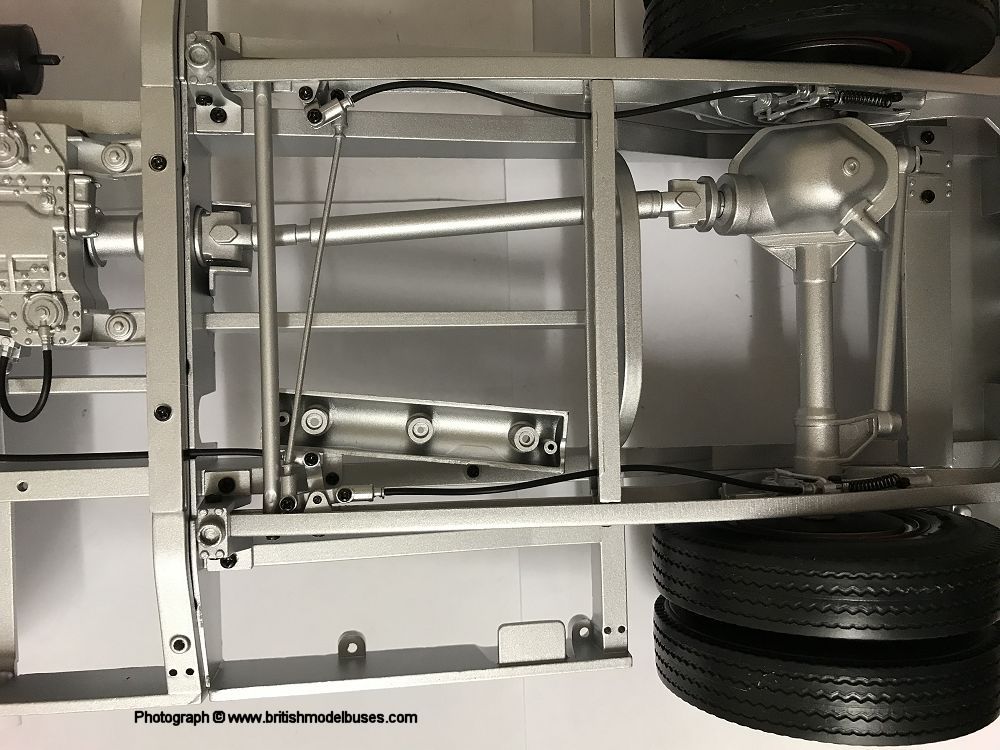
BUILD ISSUE 30 - FITTING THE EXHAUST PIPE


BUILD YOU OWN ROUTEMASTER

ISSUES TWENTY ONE TO THIRTY

This page last updated Friday, 24 April 2020

© British Model Buses 2019