HACHETTE PARTWORKS - BUILD YOU OWN ROUTEMASTER

ISSUES ONE TO TEN

TO RETURN TO THE MAIN INDEX CLICK HERE
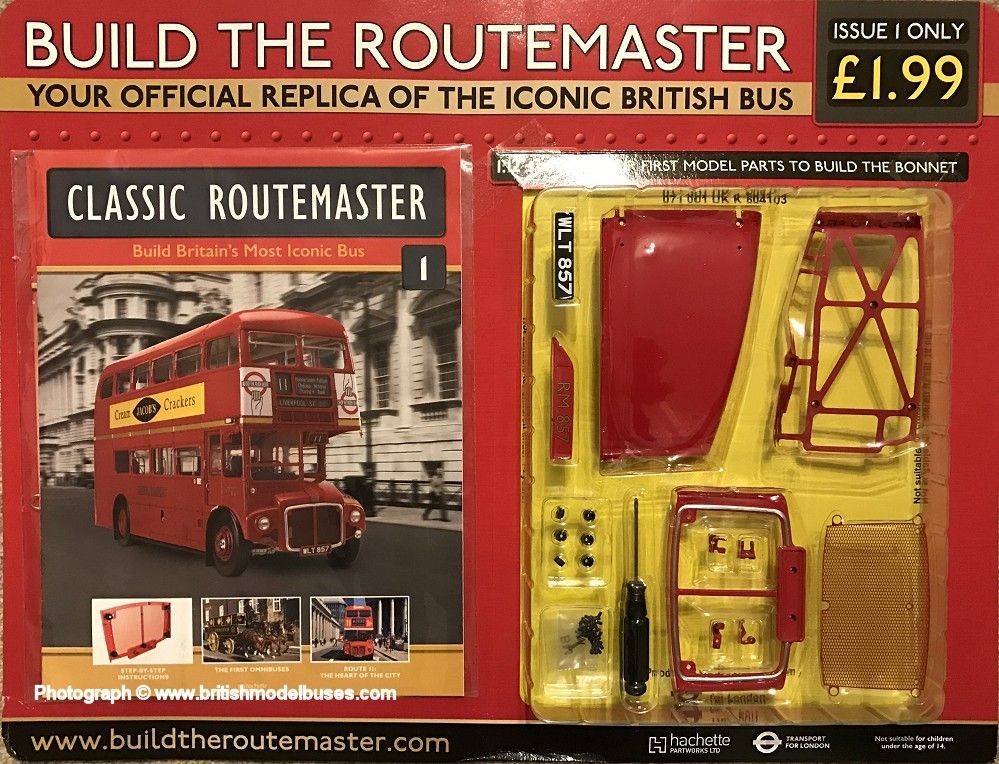
 

ISSUE ONE
I purchased the first issue on Saturday 27th January in my local branch of WH Smith. I read carefully through the pack of papers and the magazine with instructions and calculated the total cost (approx £1150) over 130 months. I decided that I would take out the subscription online using direct debit mandate. When completing the subscription it advises that it will take approx 28 days from placing the subscription for your first issues of the magazine to arrive (my first parcel arrived 8 days after I took out the subscription).

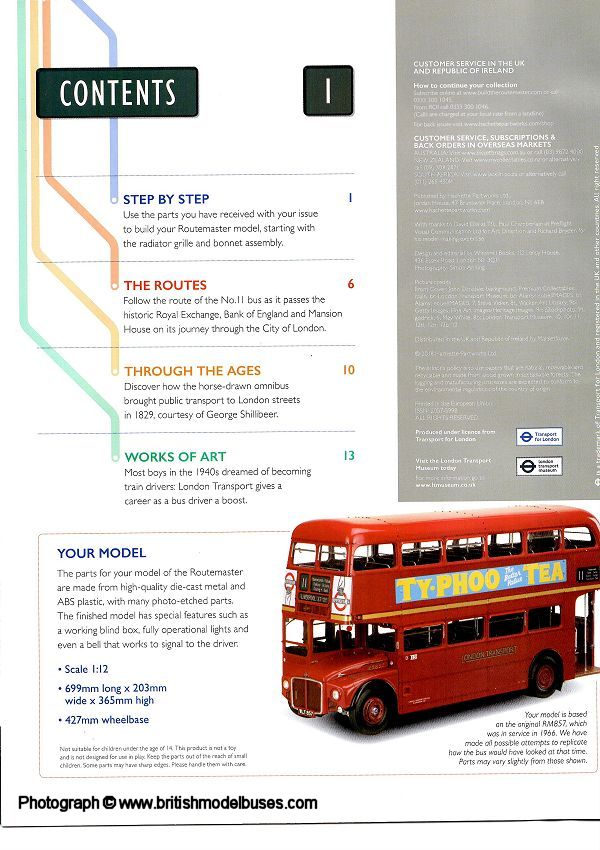
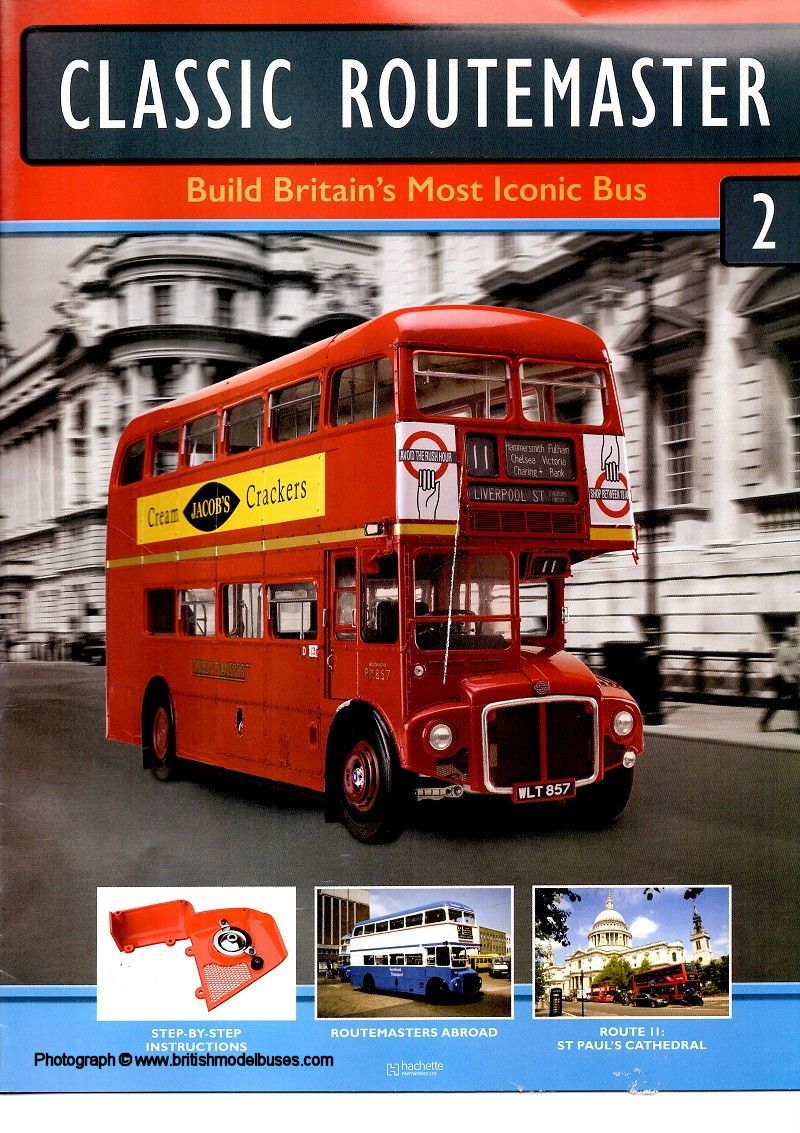
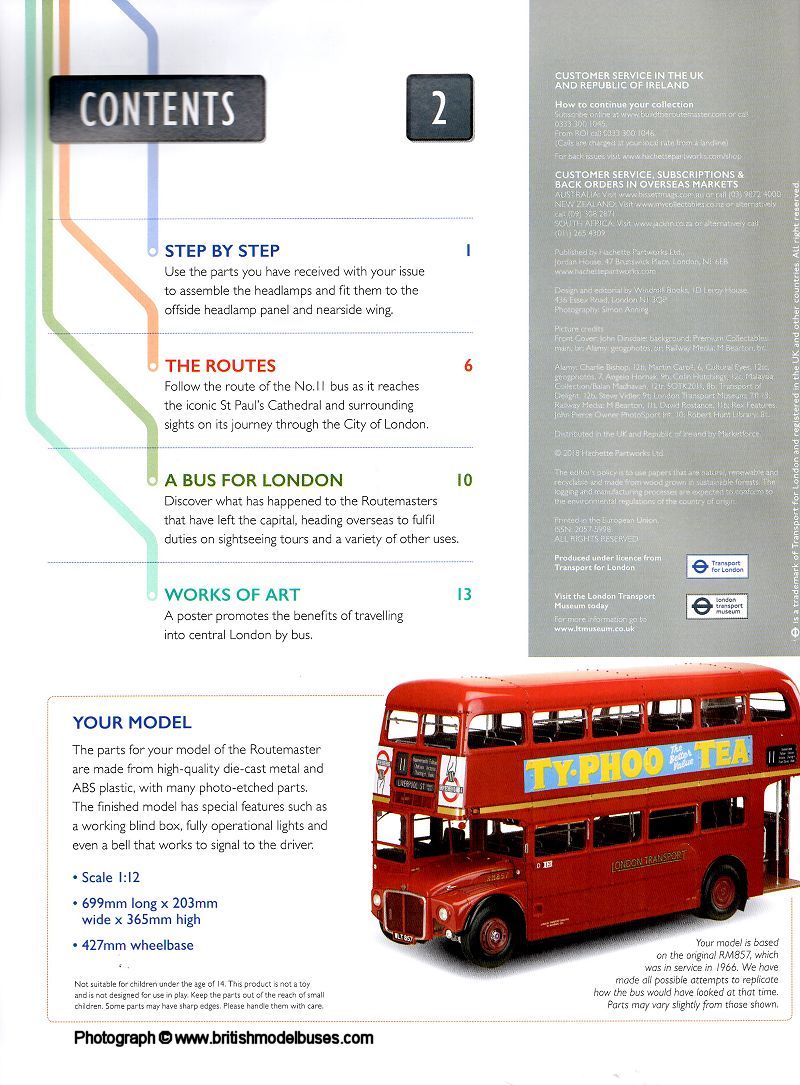
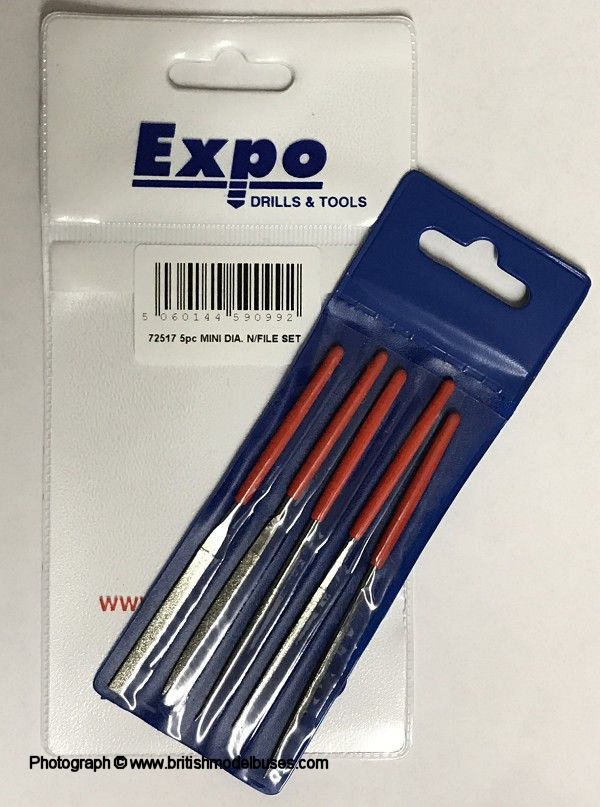
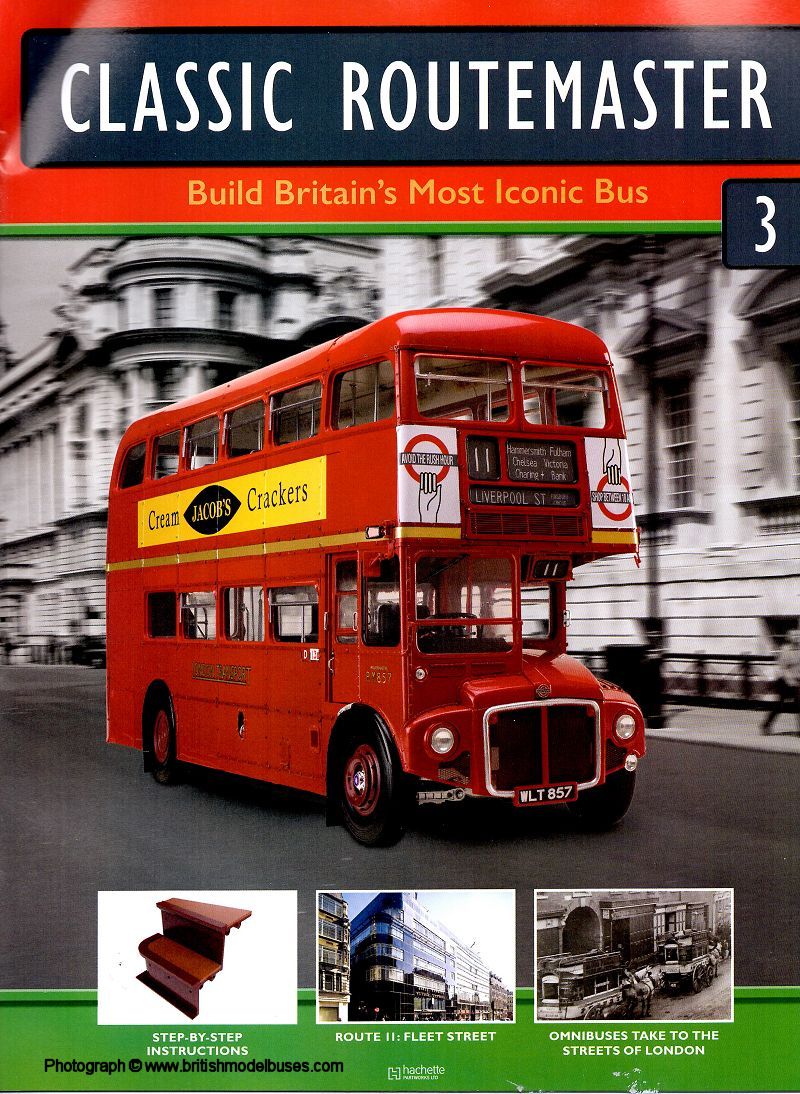
I found the instructions clear and easy to follow, with diagrams for each stage. I noted the comment in the instructions that a small modelling file may be necessary if the small holes have filled with paint during manufacture. Whilst completing this first section, I found mine to be fine and no filing was required.

I would strongly recommend assembling this model on a flat table, covered in say white paper and preferably on a vinyl type floor. I do not have large fingers, but even so found the small screws very fiddly and on two occasions I dropped them and they bounced off the table onto the floor. The small screwdriver supplied with the first issue is magnetic and I found it invaluable when picking up the screws. Had I been sat at a table on a carpeted floor (unless light coloured), when I dropped the screws, I would imagine that the screws would have been extremely difficult to find. I noted that the instructions tell you to keep any spare screws left at the end of each stage, I can imagine they would come in handy as they are so small and very easy to misplace.

Photographs taken by me of the magazine pages are purely to illustrate the build stages, so that the entire project can be followed from the start to the completed model in issue order. The copyright of Hachette Partworks is acknowledged.


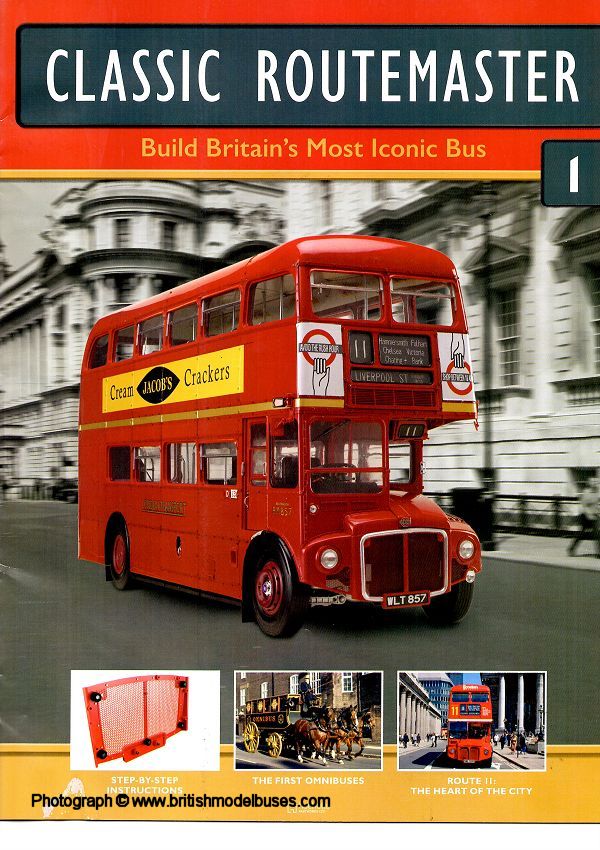
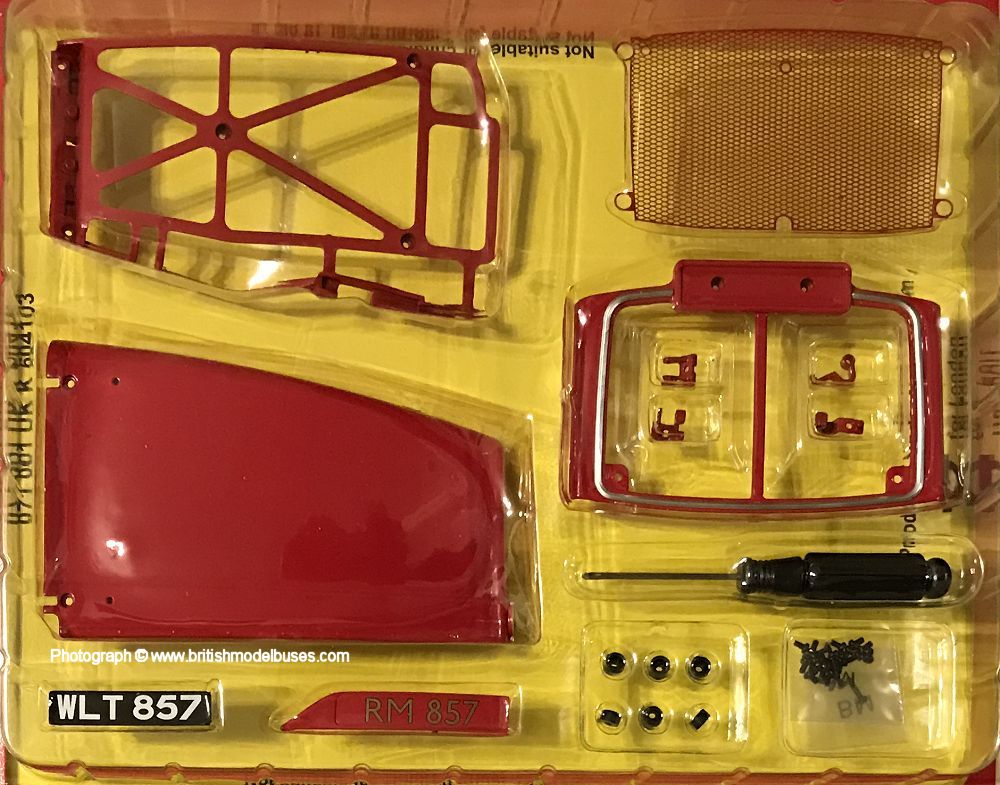
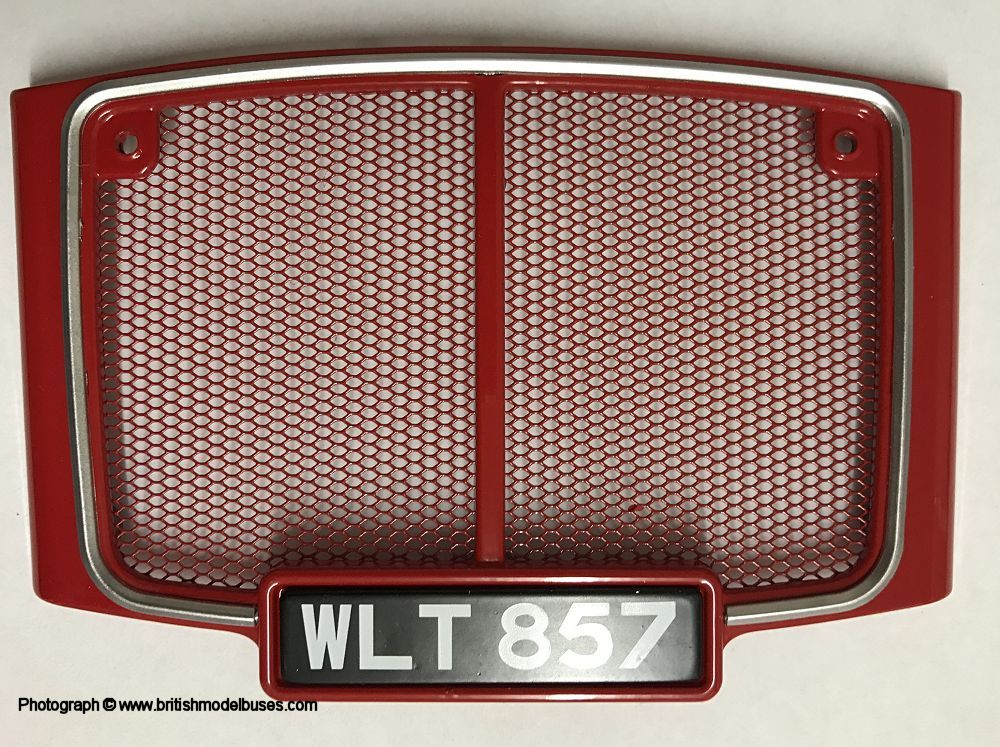
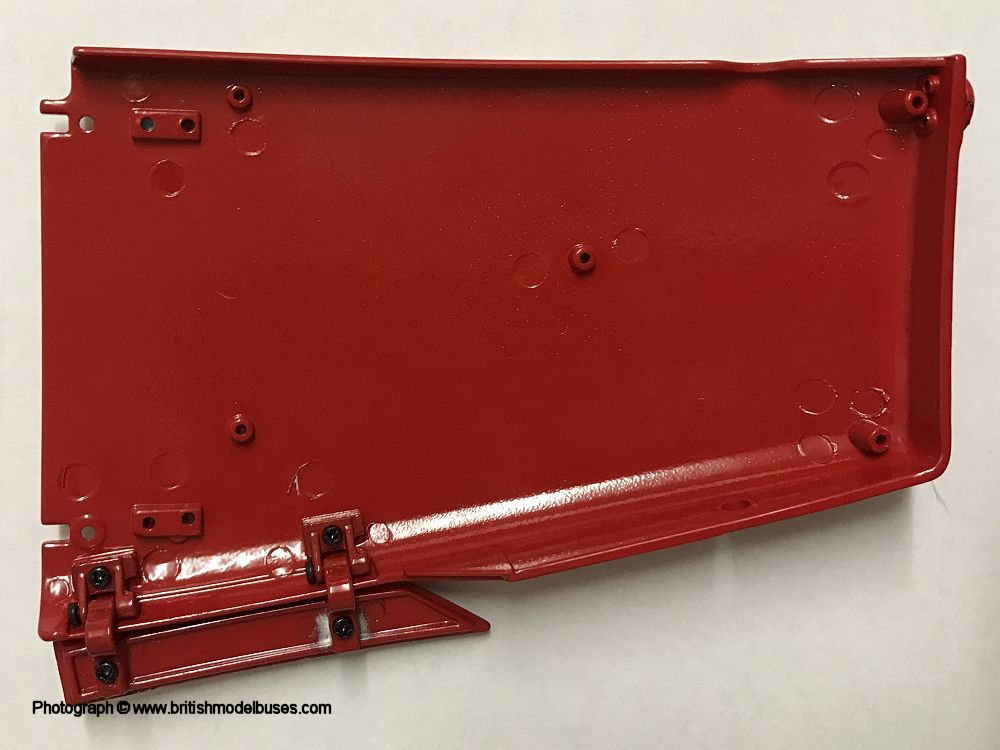
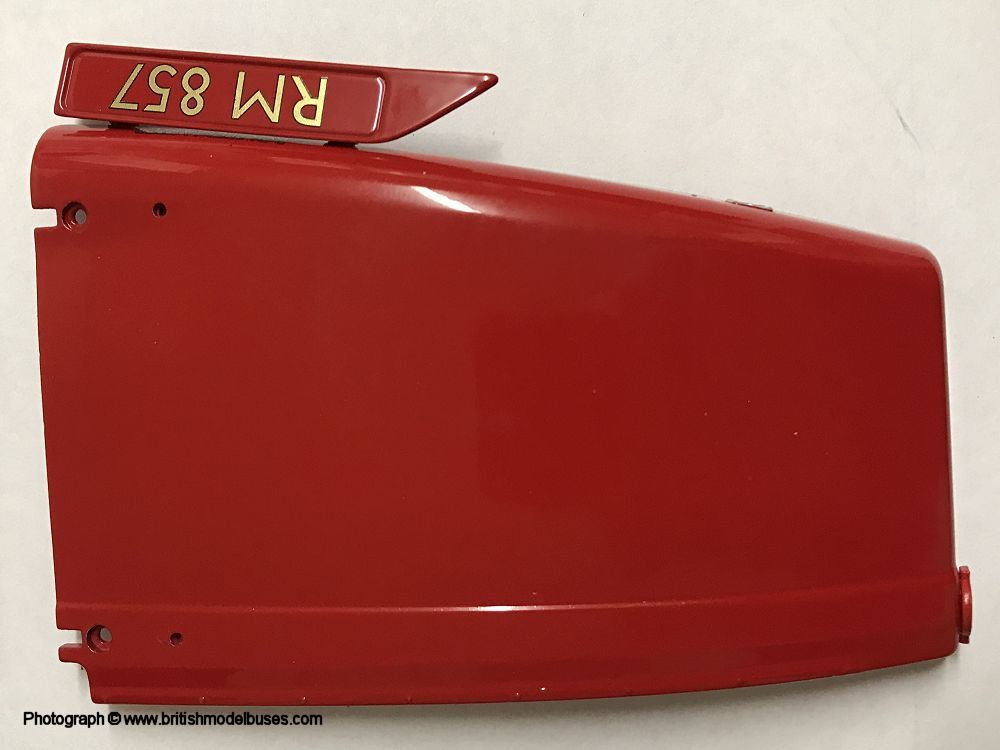
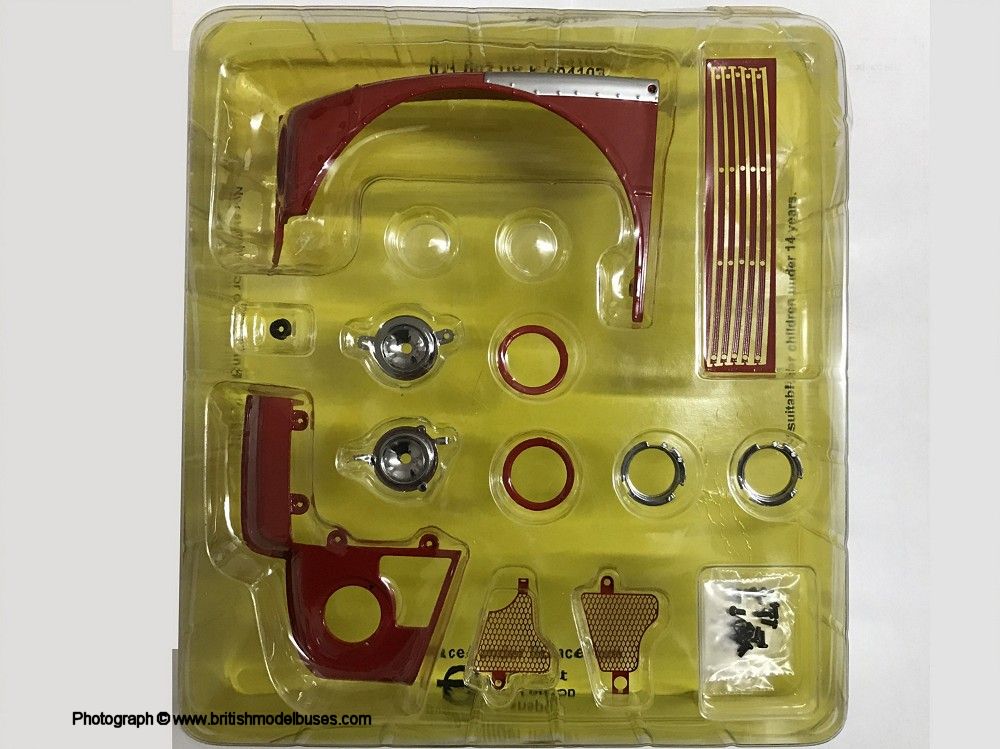
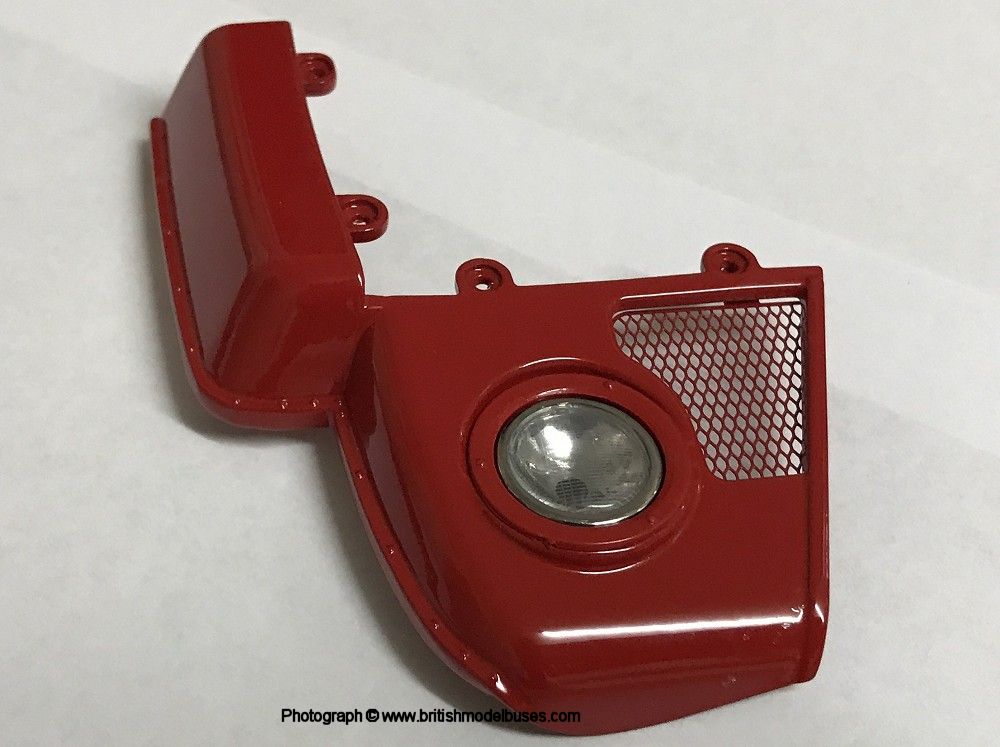
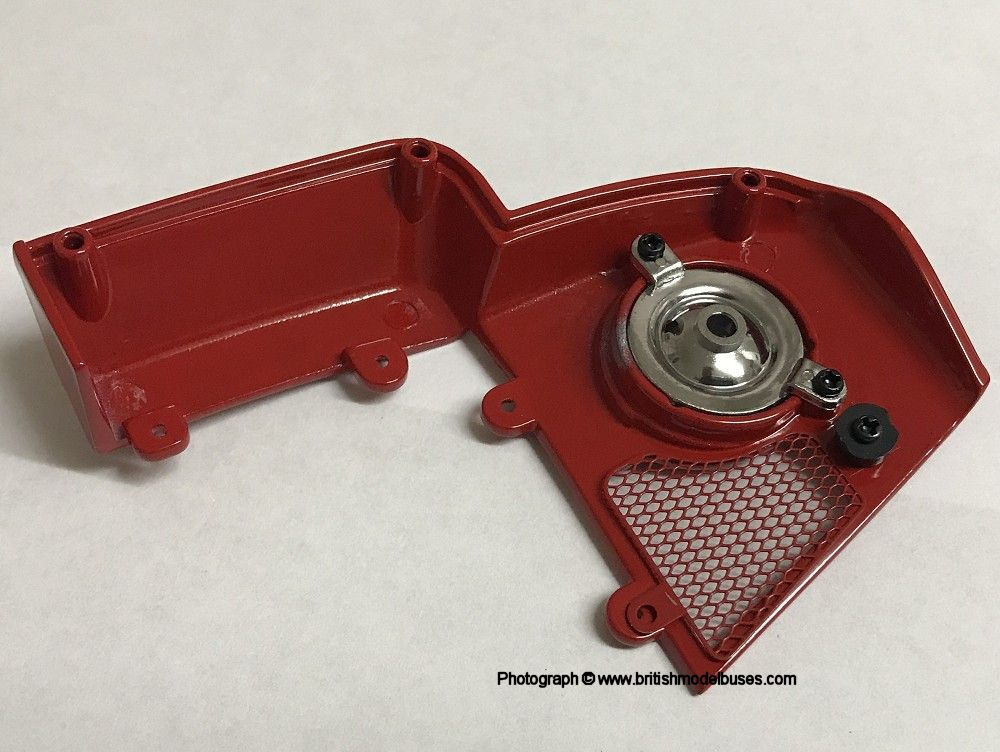
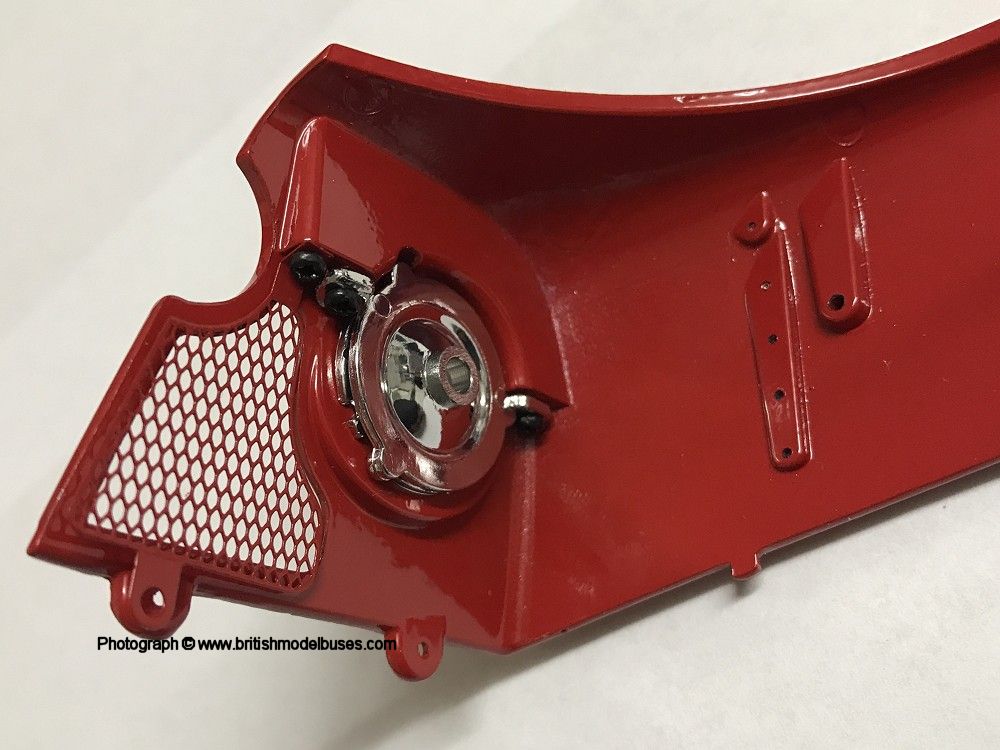
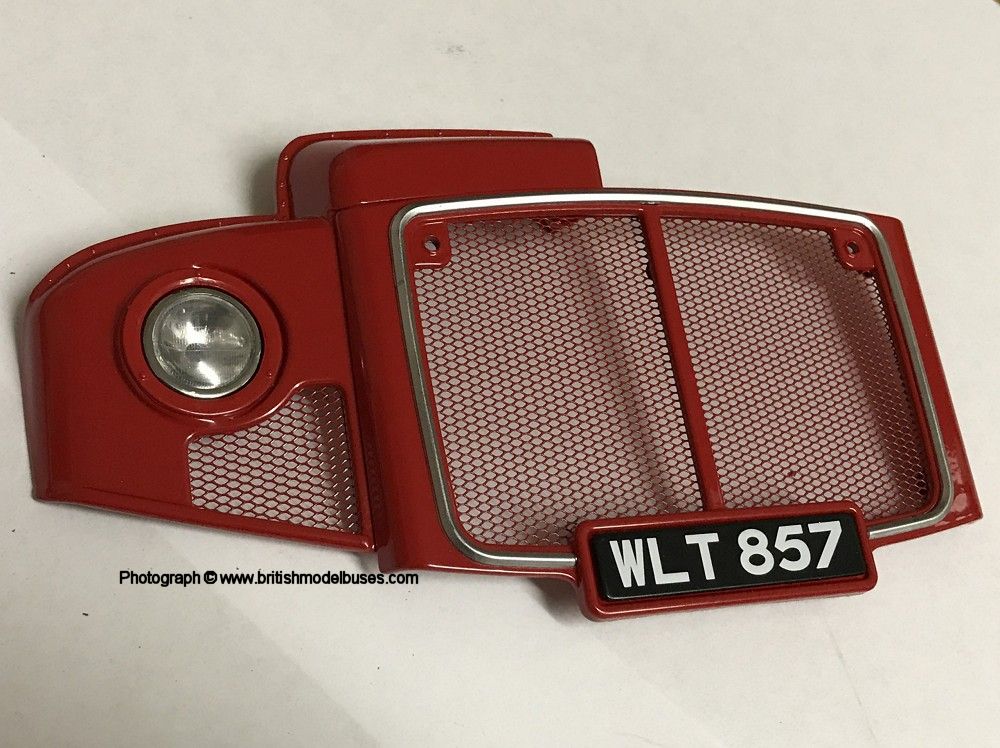
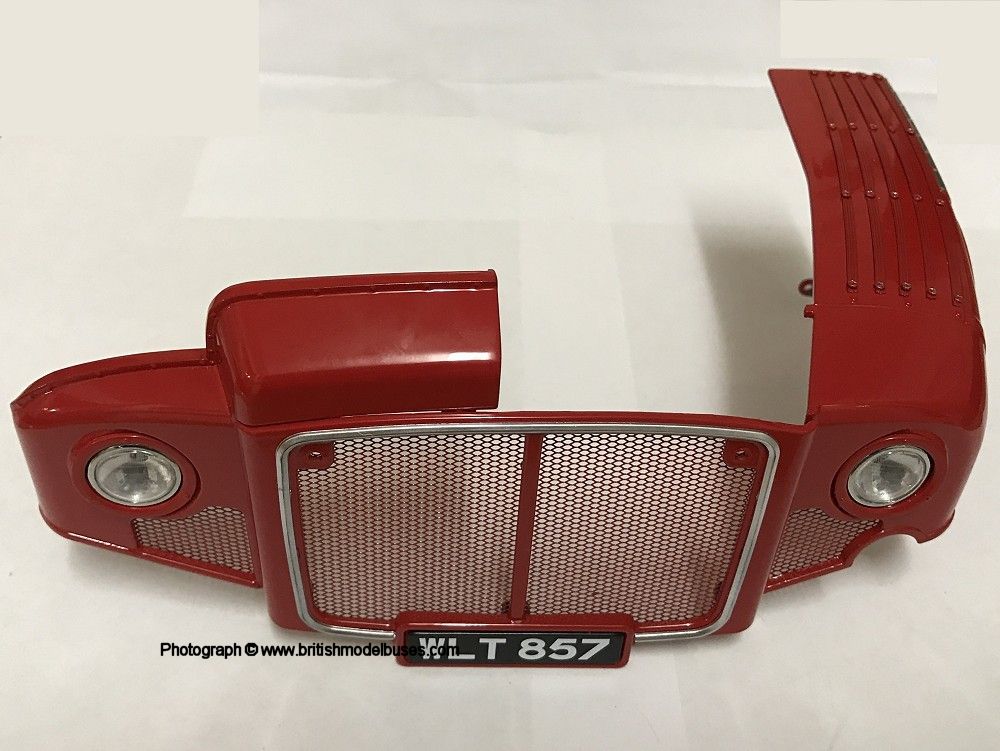
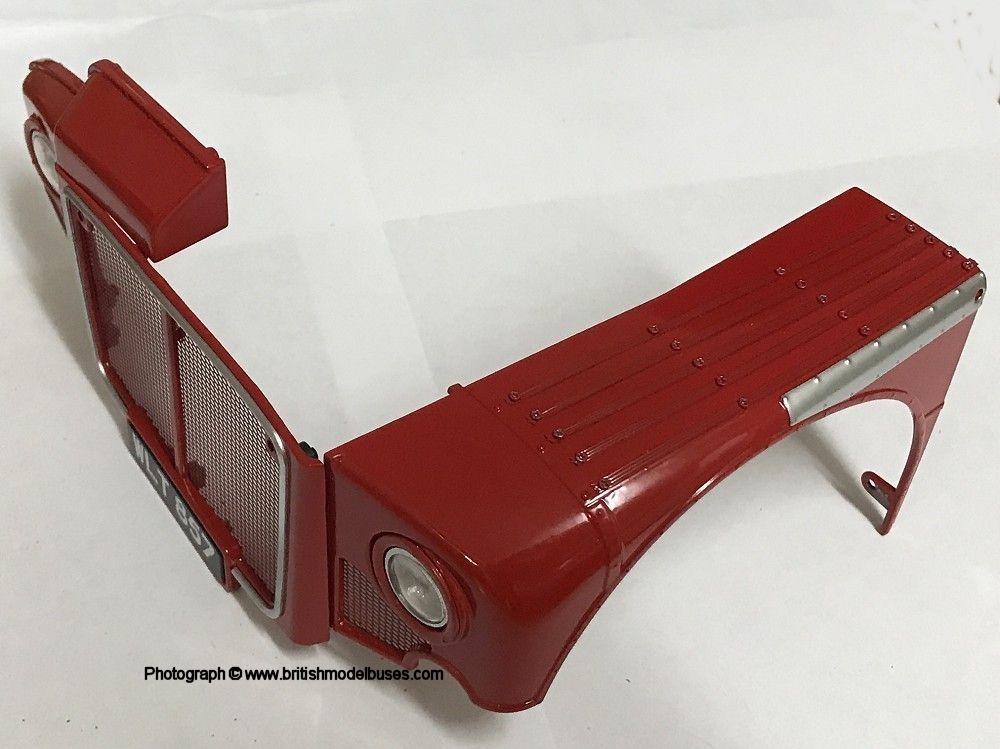
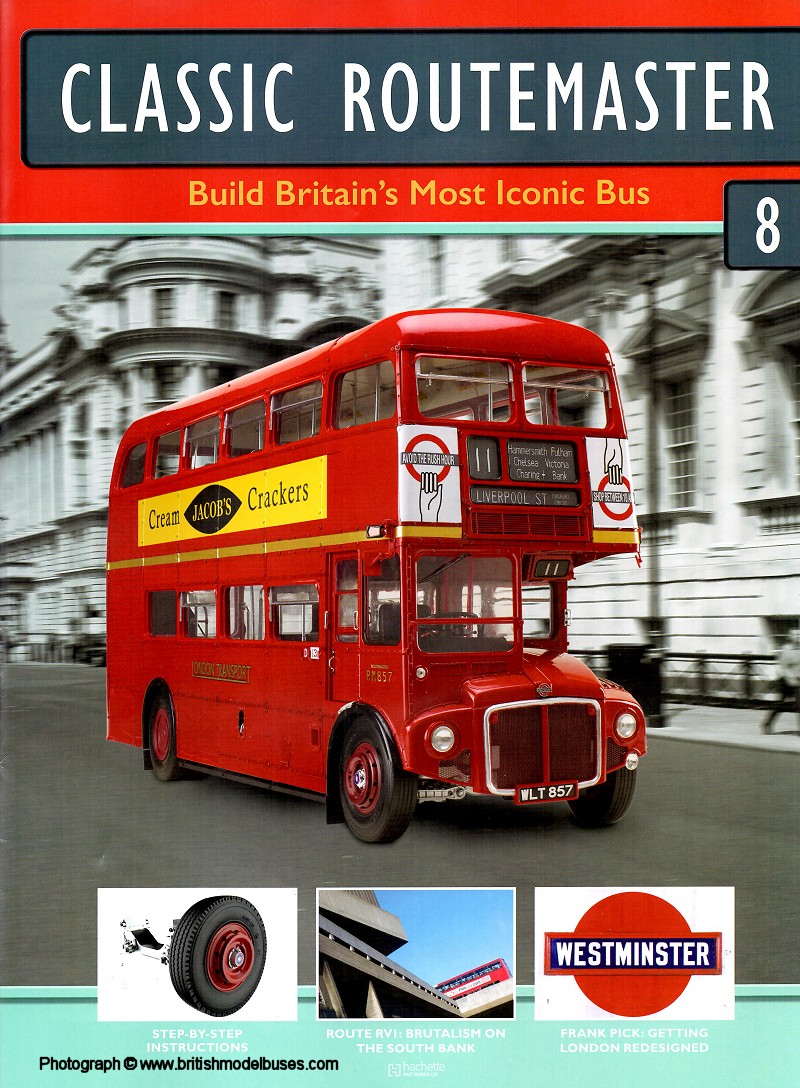
MAGAZINE ISSUE 1 - RADIATOR GRILLE AND BONNET ASSEMBLY

Click here for a higher resolution image Click here for a higher resolution image Click here for a higher resolution image Click here for a higher resolution image

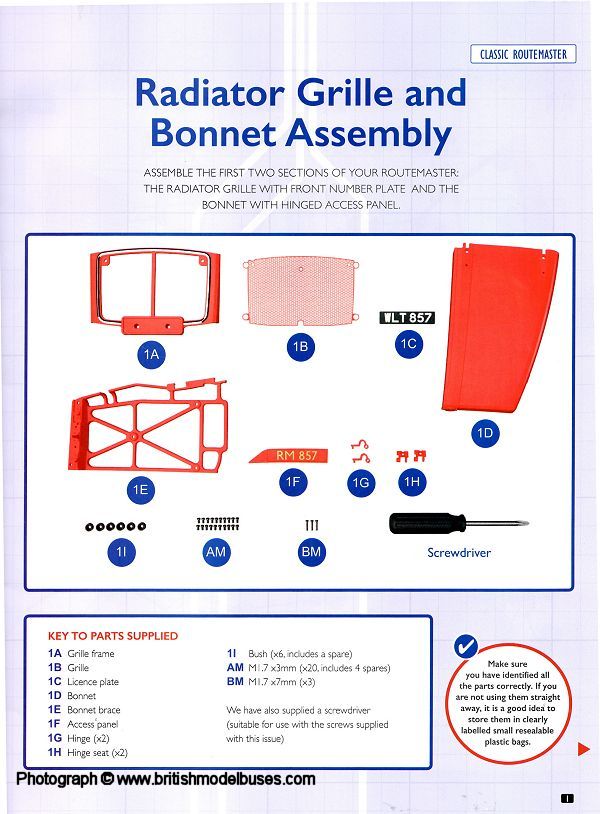
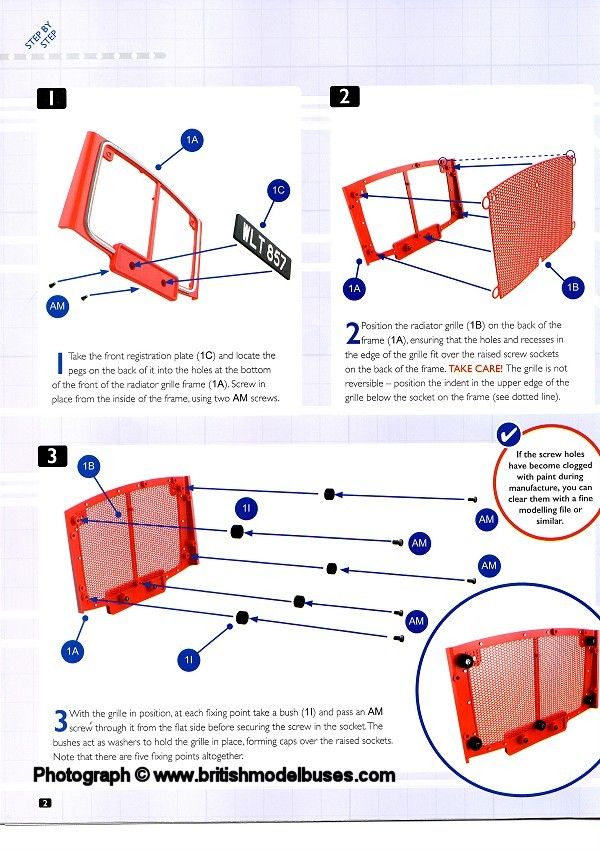
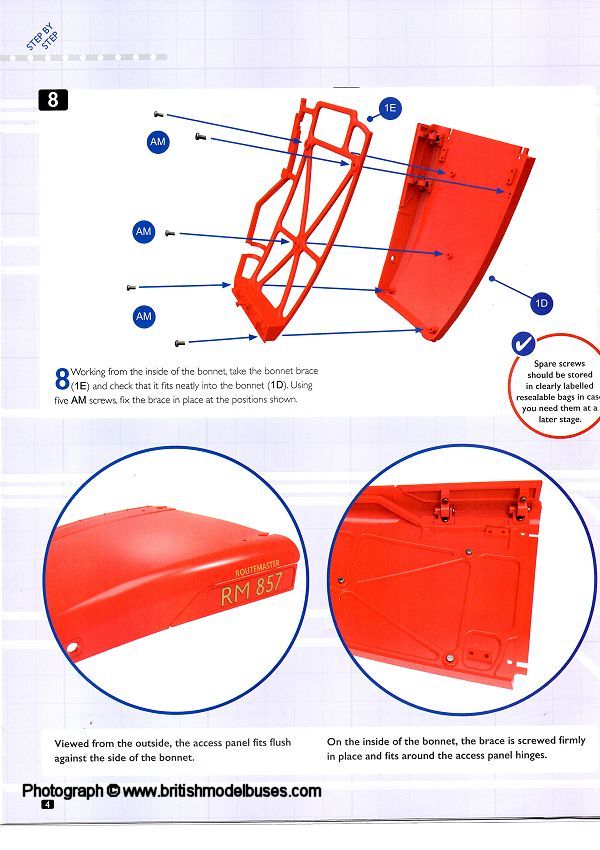
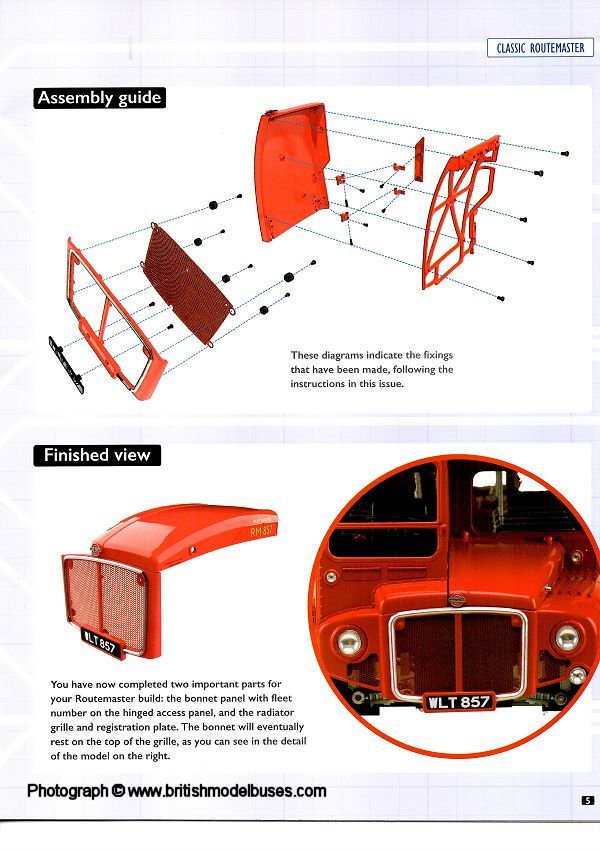
INSTRUCTIONS ISSUE 1 - RADIATOR GRILLE AND BONNET ASSEMBLY

Click here for a higher resolution image Click here for a higher resolution image Click here for a higher resolution image Click here for a higher resolution image Click here for a higher resolution image

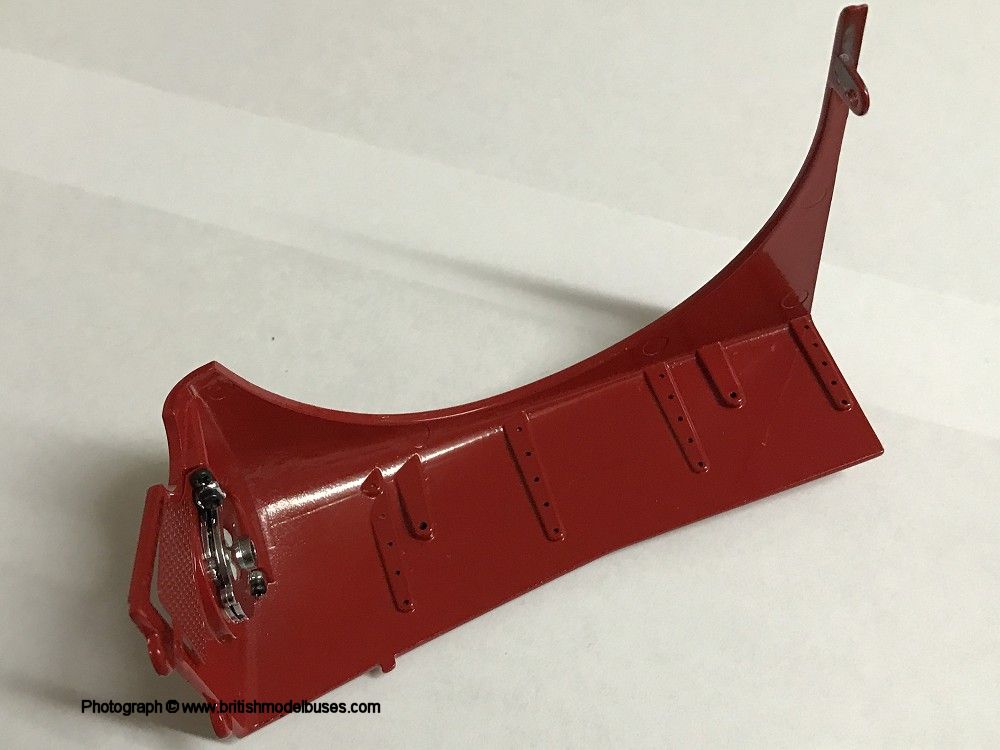
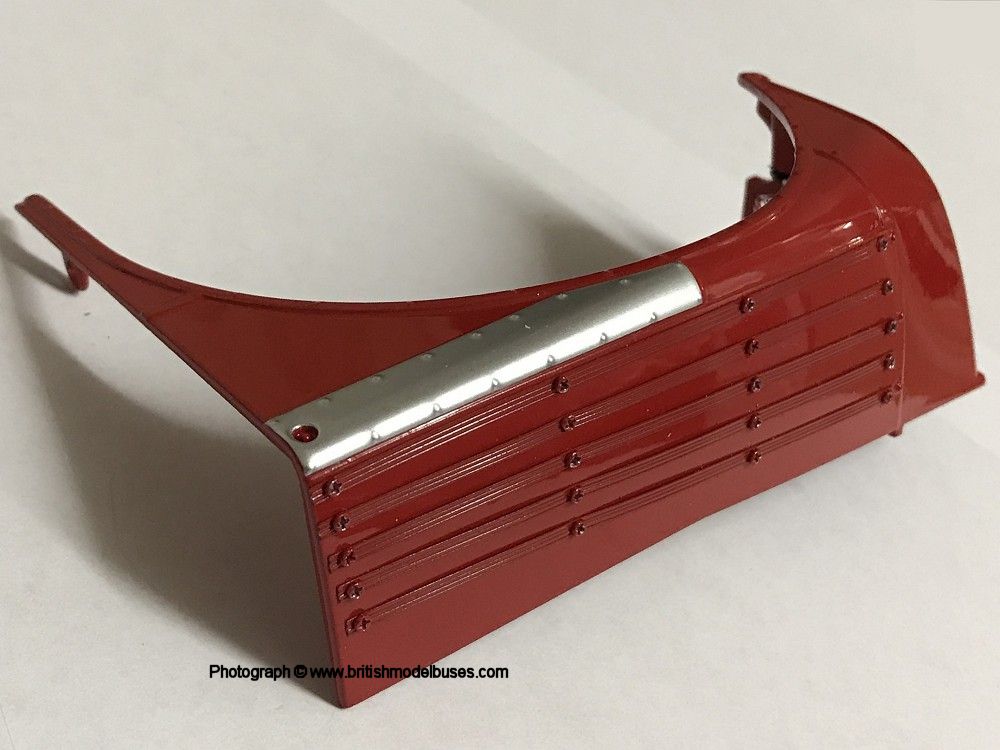
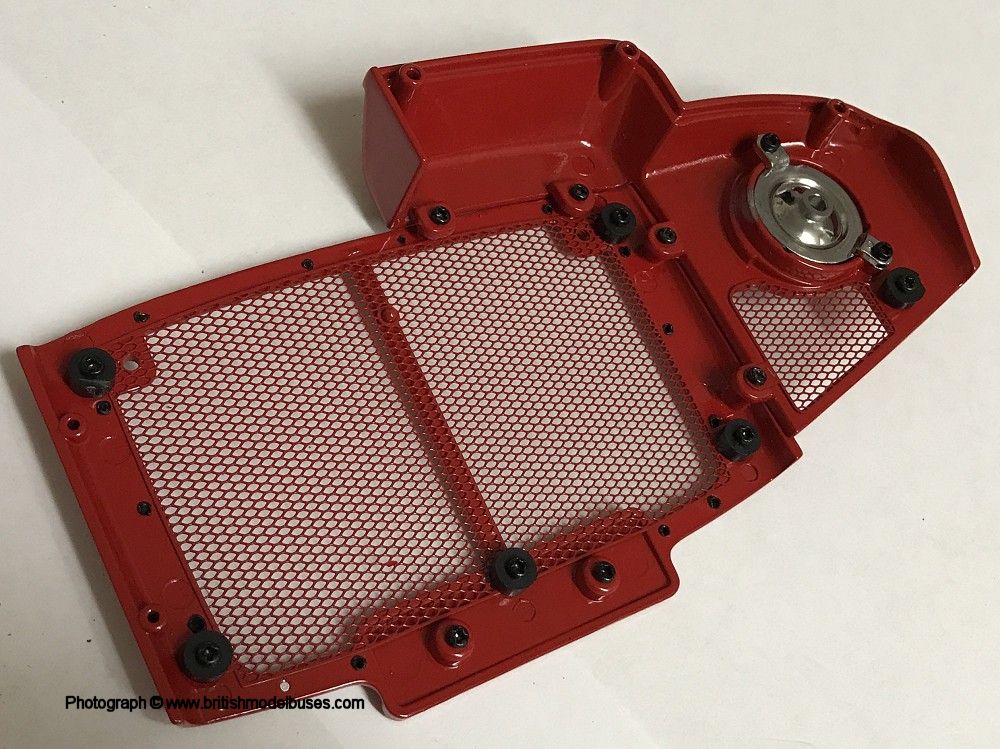
BUILD ISSUE 1 - RADIATOR GRILLE AND BONNET ASSEMBLY

Click here for a higher resolution image Click here for a higher resolution image Click here for a higher resolution image Click here for a higher resolution image Click here for a higher resolution image Click here for a higher resolution image Click here for a higher resolution image

MAGAZINE ISSUE 2 - OFFSIDE AND NEARSIDE HEADLIGHT ASSEMBLY
Issue 2 of the magazine and the first to arrive under my subscription arrived approx 7 days after I set up my direct debit, a lot less than the 28 days they advised me, so it was a pleasant surprise when it arrived. Also included in the package was issue 3 which will be added shortly and my first free gift the Route 11 Tin Poster.

I found the build to be slightly more complicated than the first. This time, I did have an issue with holes that were too small due to paint having gathered in them during spraying, so a trip to my local model shop (John Dutfields in Chelmsford) was necessary to purchase a small file set. I had to use one or more of the files on a number of occasions to open up the holes. I find the instructions provided, easy to follow (provided you read them properly) and because I did not follow them precisely as per the instructions, I had to remove and refit the wing protectors strips when I realised I had but them on upside down! I was pleased to see that on this occasion red screws were included to secure the wing protectors strips to the front nearside wing, the only problem they were really small (about the size of ones used to hold the arms onto glasses) so were very fiddly.

I have copied below photographs of the build, the file set I purchased and my free gift.

Click here for a higher resolution image Click here for a higher resolution image Click here for a higher resolution image Click here for a higher resolution image

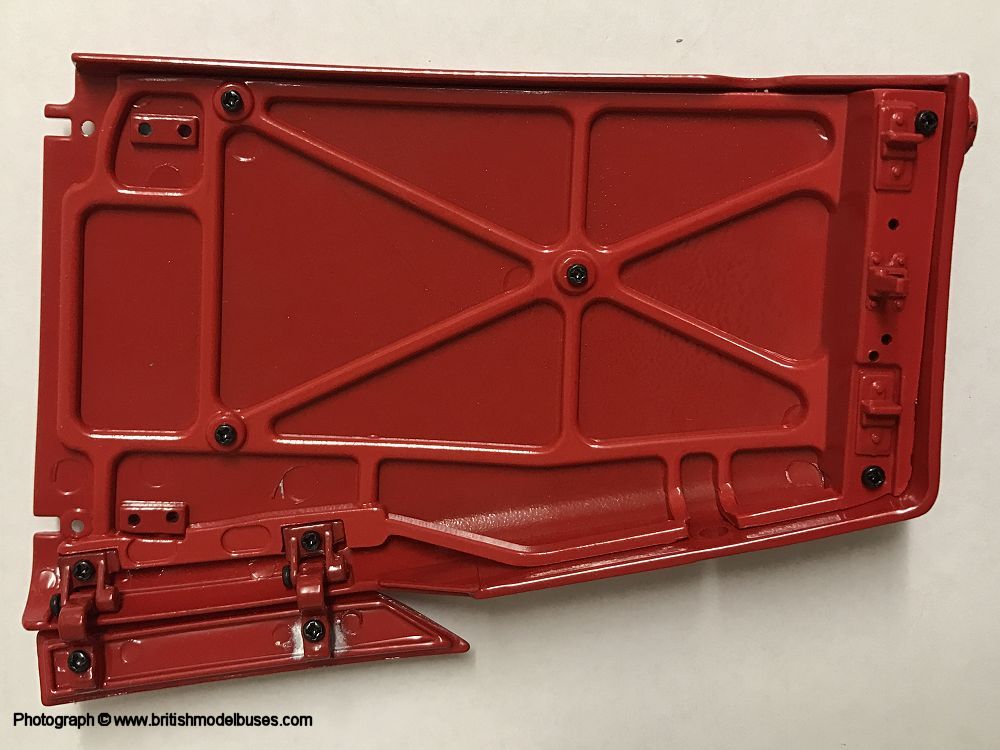
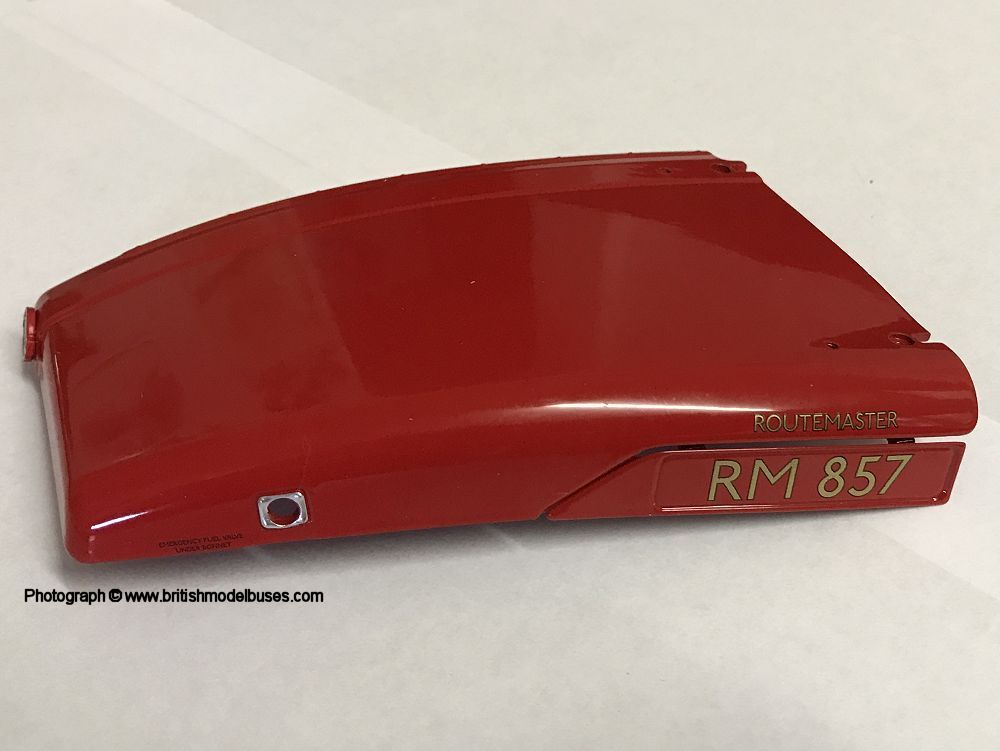
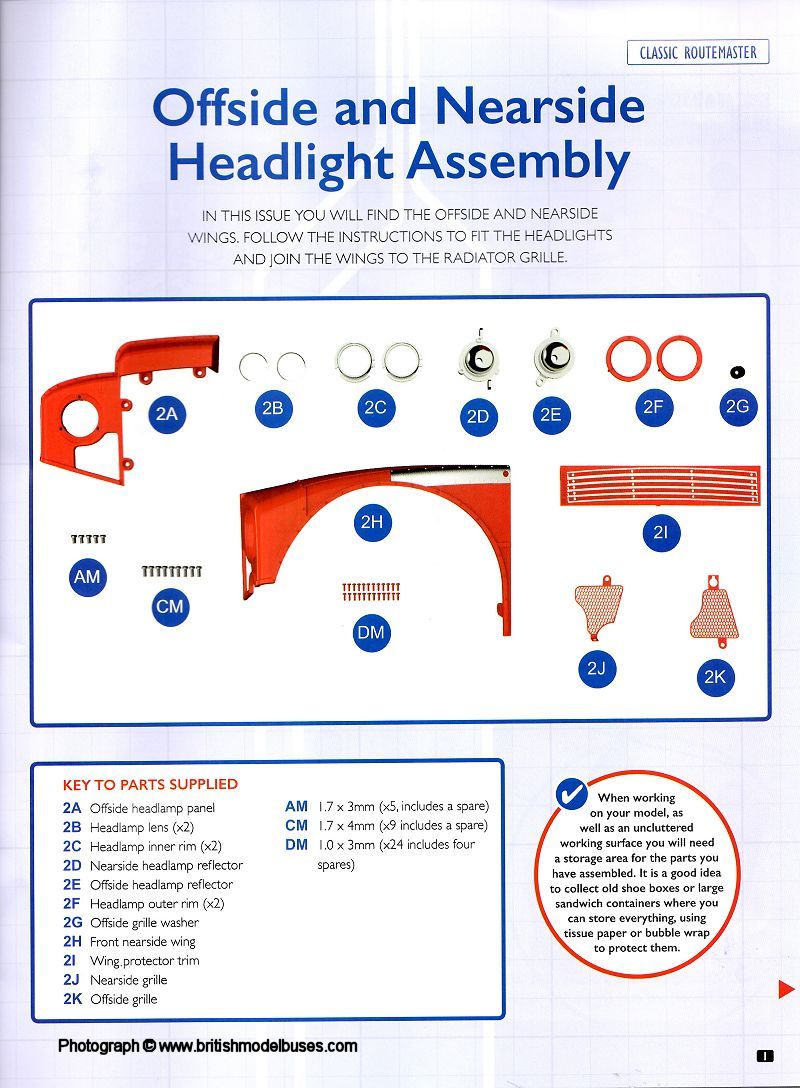
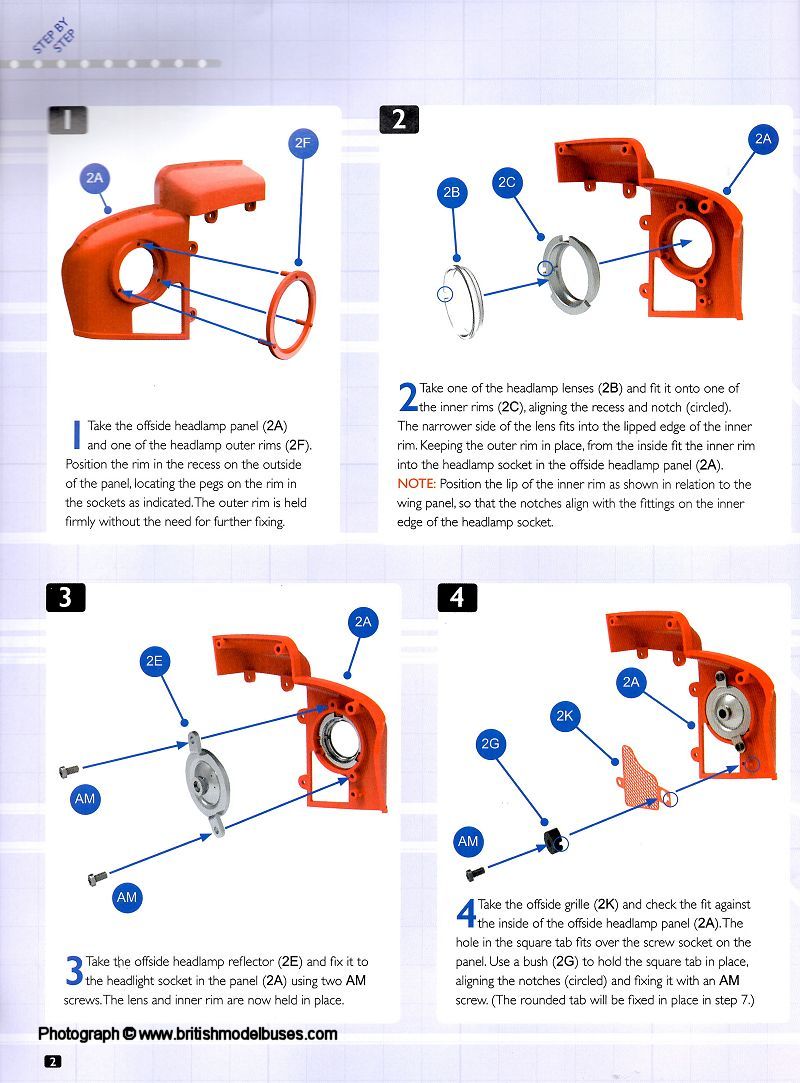
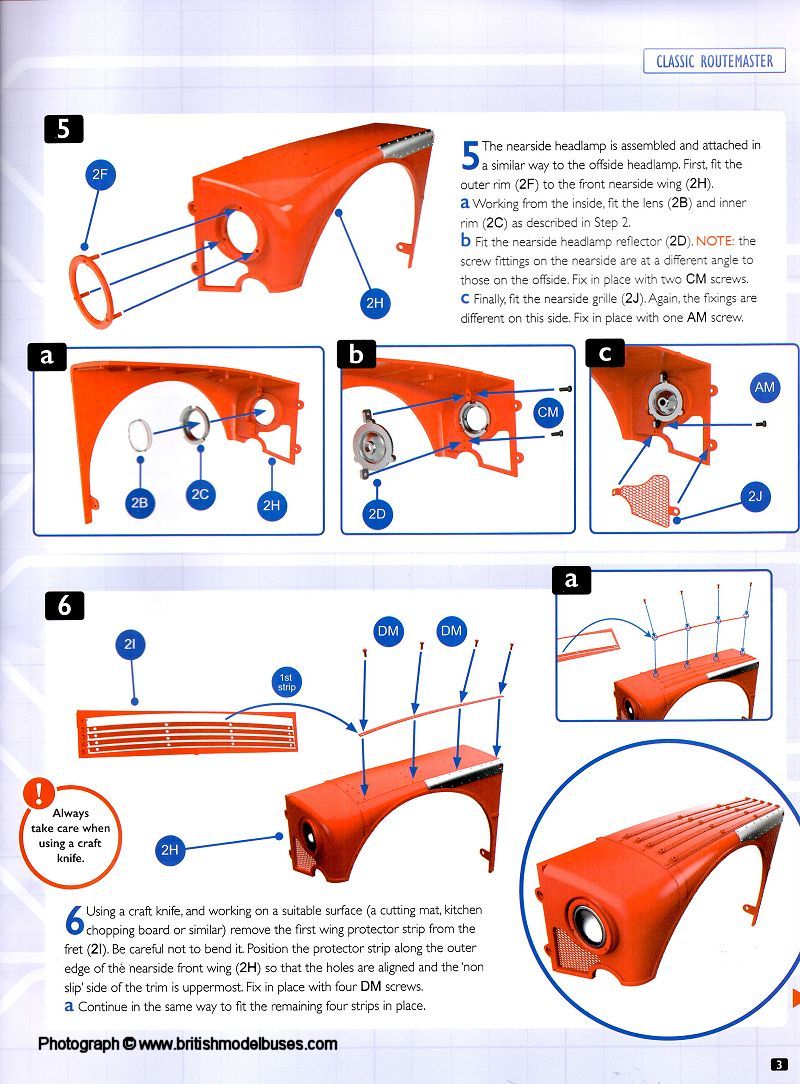
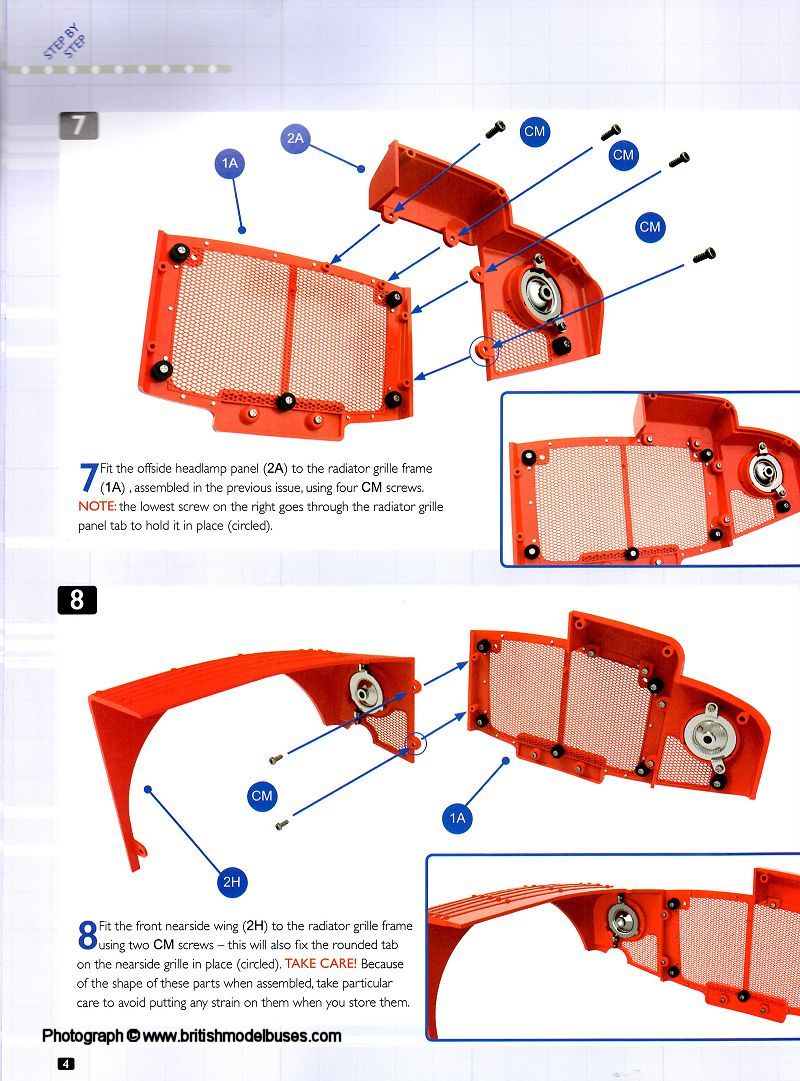
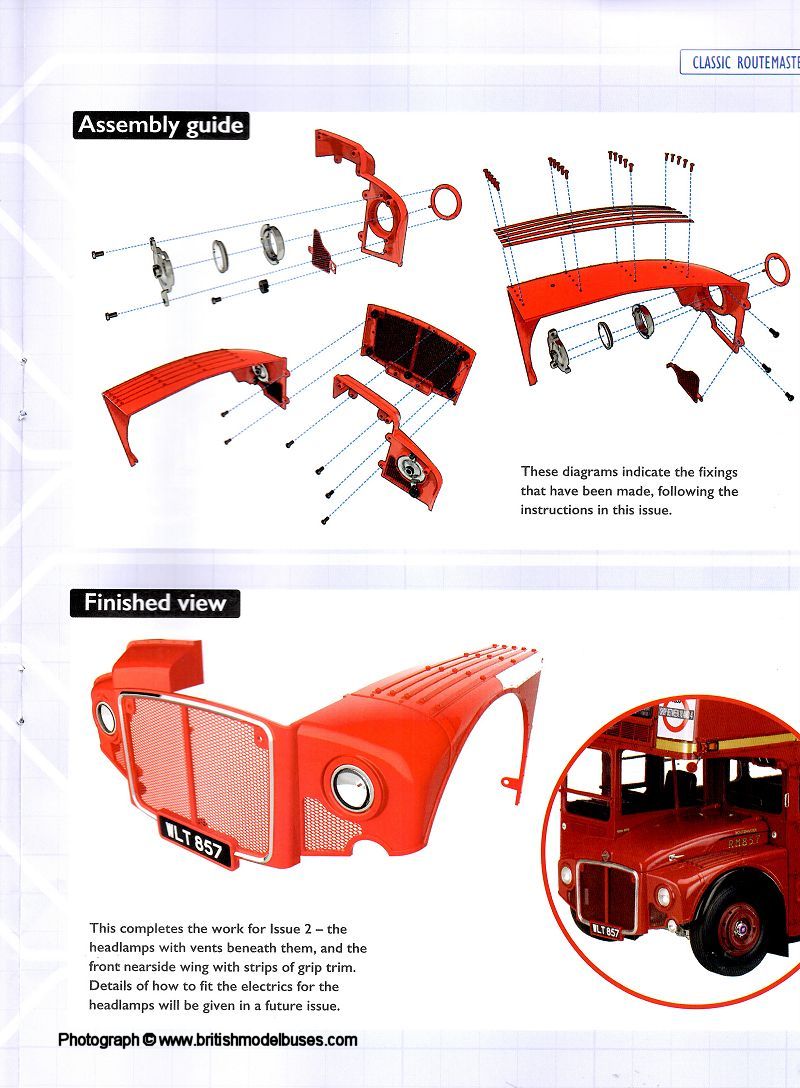
INSTRUCTIONS ISSUE 2 - OFFSIDE AND NEARSIDE HEADLIGHT ASSEMBLY

Click here for a higher resolution image Click here for a higher resolution image Click here for a higher resolution image Click here for a higher resolution image Click here for a higher resolution image

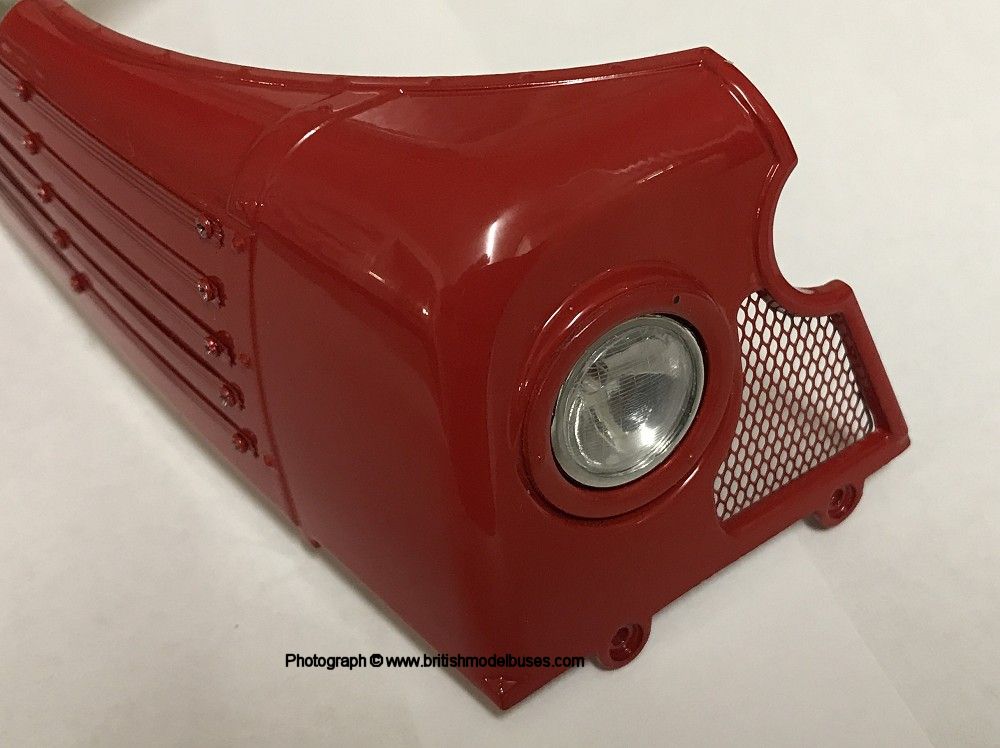
BUILD ISSUE 2 - OFFSIDE AND NEARSIDE HEADLIGHT ASSEMBLY

Click here for a higher resolution image Click here for a higher resolution image Click here for a higher resolution image Click here for a higher resolution image Click here for a higher resolution image Click here for a higher resolution image


MAGAZINE ISSUE 3 - LOWER PART OF THE STAIRCASE
This weeks build was very easy with no issues and took me about 10 minutes to complete the lower part of the stair case. The next issue will comprise the kick plates from the stairs and the rear platform.

Click here for a higher resolution image Click here for a higher resolution image Click here for a higher resolution image

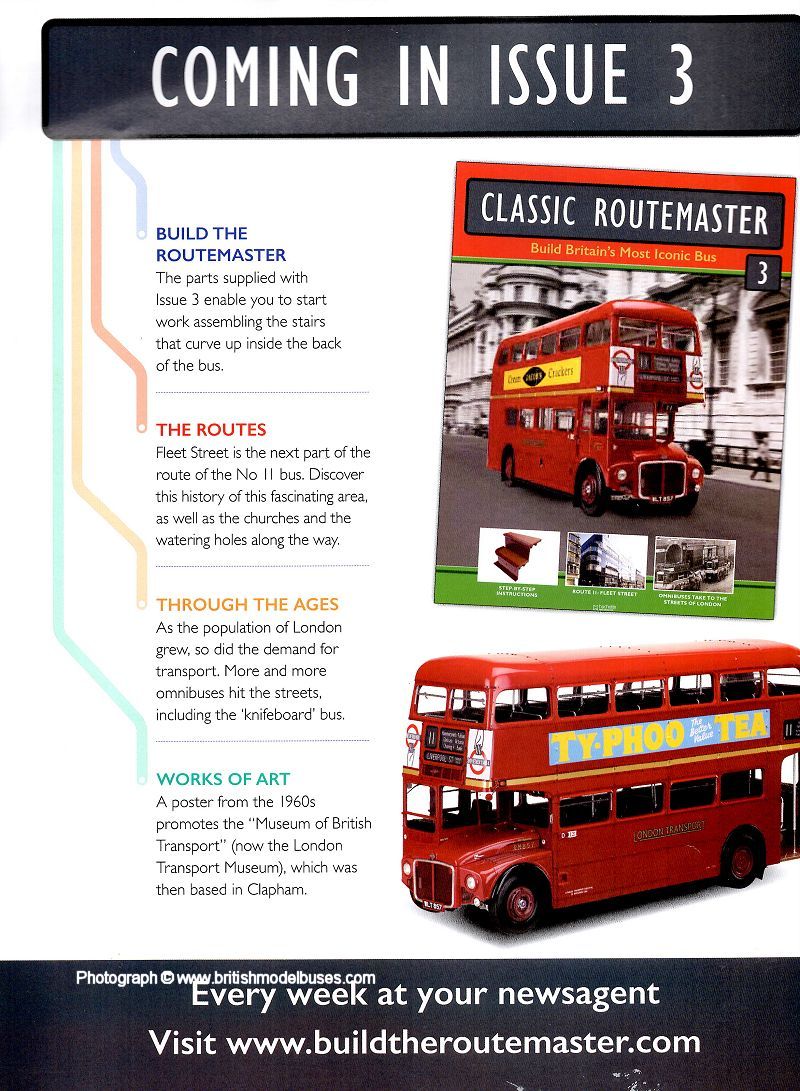
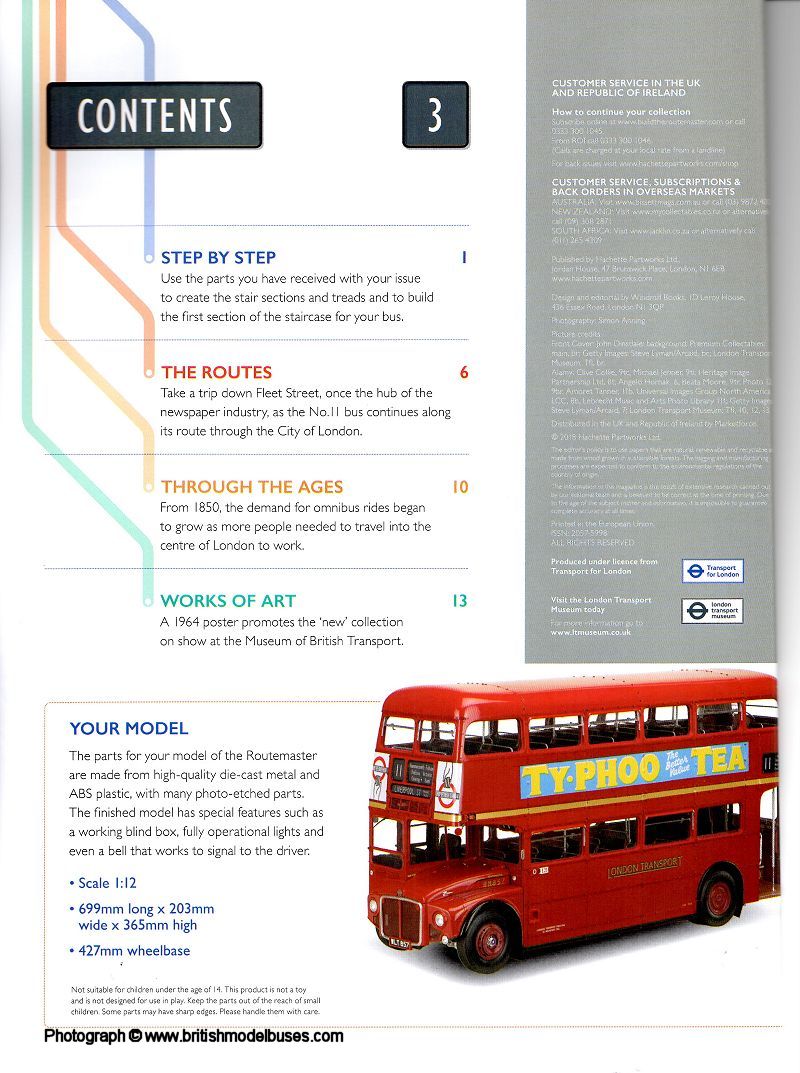
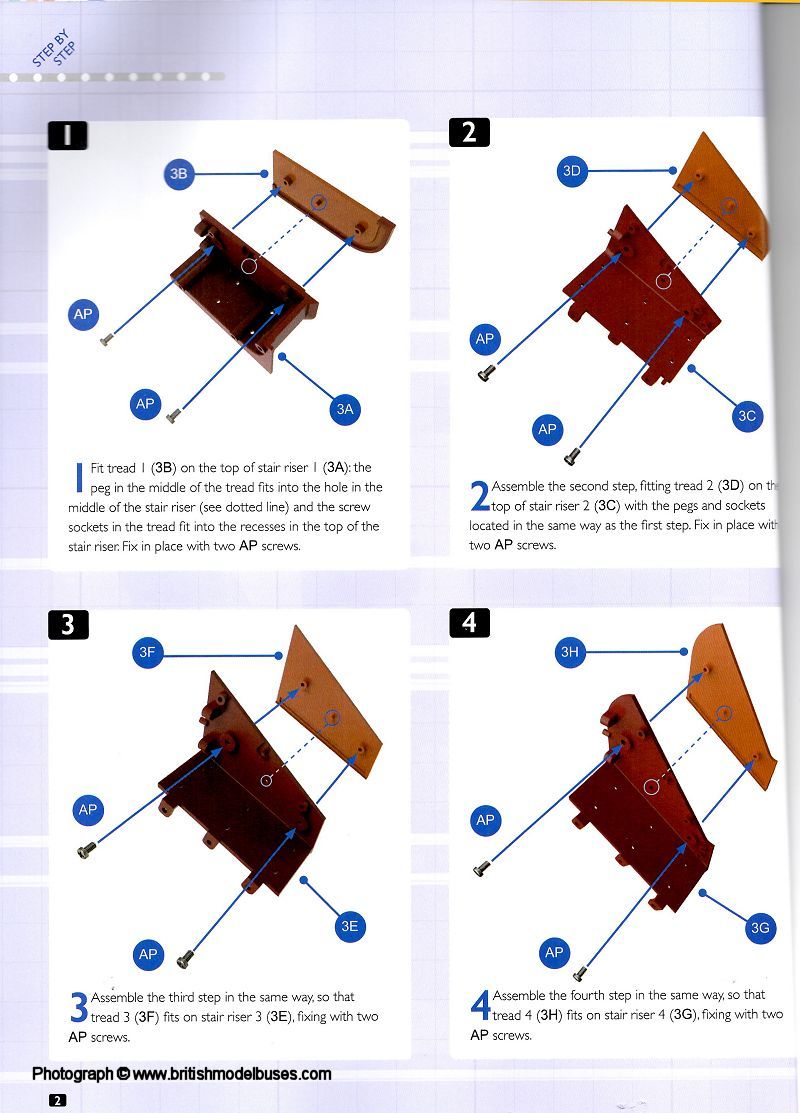
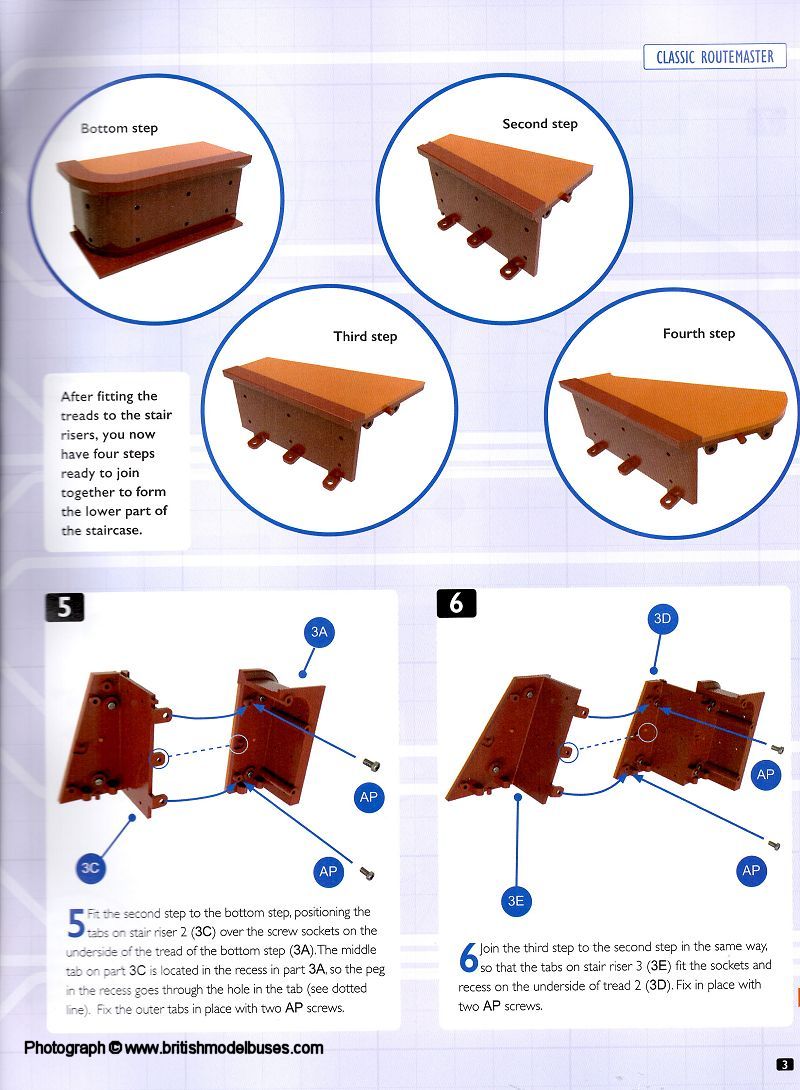
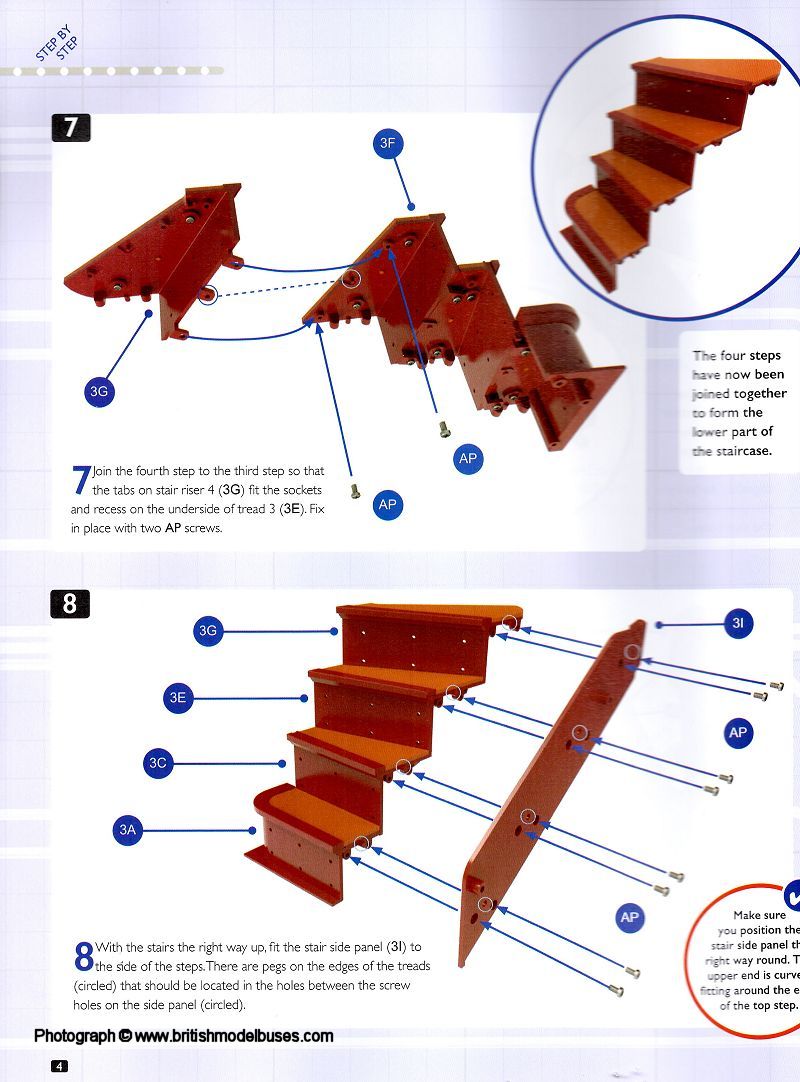
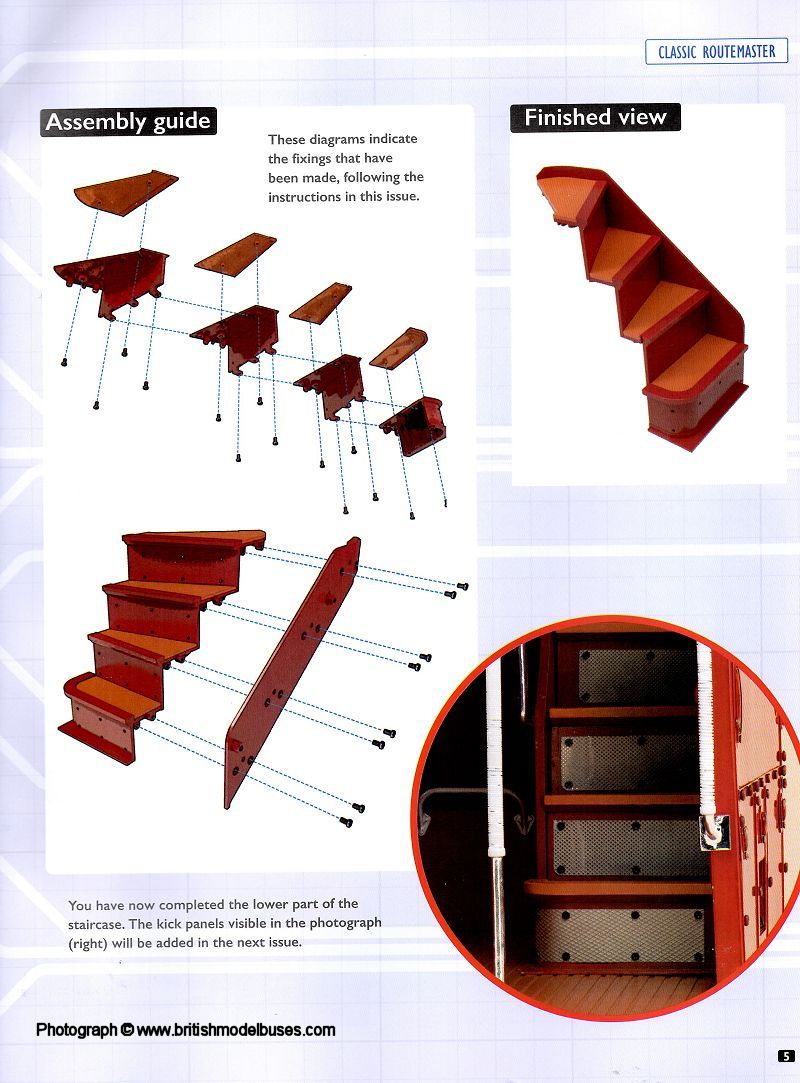
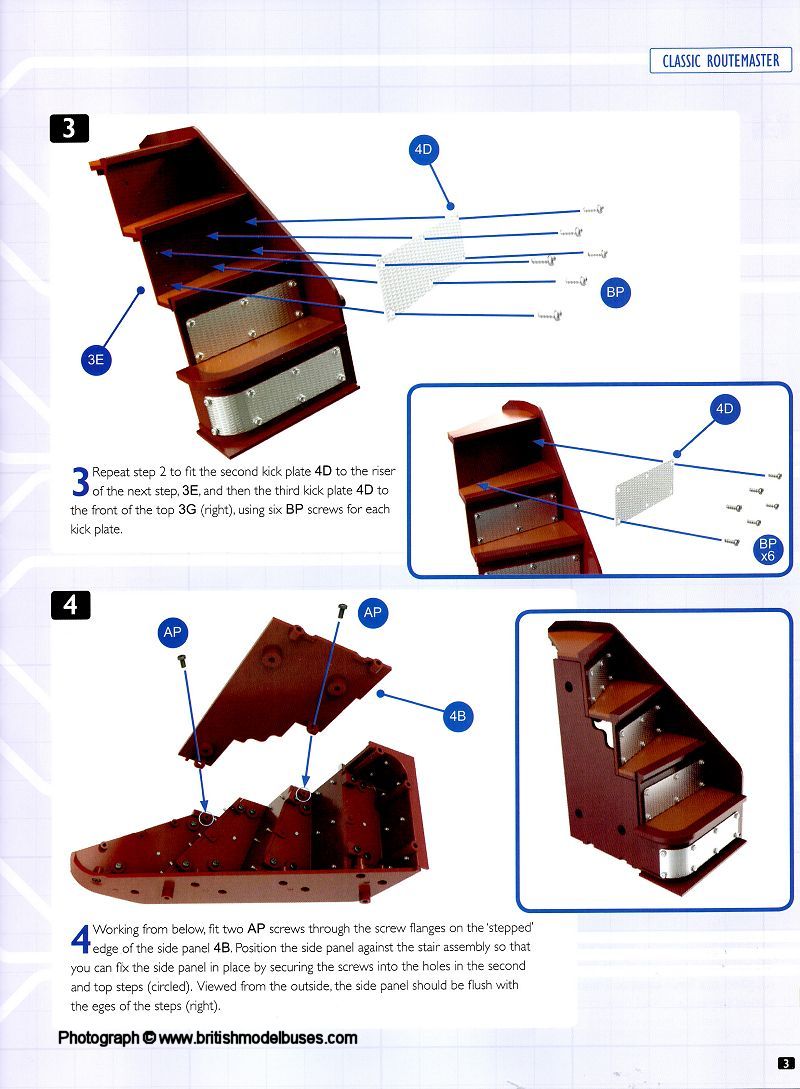
INSTRUCTIONS ISSUE 3 - LOWER PART OF THE STAIRCASE

Click here for a higher resolution image Click here for a higher resolution image Click here for a higher resolution image Click here for a higher resolution image Click here for a higher resolution image

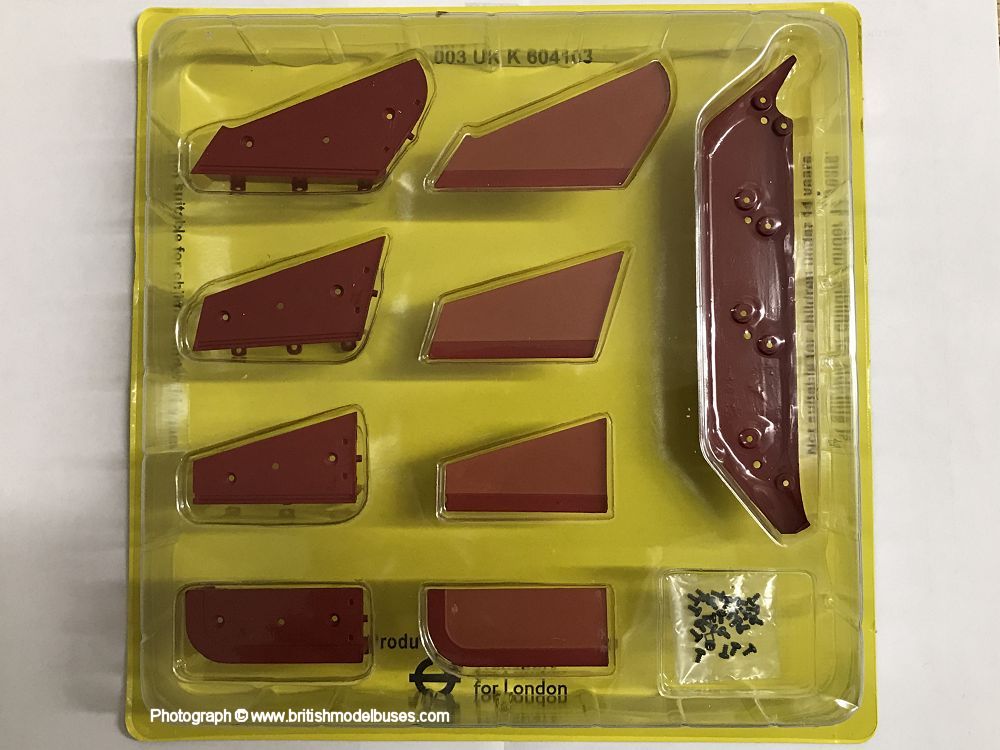
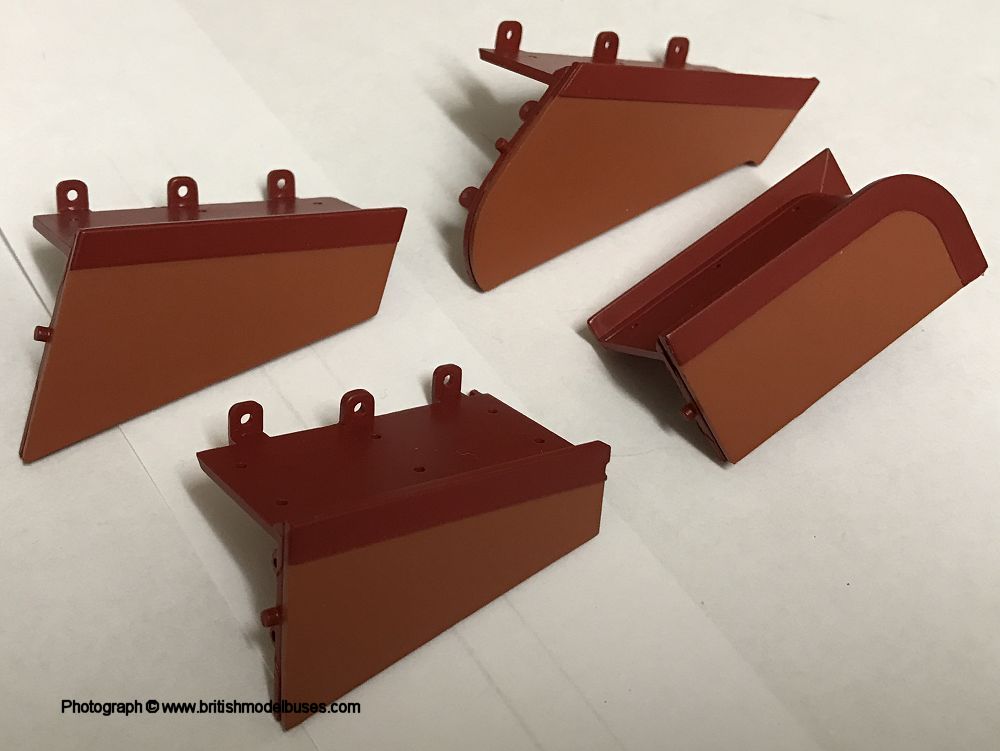
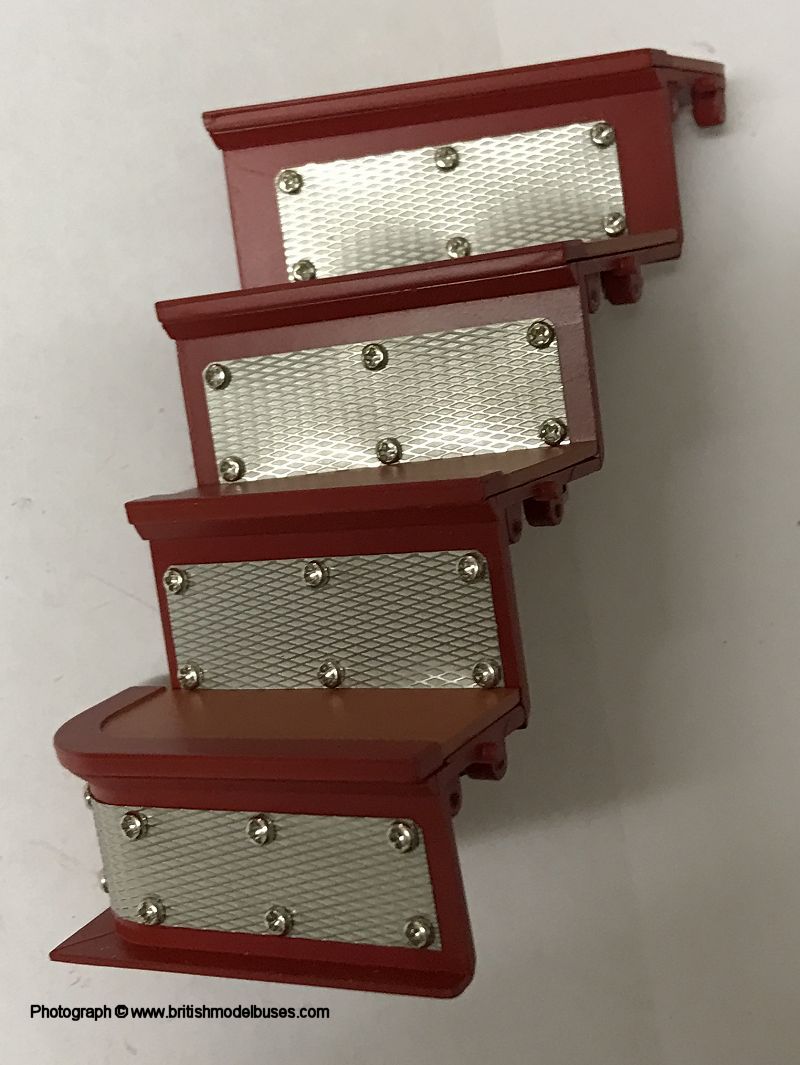
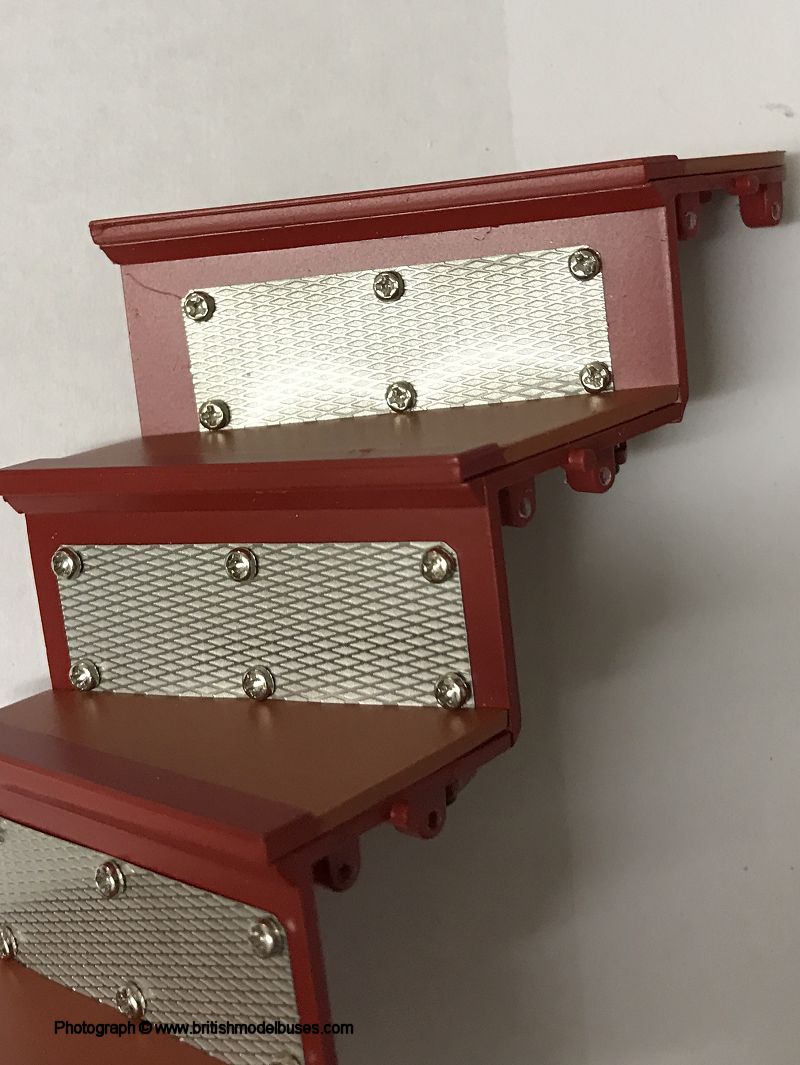
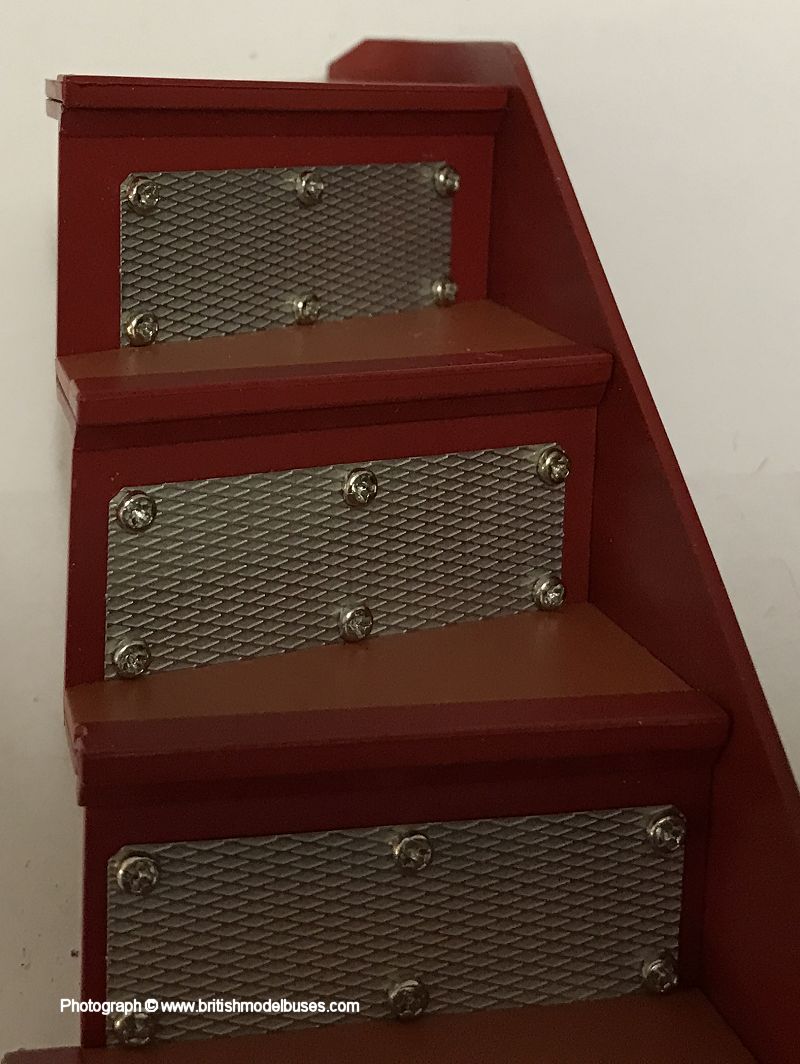
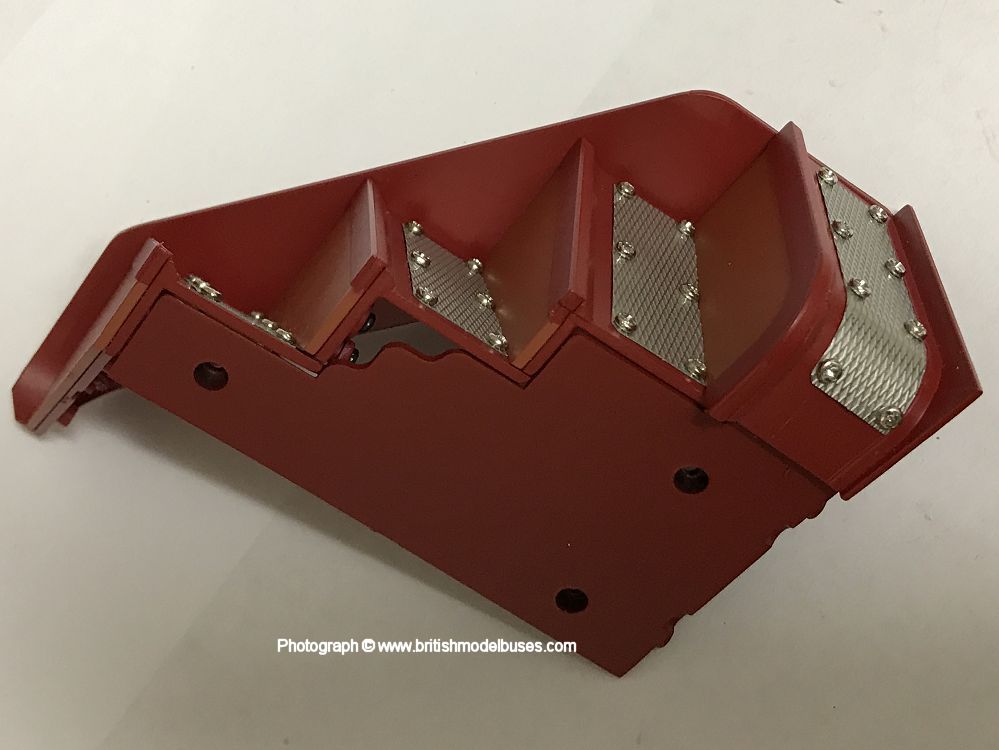
BUILD ISSUE 3 - LOWER PART OF THE STAIRCASE

Click here for a higher resolution image Click here for a higher resolution image Click here for a higher resolution image Click here for a higher resolution image Click here for a higher resolution image


MAGAZINE ISSUE 4 -  STAIRS KICK PLATES AND REAR PLATFORM
This weeks build was on face value very simple to complete, however I experienced problems when securing the kick plates to the top two stairs. As the stairs start to bend to the left, the stair side panel to the right of the stairs prevent you from holding the screwdriver perpendicular to the screw and you had to hold the screwdriver at an angle of approx 60 degrees to the screw head (which created difficulties). After struggling for a few minutes to get the screws to go in, I decided to remove the stair side panel attached during issue 3. On the closer up photograph of the top of the stairs (see below), you can see the restricted space. I was then able to quickly complete the job (although a couple of holes in the kick plate and stairs needed enlarging very slightly using the file set I purchased early on in the project). I then reattached the side panel and finally, I added the left hand side panel and attached the rear platform both of which were very straightforward and only took a couple of minutes.

Click here for a higher resolution image Click here for a higher resolution image Click here for a higher resolution image

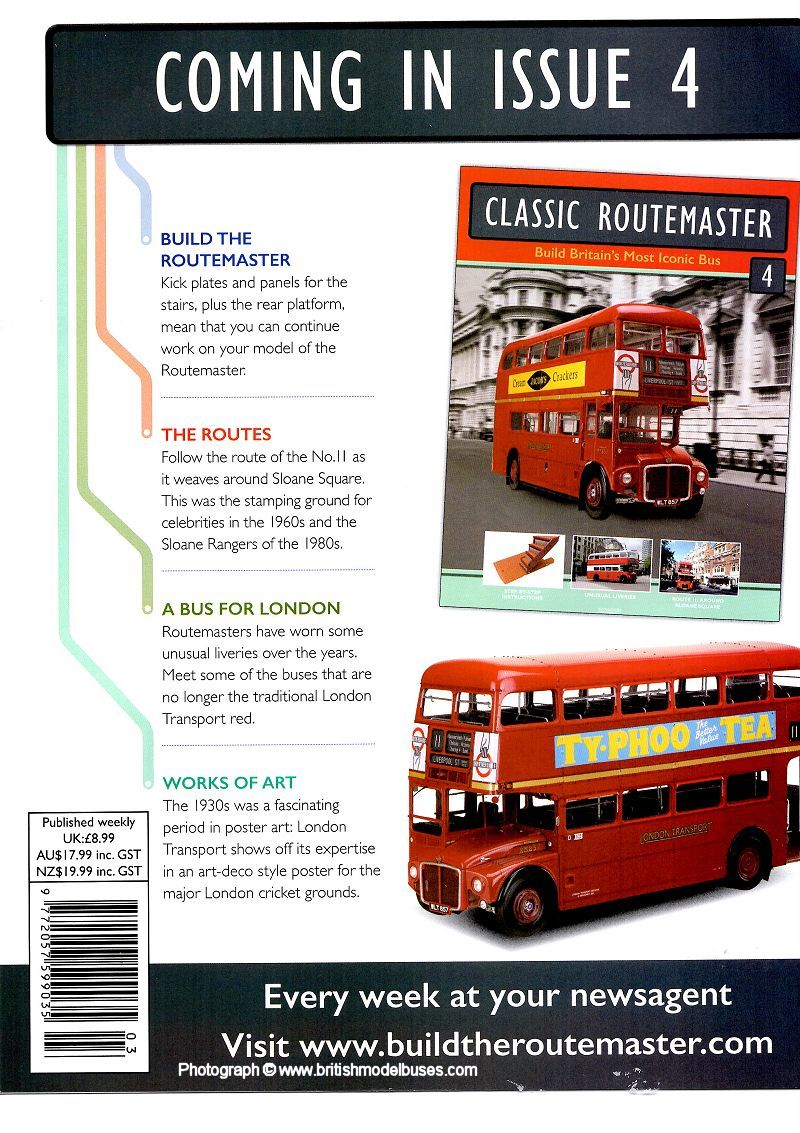
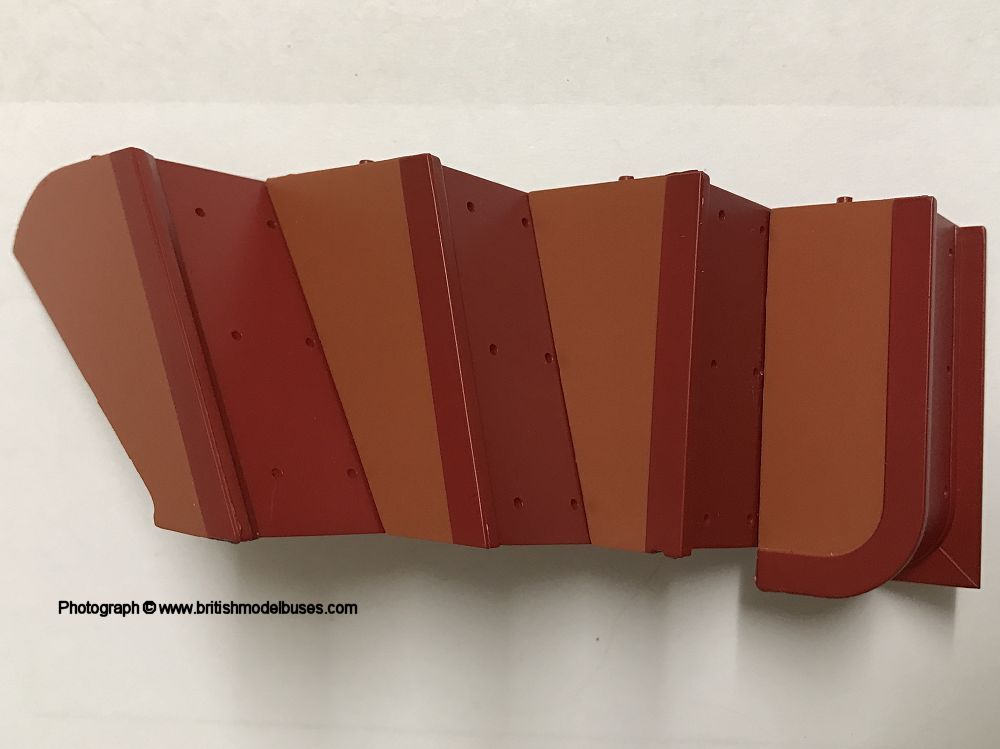
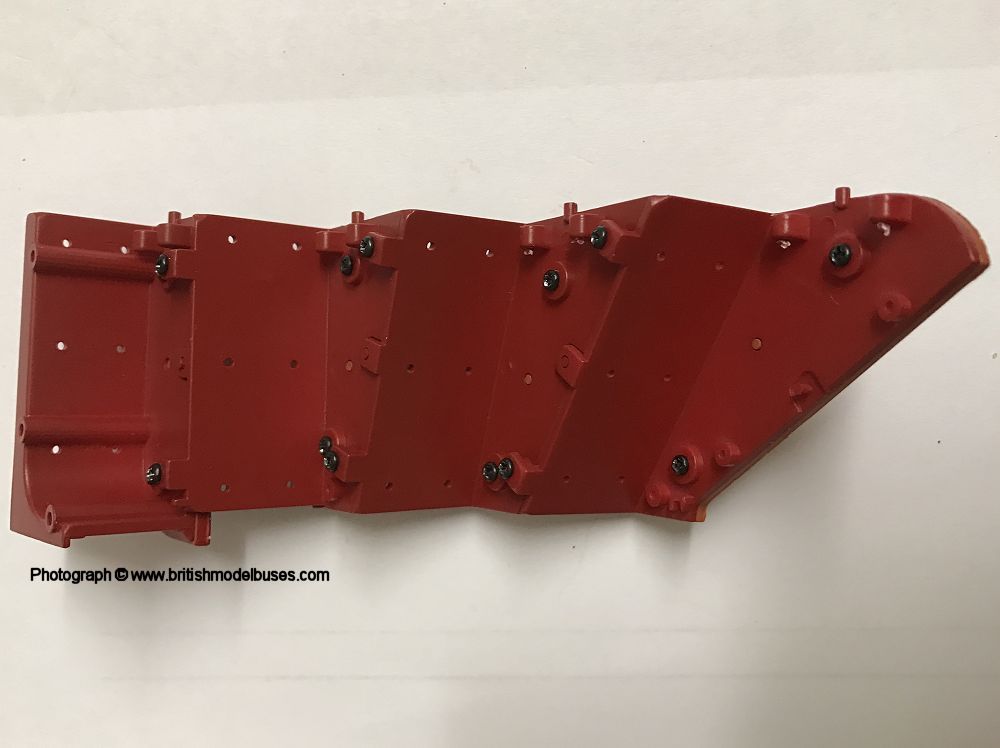
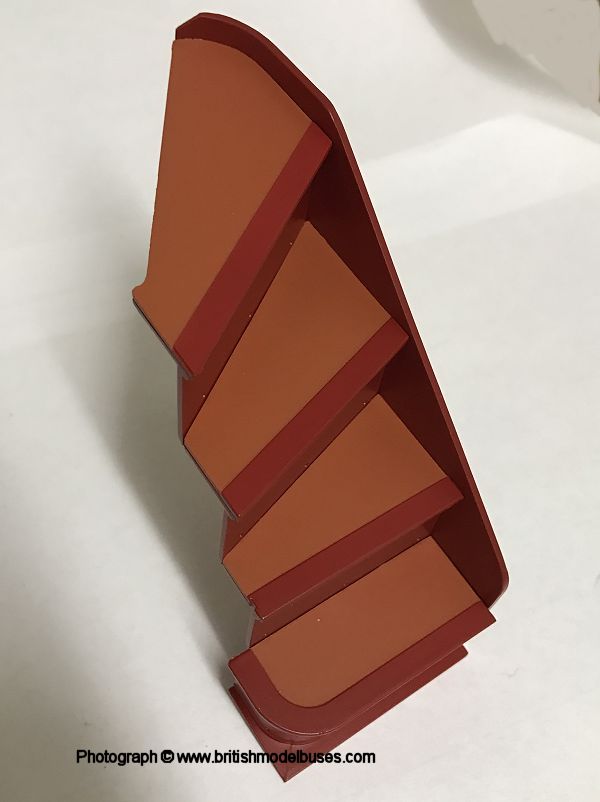
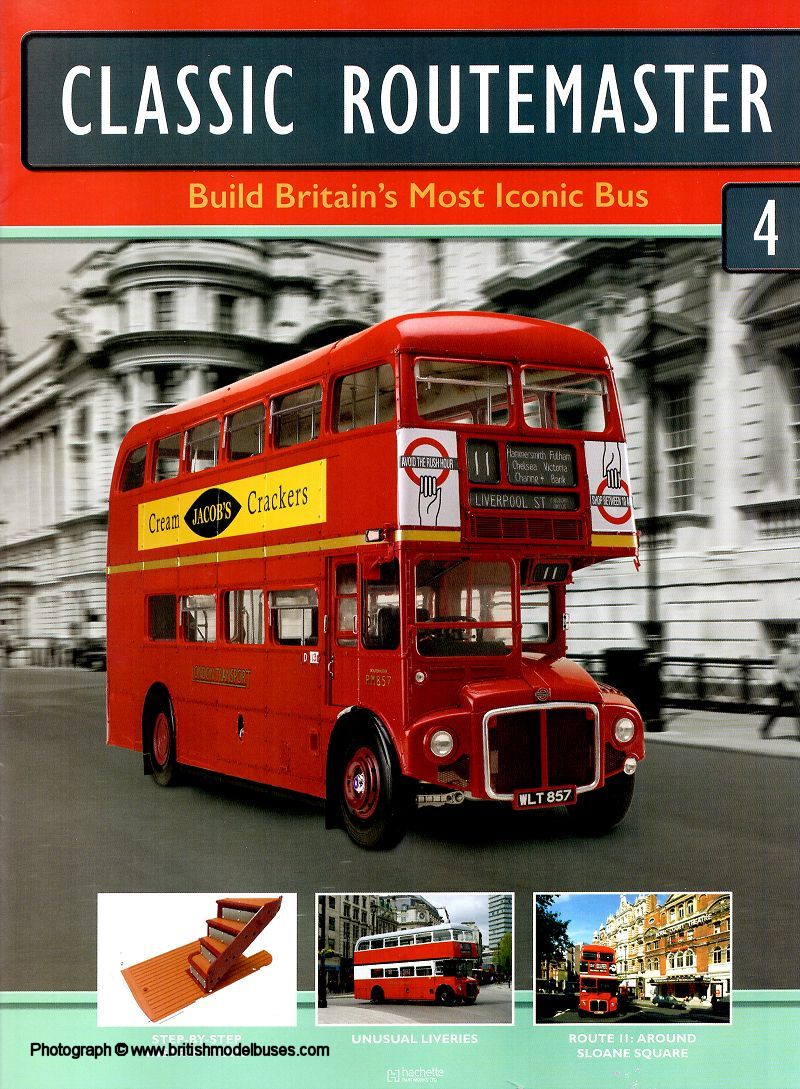
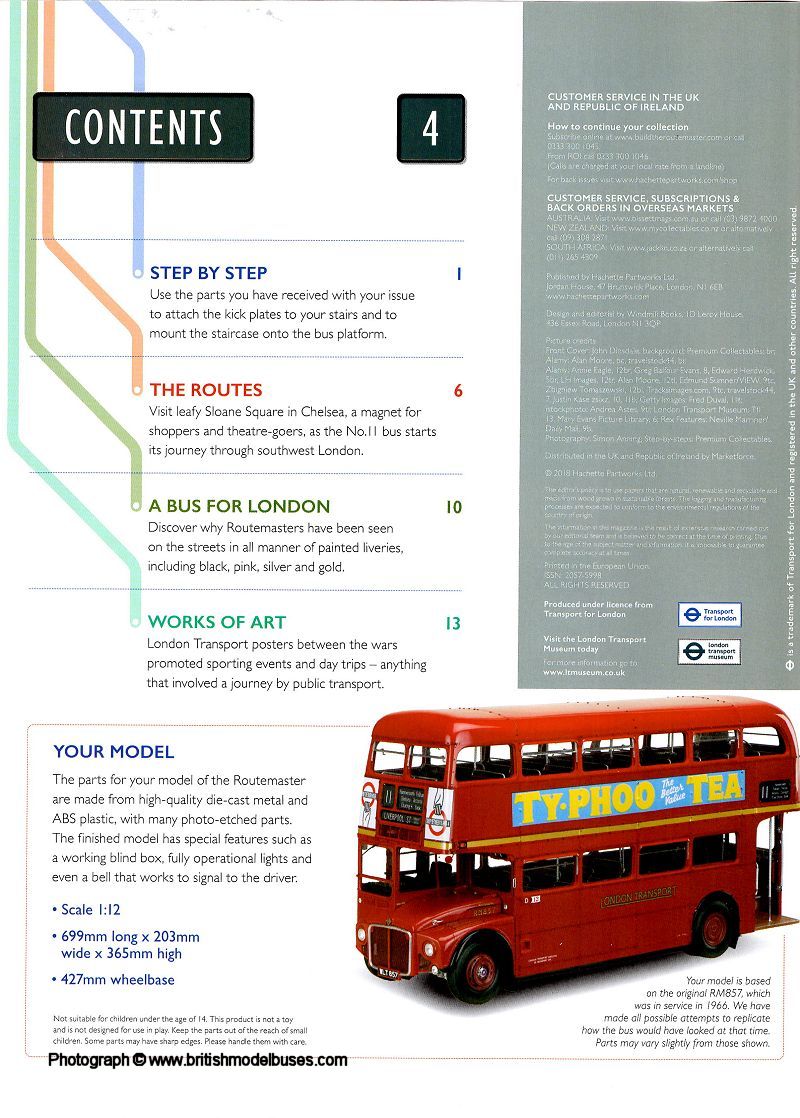
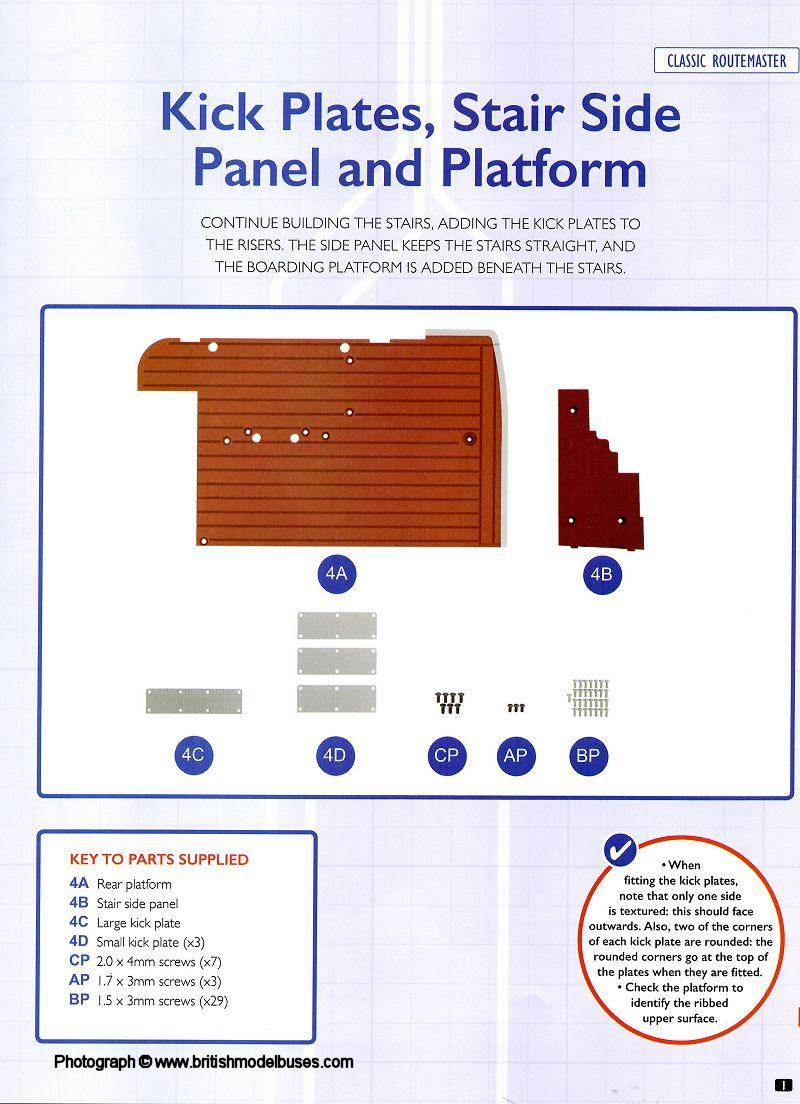
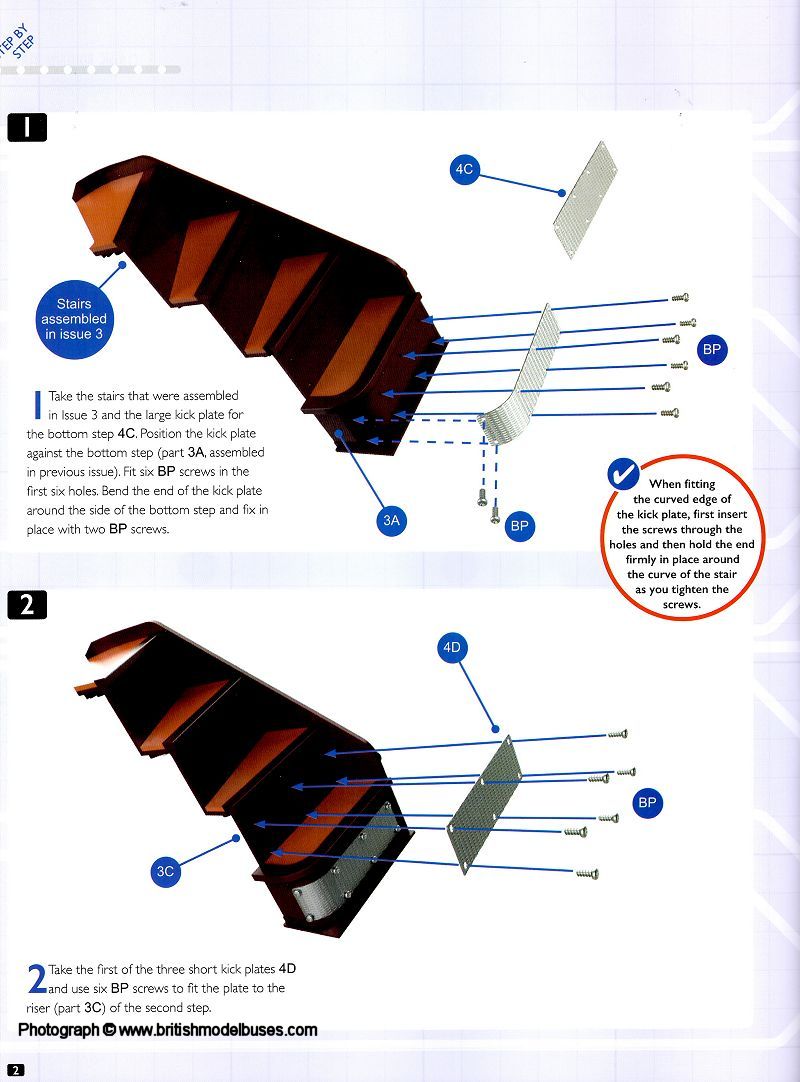
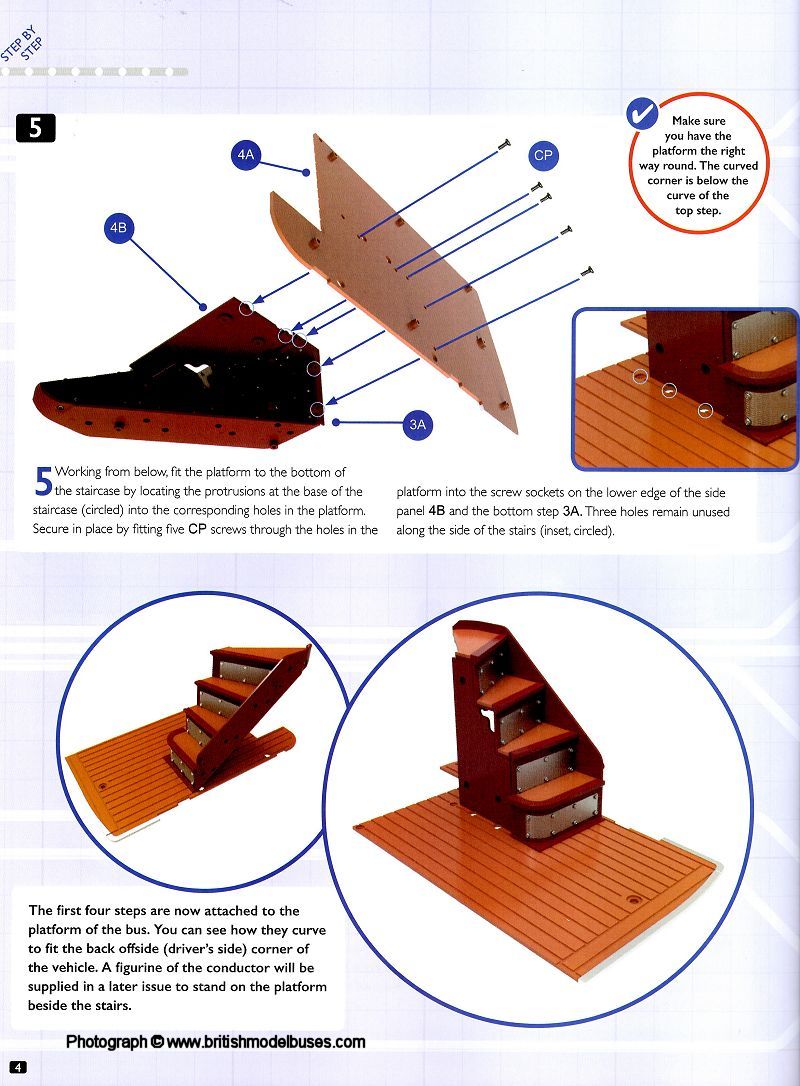
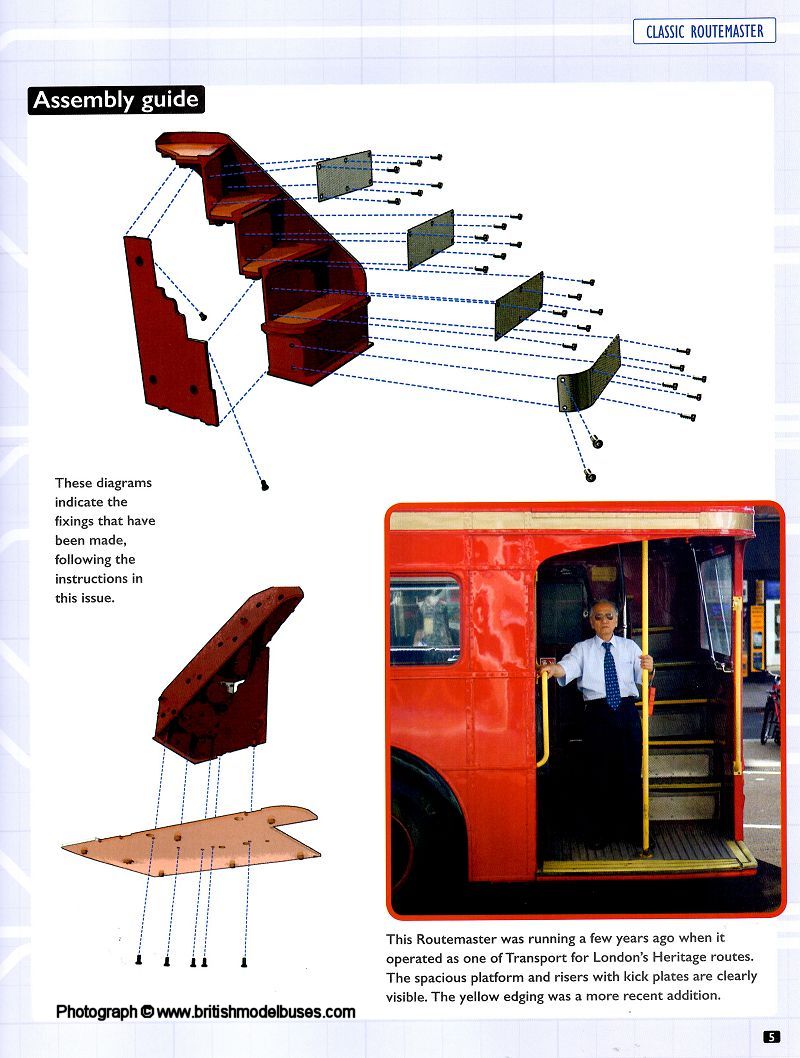
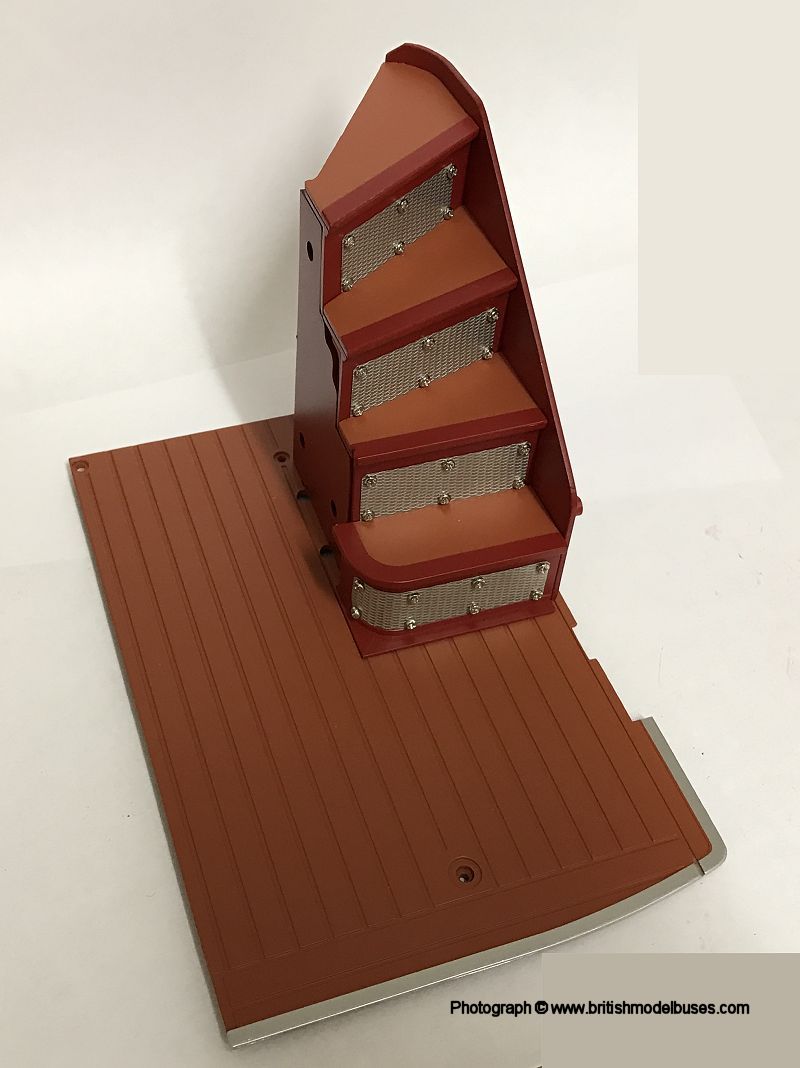
INSTRUCTIONS ISSUE 4 -  STAIRS KICK PLATES AND REAR PLATFORM

Click here for a higher resolution image Click here for a higher resolution image Click here for a higher resolution image Click here for a higher resolution image Click here for a higher resolution image

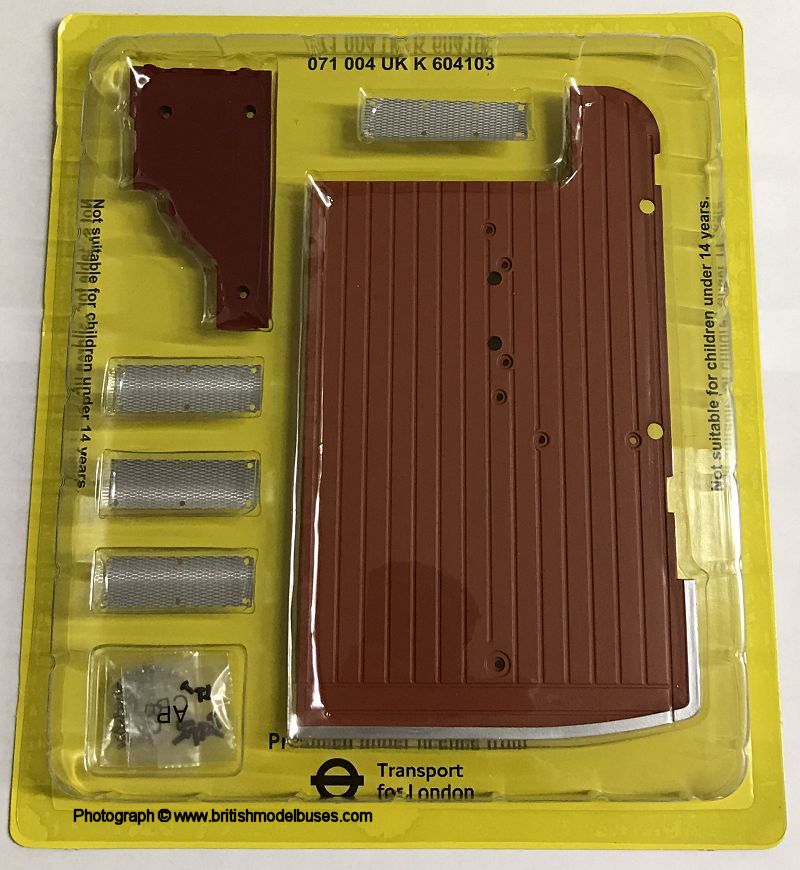
BUILD ISSUE 4 - STAIRS KICKS PLATE AND REAR PLATFORM

Click here for a higher resolution image Click here for a higher resolution image Click here for a higher resolution image Click here for a higher resolution image Click here for a higher resolution image Click here for a higher resolution image Click here for a higher resolution image


MAGAZINE ISSUE 5 - SUSPENSION ARM ASSEMBLY
This issue came complete with a new screwdriver. I found the build very easy to complete and it took me approximately 20 minutes to finish. The next issue covers the fitting of shock absorbers to the suspension arm assembly completed this week. The features in this weeks magazine covered the Kings Road section of the route 11 with some interesting facts about King Charles 2 and the fact that it was a private road until 1830. I did not realise that this literally was "The Kings Road" and Charles 2 used to ride out along it to go to his palaces and hunting grounds.

Click here for a higher resolution image Click here for a higher resolution image Click here for a higher resolution image

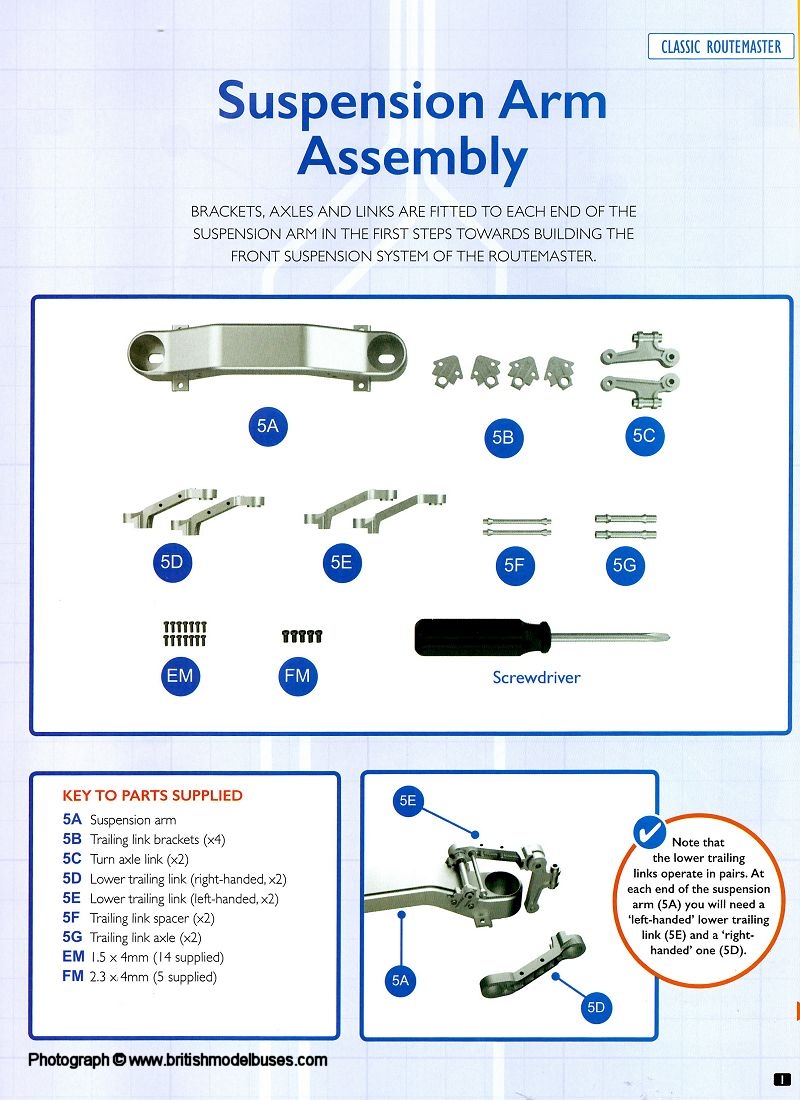
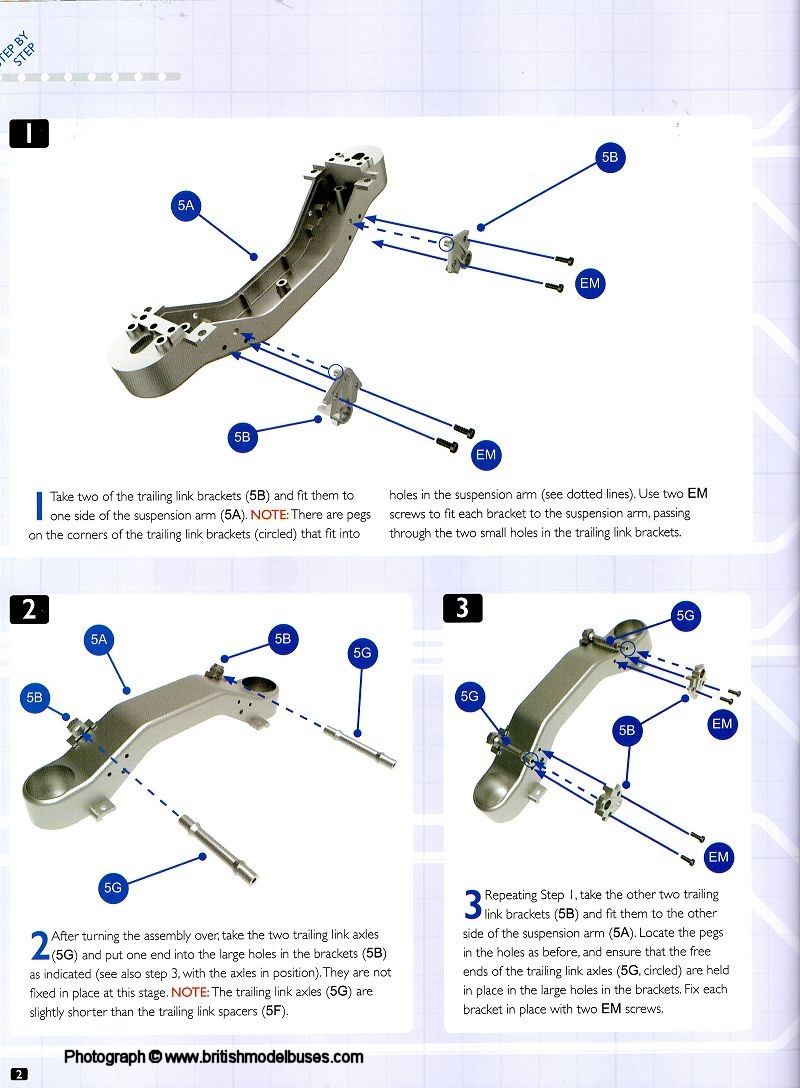
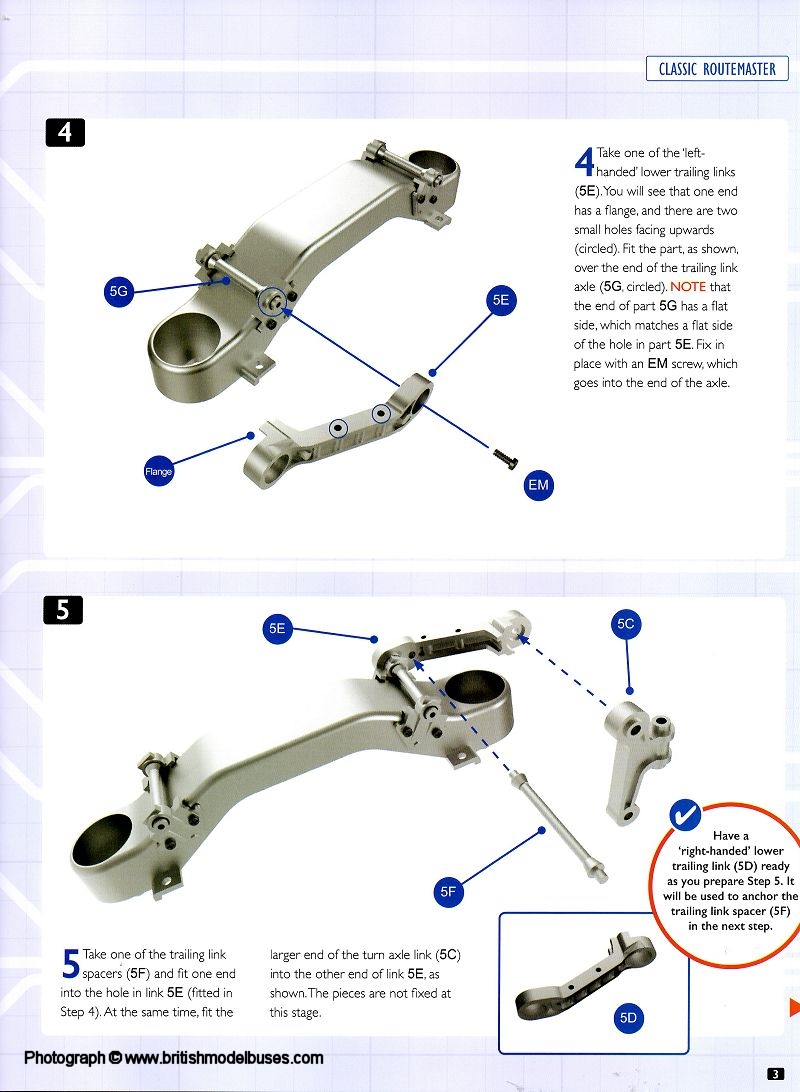
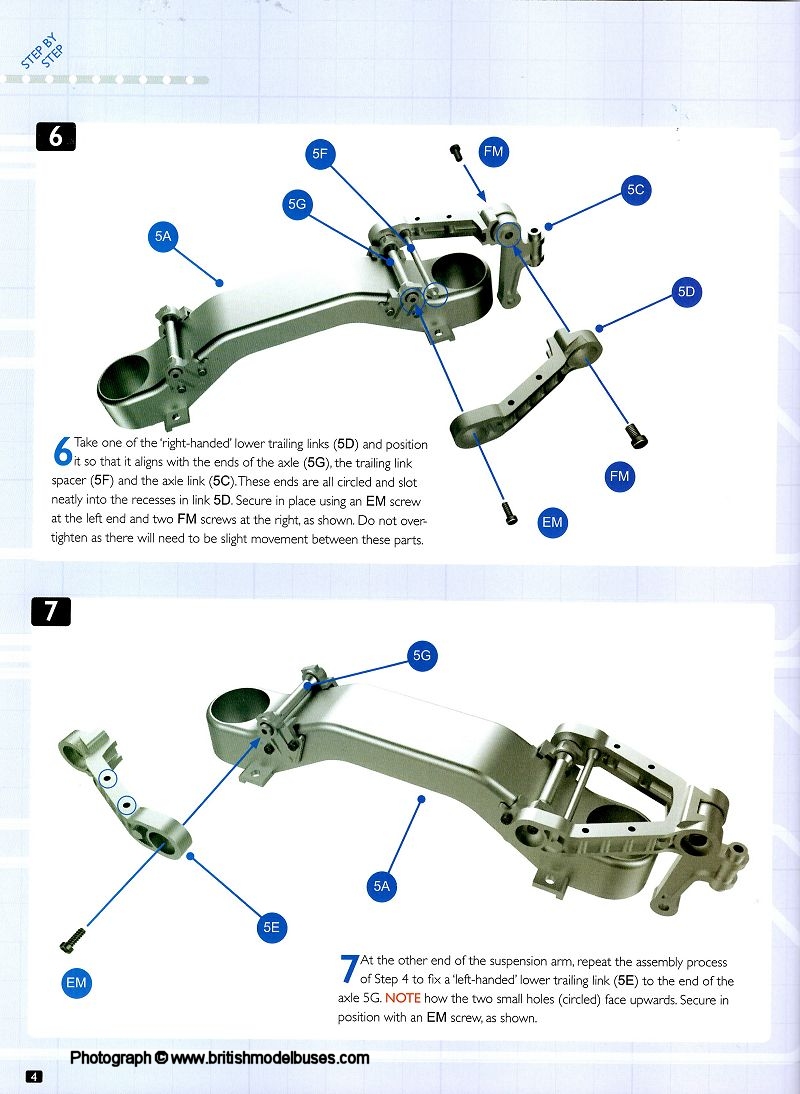
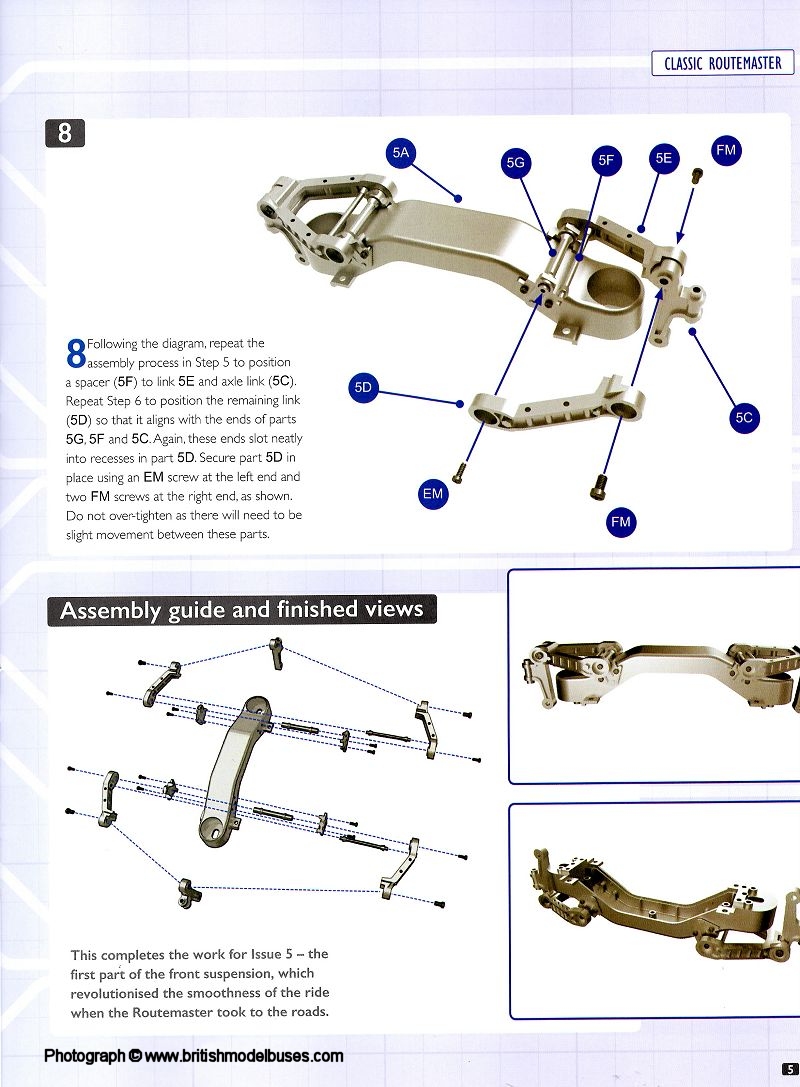
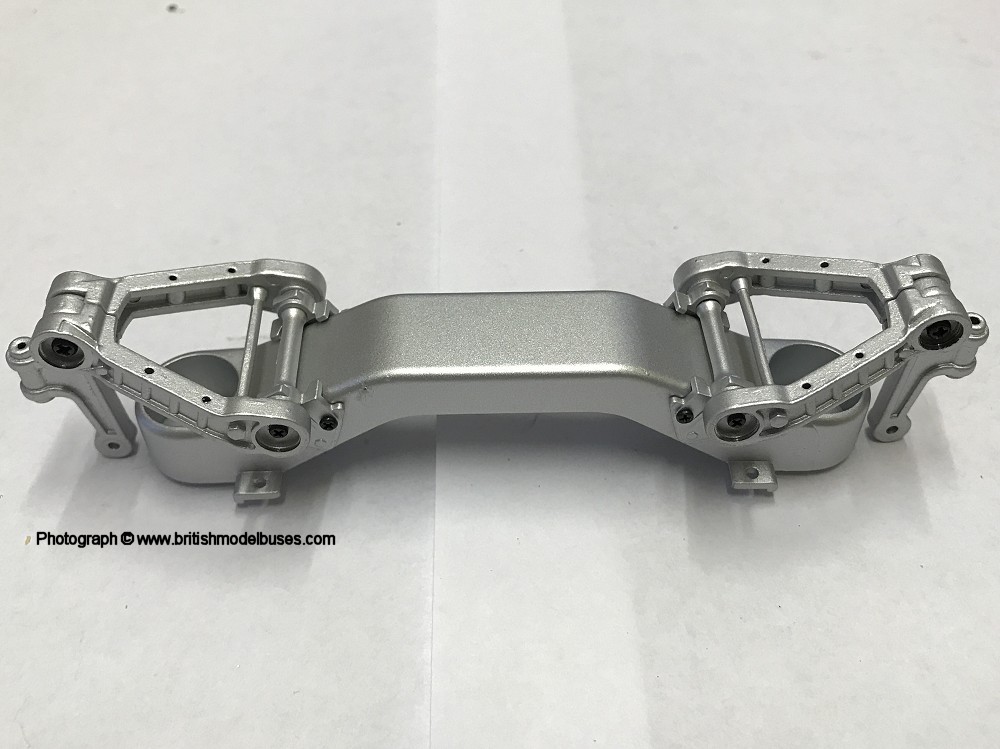
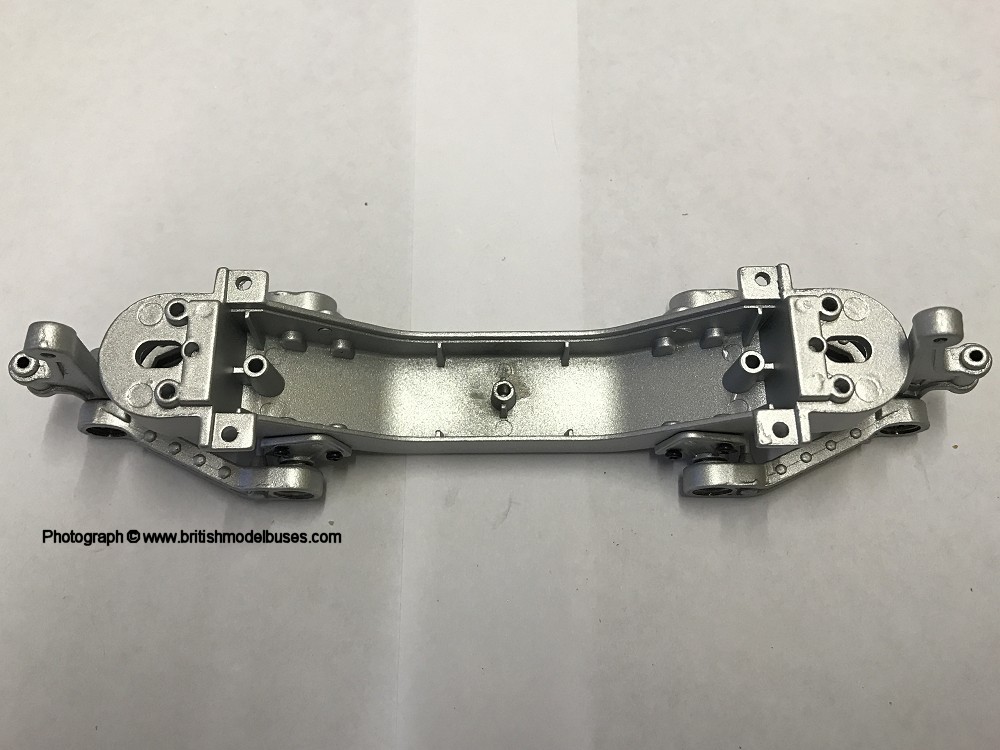
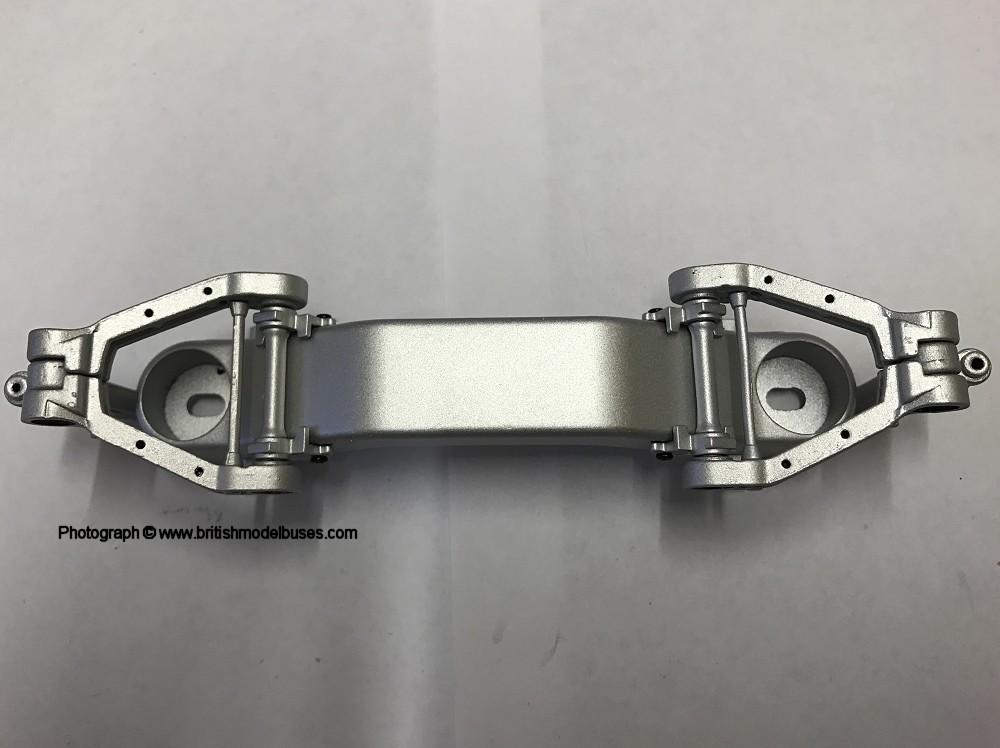
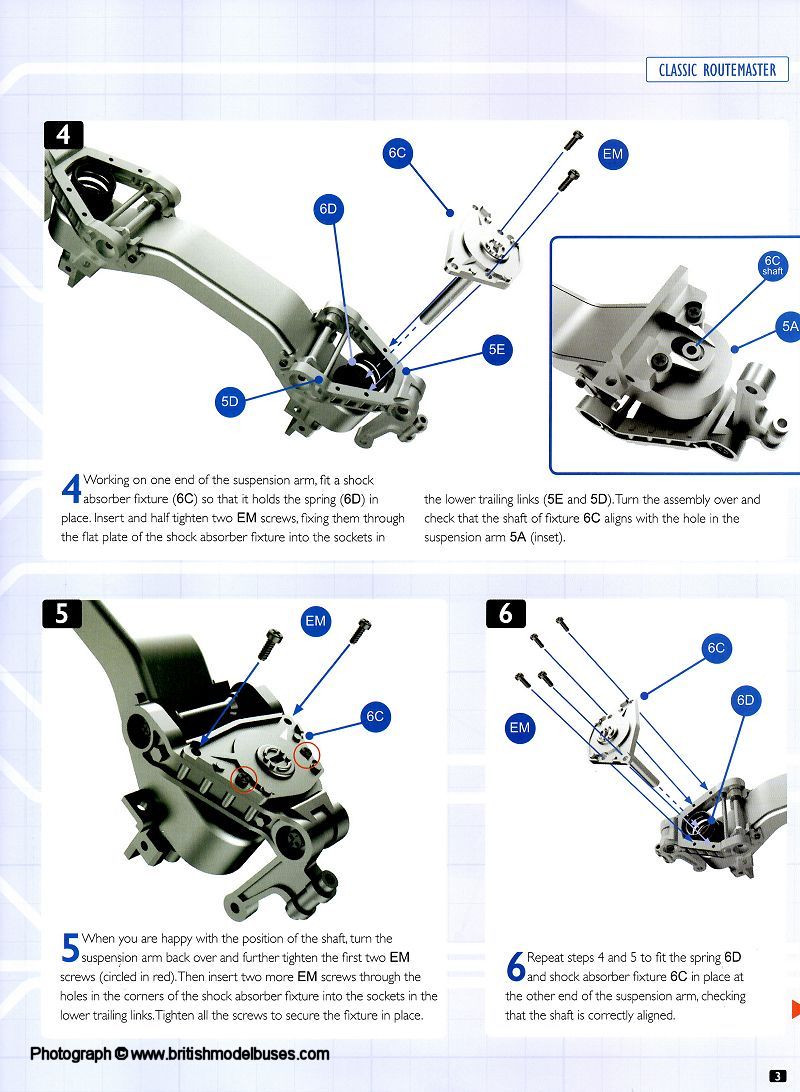
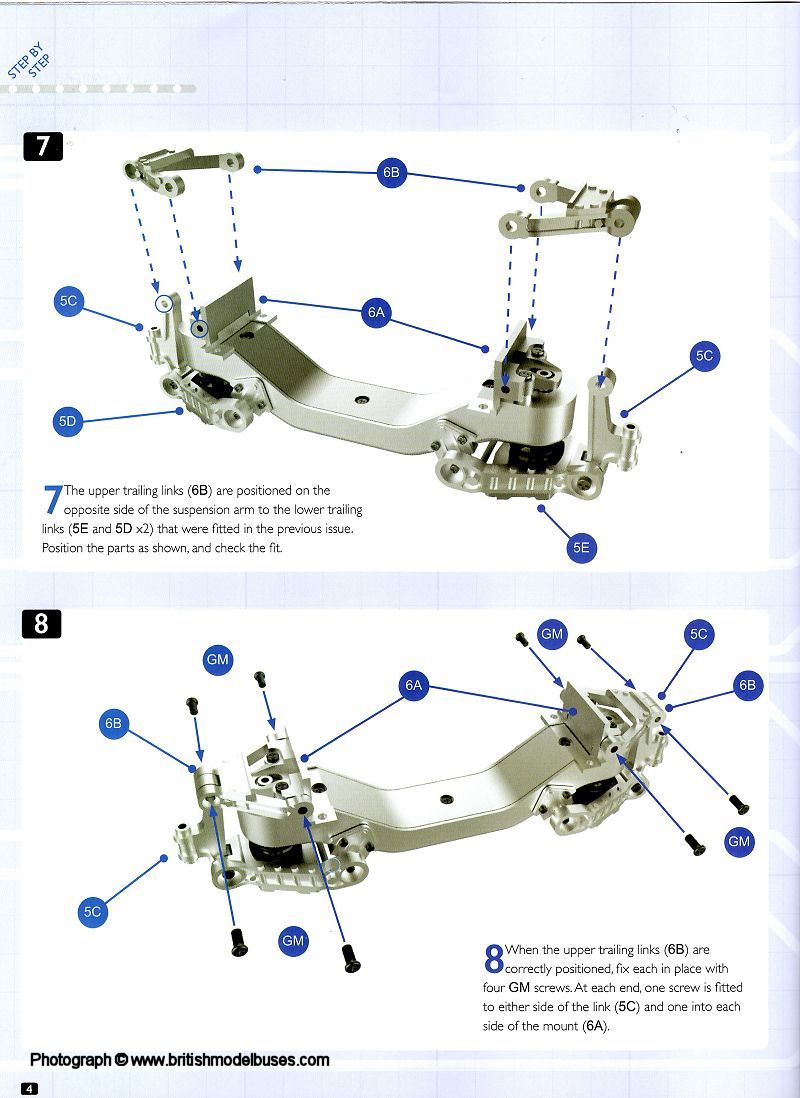
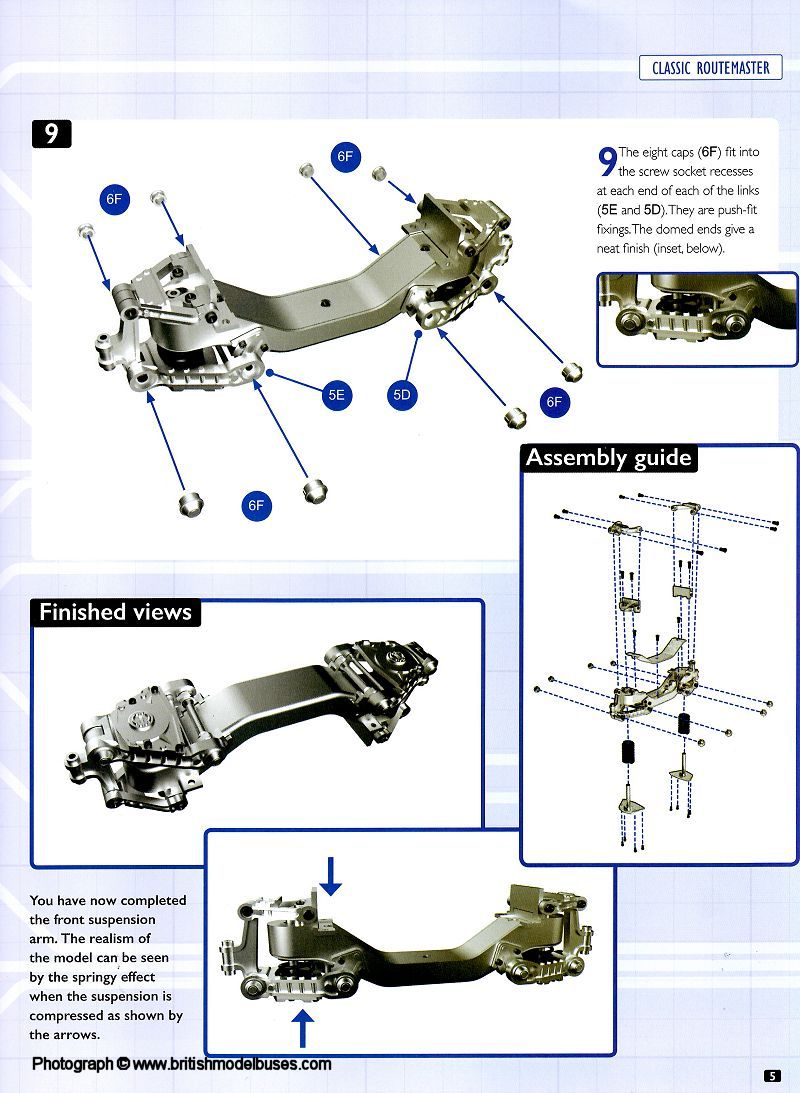
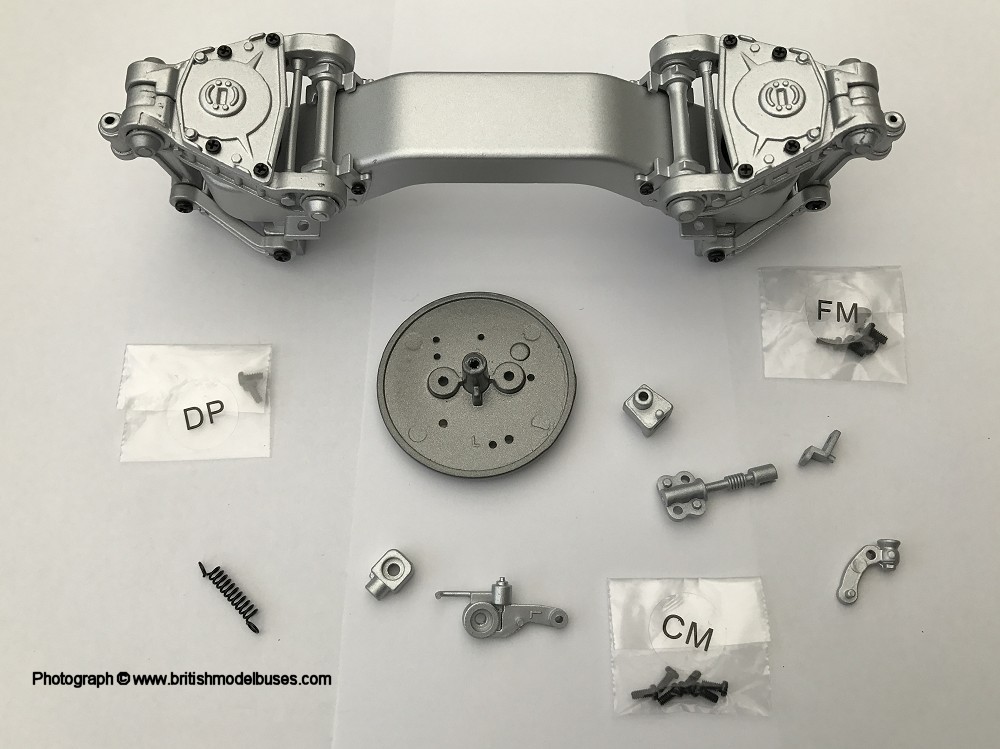
INSTRUCTIONS ISSUE 5 - SUSPENSION ARM ASSEMBLY

Click here for a higher resolution image Click here for a higher resolution image Click here for a higher resolution image Click here for a higher resolution image Click here for a higher resolution image

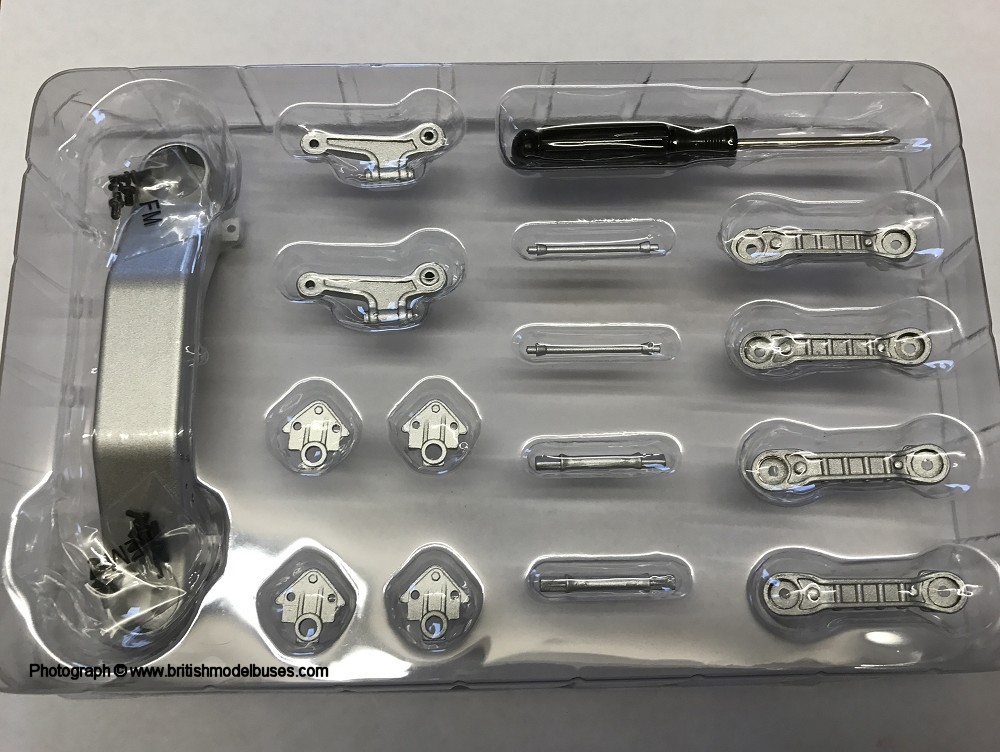
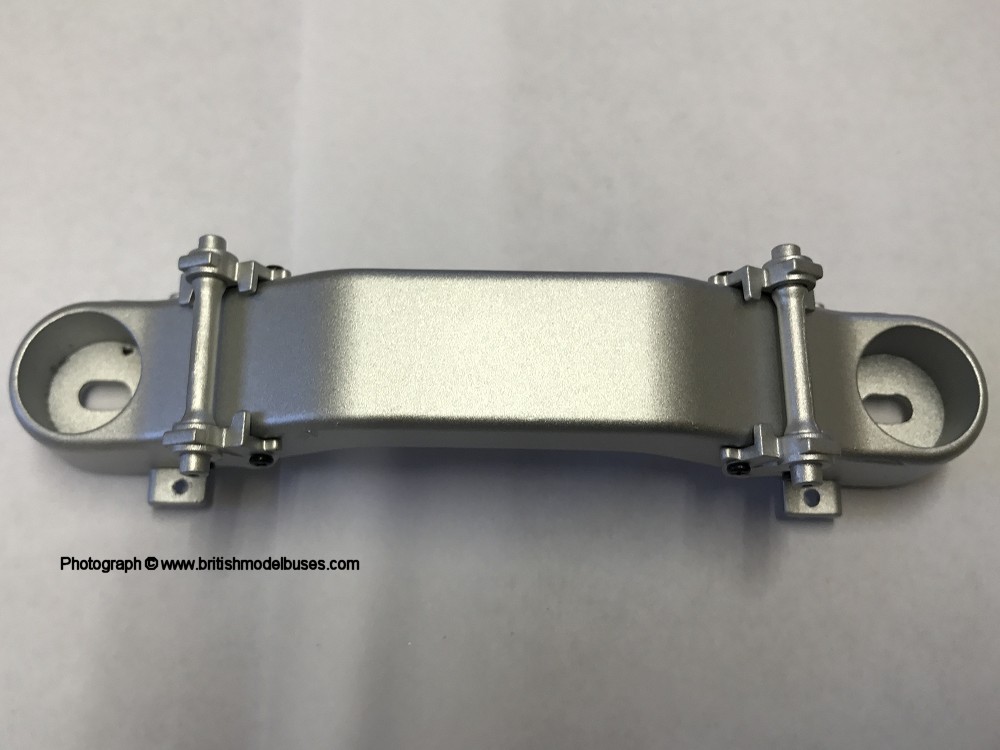
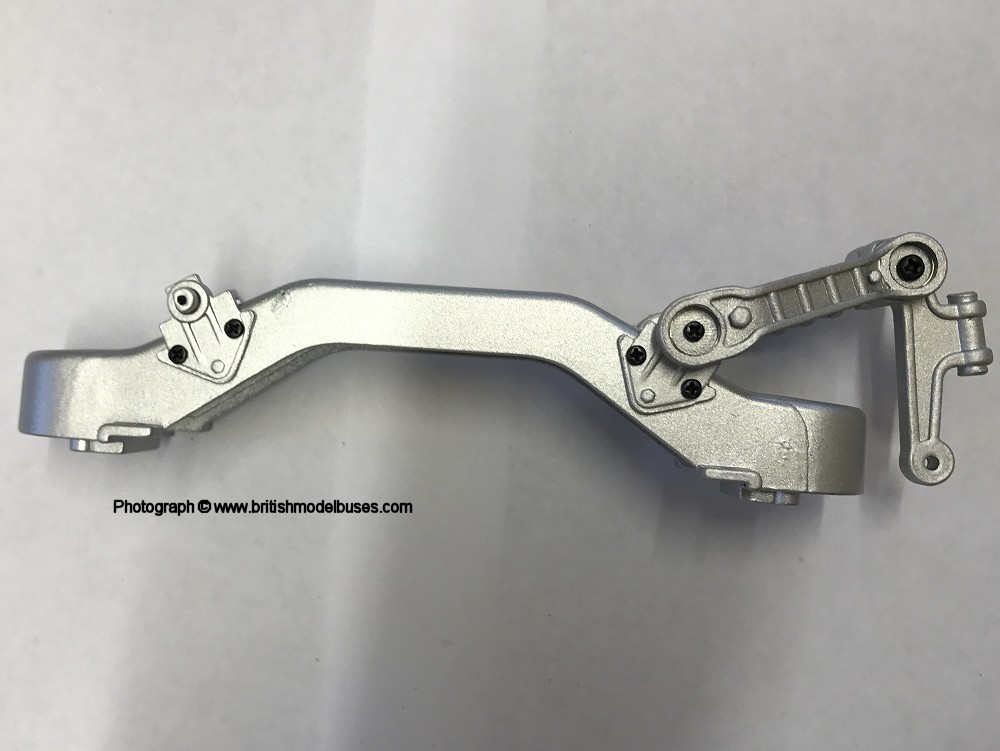
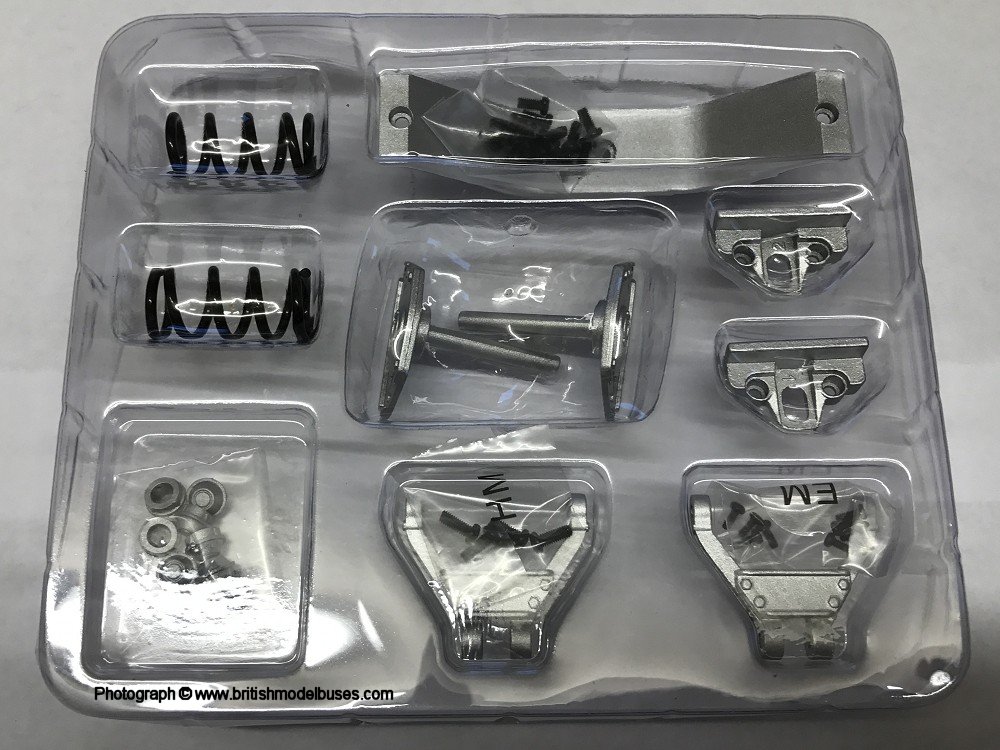
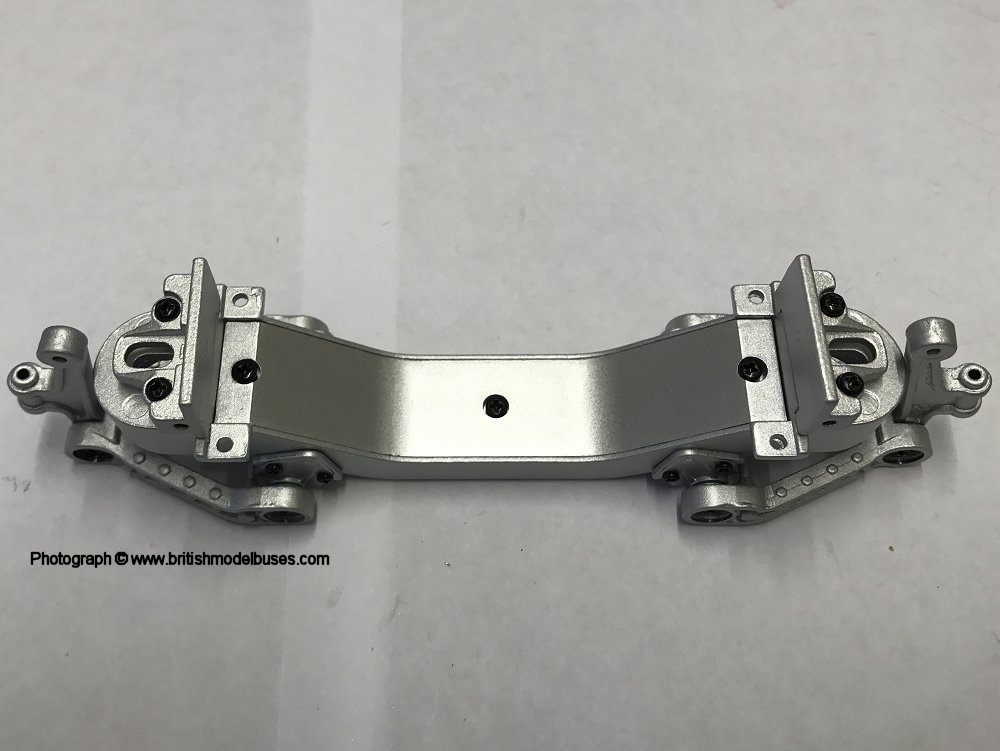
BUILD ISSUE 5 - SUSPENSION ARM ASSEMBLY

Click here for a higher resolution image Click here for a higher resolution image Click here for a higher resolution image Click here for a higher resolution image Click here for a higher resolution image Click here for a higher resolution image Click here for a higher resolution image


MAGAZINE ISSUE 6 - FITTING SHOCK ABSORBERS
I found this build to be quite straight forward, again it took me approximately 20 minutes. The trickiest bit was fitting the shock absorber fixture and making sure that the shaft of the fixture aligned with the hole in the suspension arm.  Then, fitting screws to hold the shock absorber fixture in place, whilst having to push against the resistance of the spring. The two springs are quite strong little critters for their size! There are a couple of interesting articles in the magazine, one about Covent Garden and the other about the demise of the trolleybus. Issue 7 involves putting together one of the disc brakes and attaching it to the suspension arm.

Click here for a higher resolution image Click here for a higher resolution image Click here for a higher resolution image

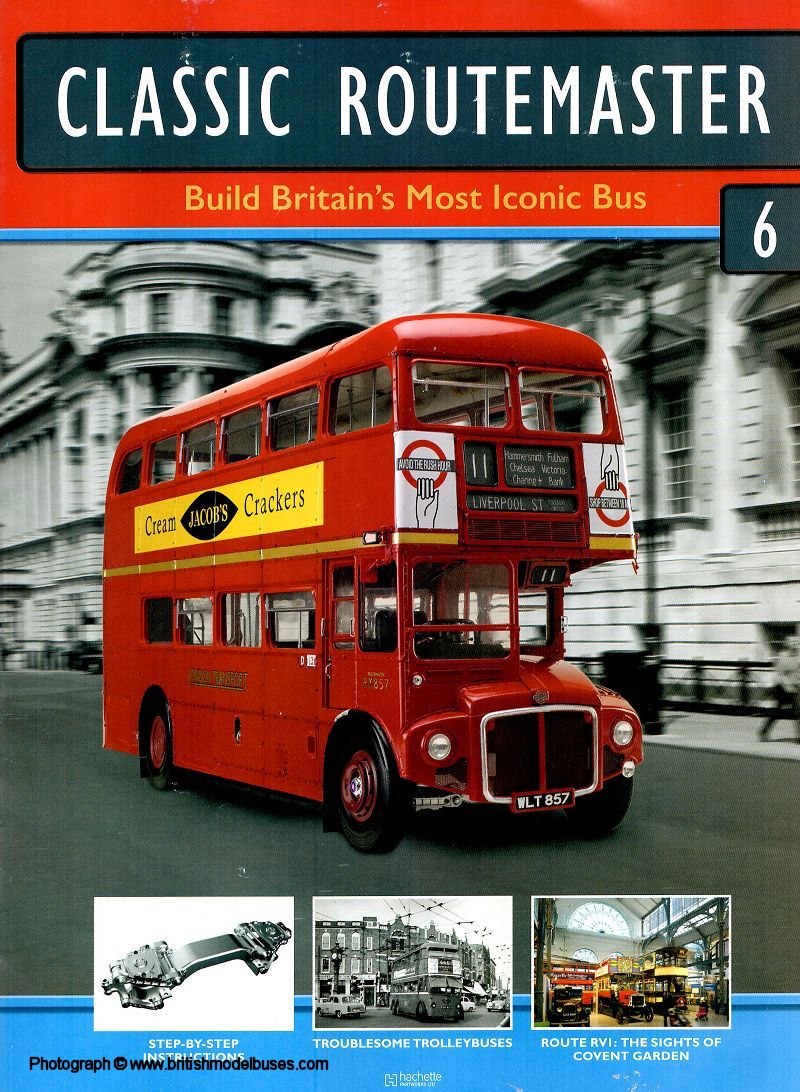
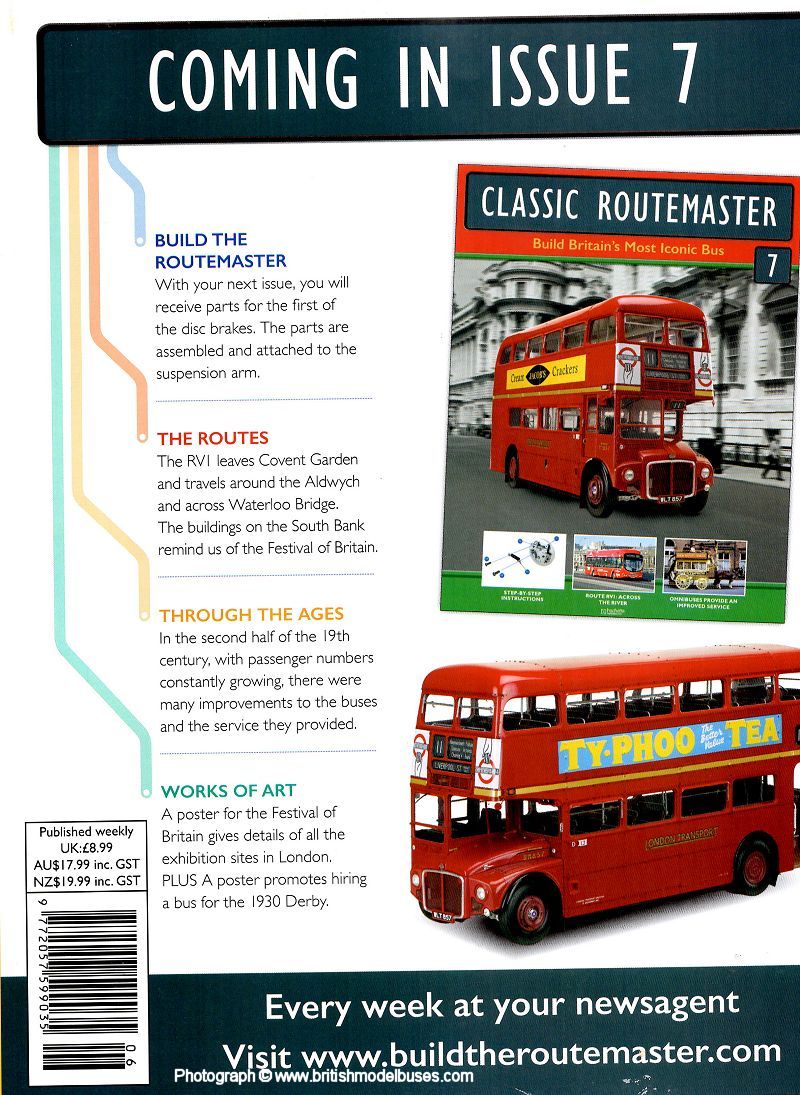
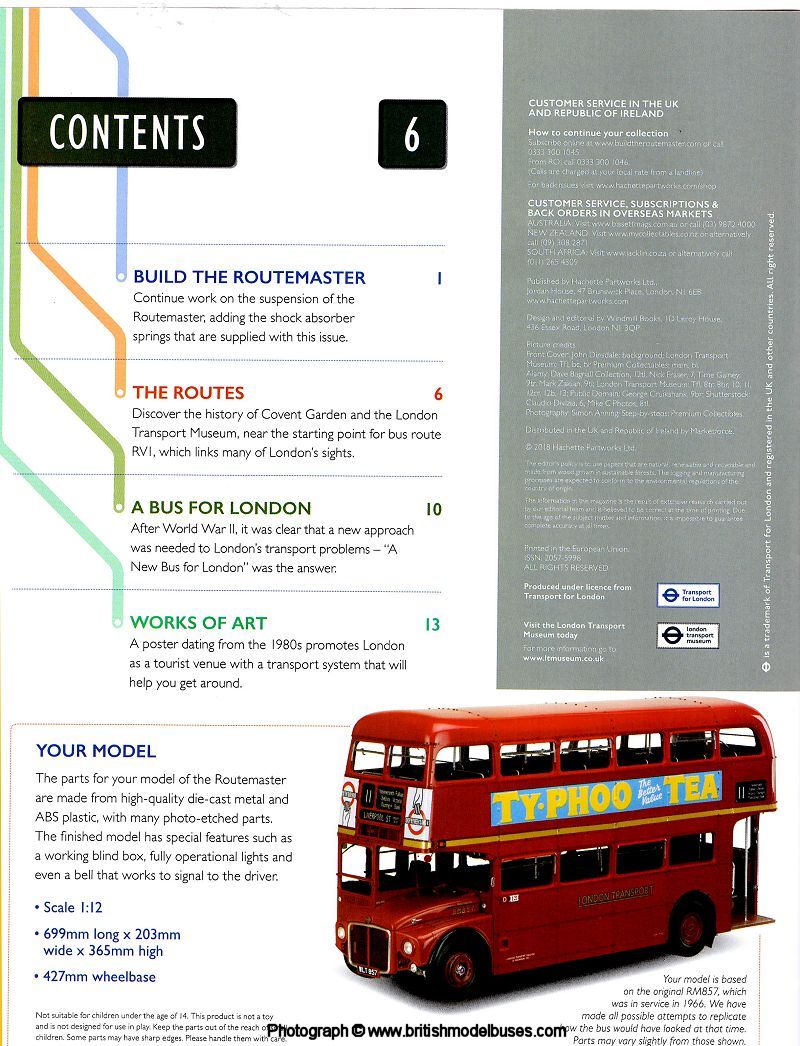
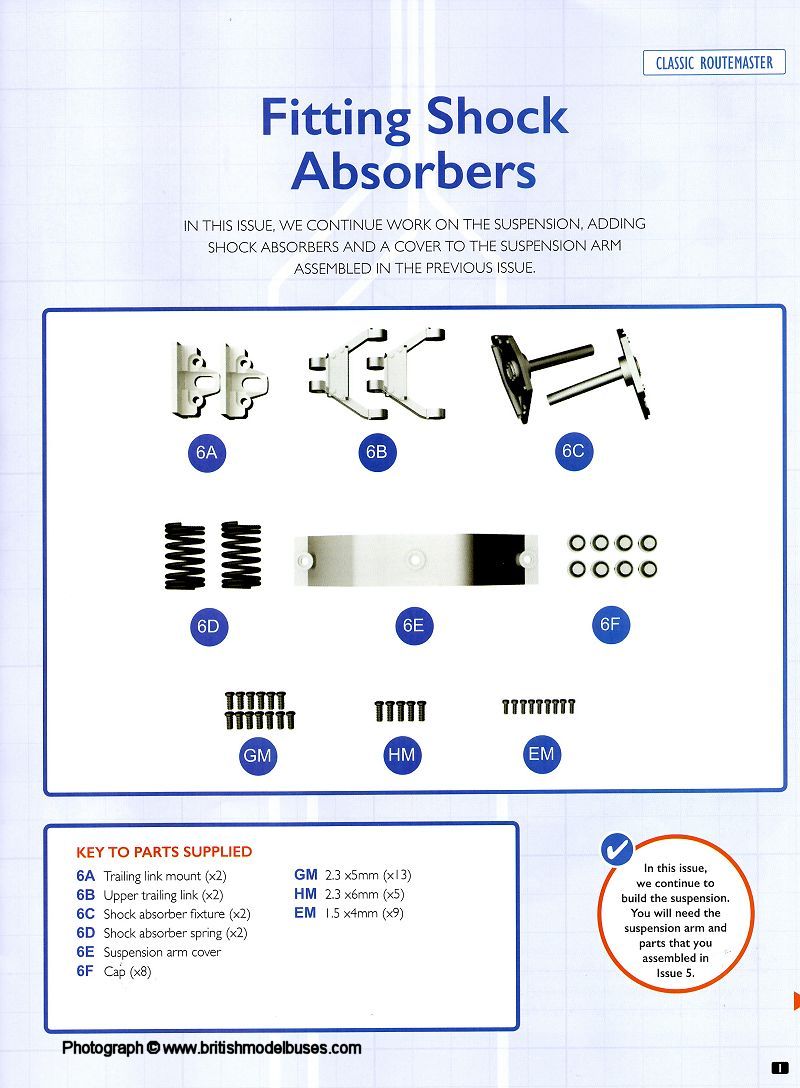
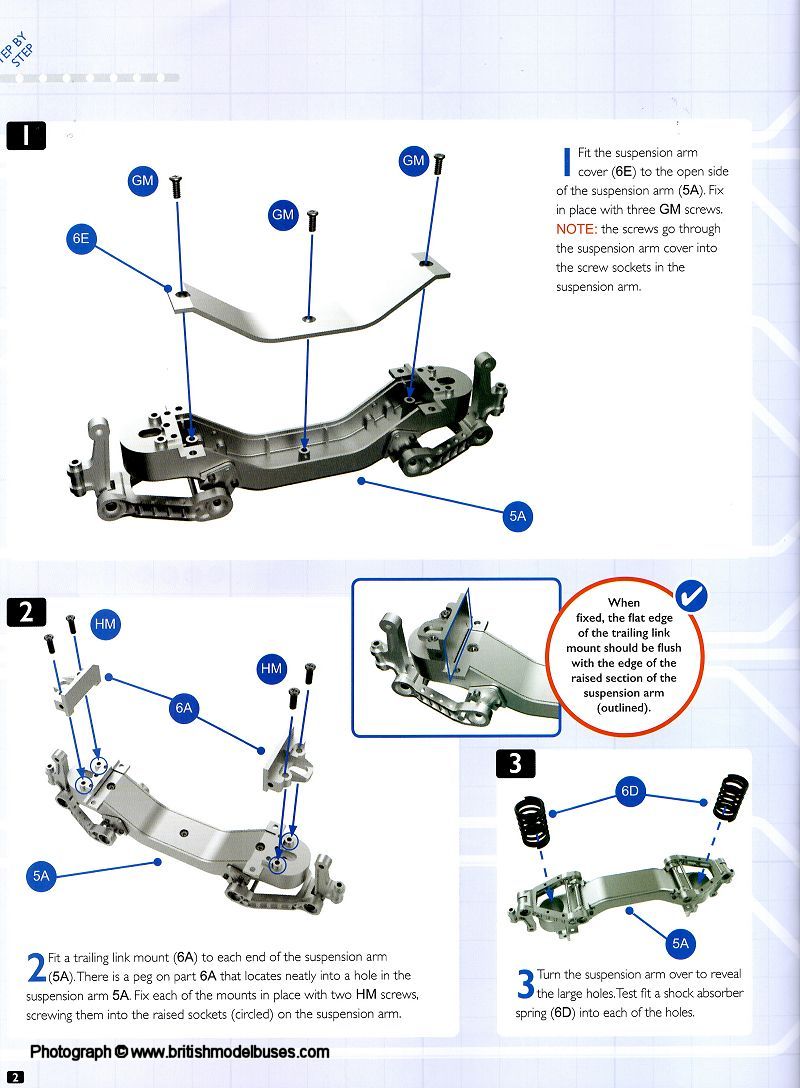
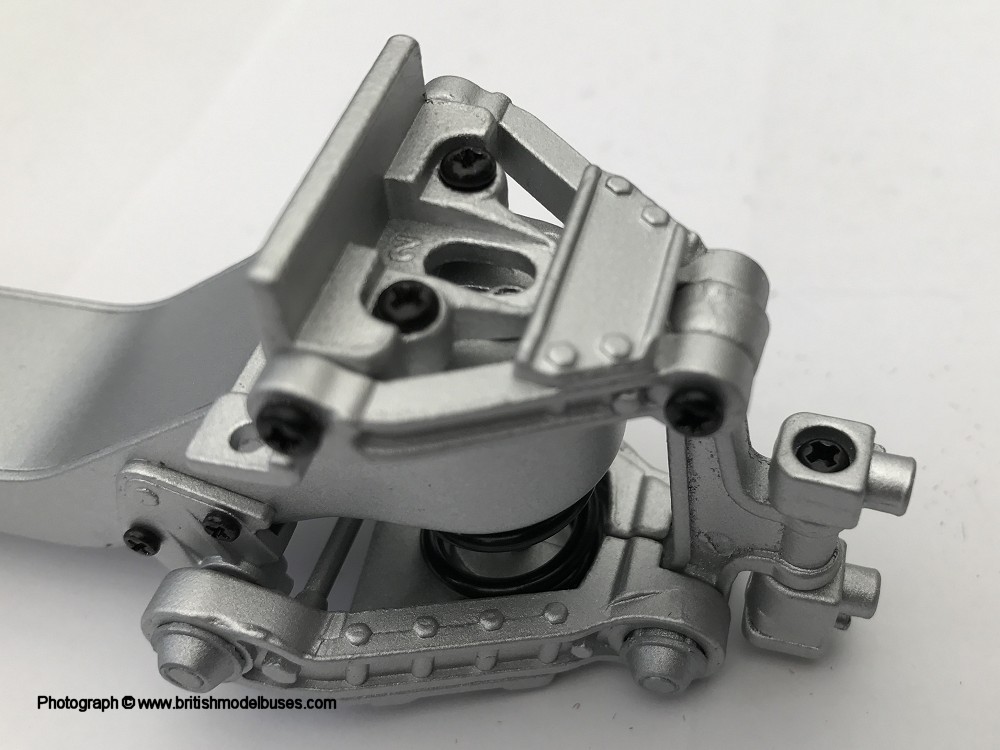
INSTRUCTIONS ISSUE 6 - FITTING SHOCK ABSORBERS

Click here for a higher resolution image Click here for a higher resolution image Click here for a higher resolution image Click here for a higher resolution image Click here for a higher resolution image

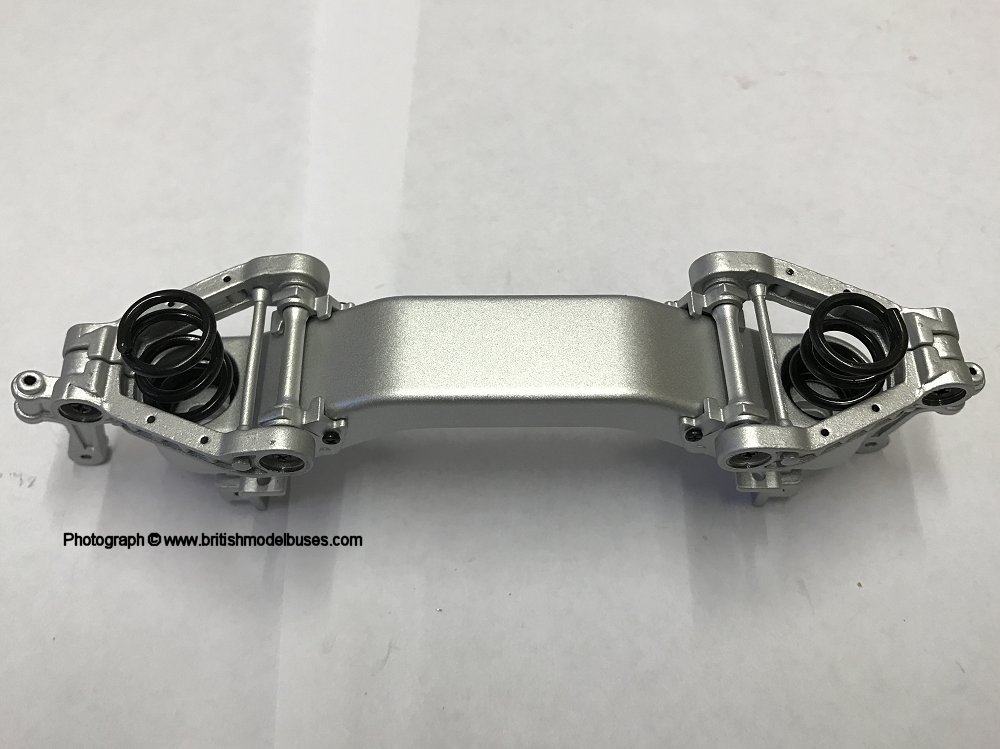
BUILD ISSUE 6 - FITTING SHOCK ABSORBERS

Click here for a higher resolution image Click here for a higher resolution image Click here for a higher resolution image Click here for a higher resolution image Click here for a higher resolution image Click here for a higher resolution image Click here for a higher resolution image


MAGAZINE ISSUE 7 - FITTING THE FIRST DISC BRAKE
There has been a significant delay between issues 6 and 7. After waiting for a month for my next parcel to arrive, I contacted
Hachette Partworks who apologised and told me that the entire consignment of issues 7 to 10 that they had posted out to subscribers had been lost by the Royal Mail! Once I spoke to them, a replacement parcel arrived approximately a week later, included in the package was a folder to keep my magazines in (I suspect there will need to be a number of folders by the times the model is built). The replacement parcel was closely followed by my parcel for weeks 11 to 14. I need to catch up with my build now! The magazine contains an interesting read on route RV1, covering the section Aldwych to Waterloo and an article about horse drawn buses.

Week 7 involved putting together one of the front disc brakes and attaching it to the suspension arm. The second front disc brake with an identical process is due in week 9. I found the process to be very straightforward apart from not realising that the spring could lay in two ways and after I turned it over, it laid flat once attached by the screws. Issue 8 involves assembling one of the front wheels and attaching it to the suspension arm. This process will be repeated for the other front wheel in issue 11.

Click here for a higher resolution image Click here for a higher resolution image Click here for a higher resolution image

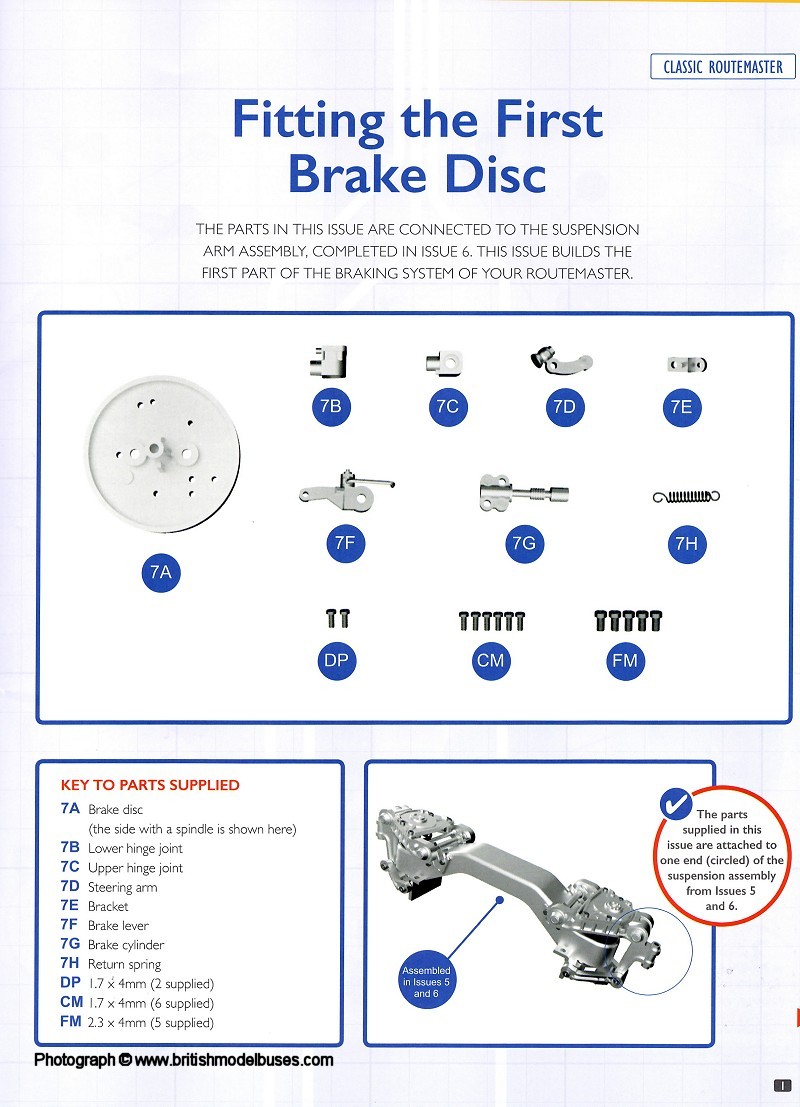
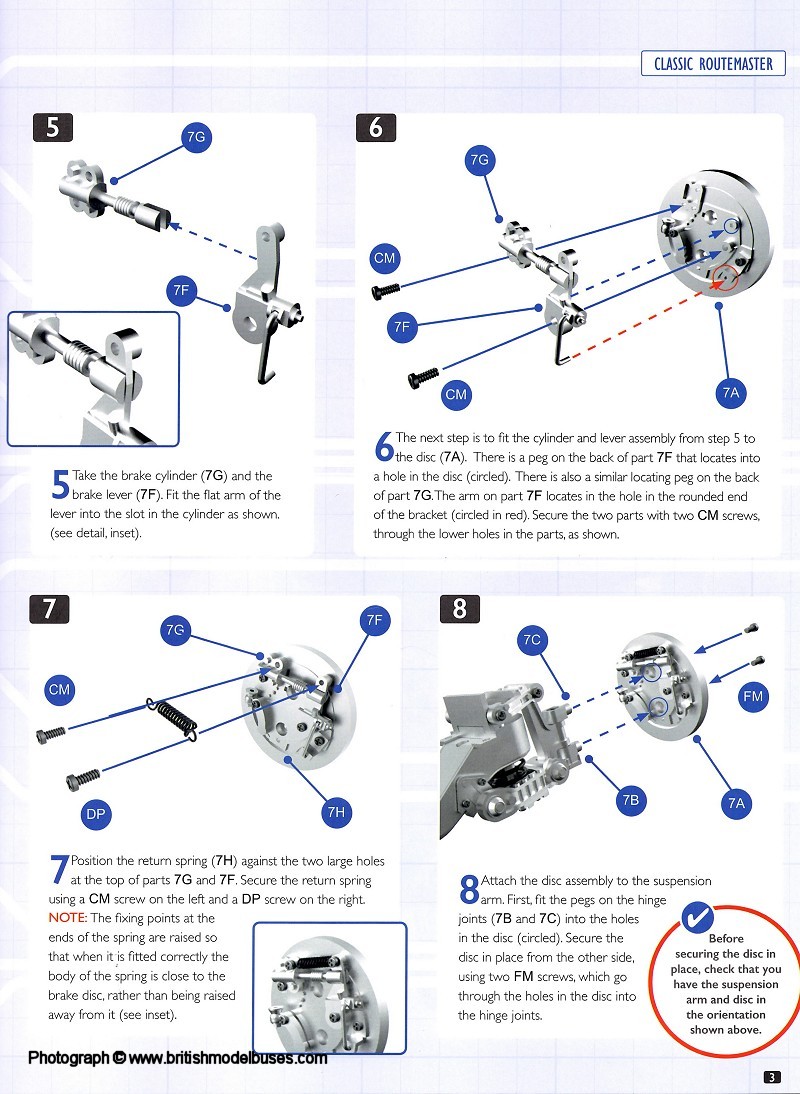
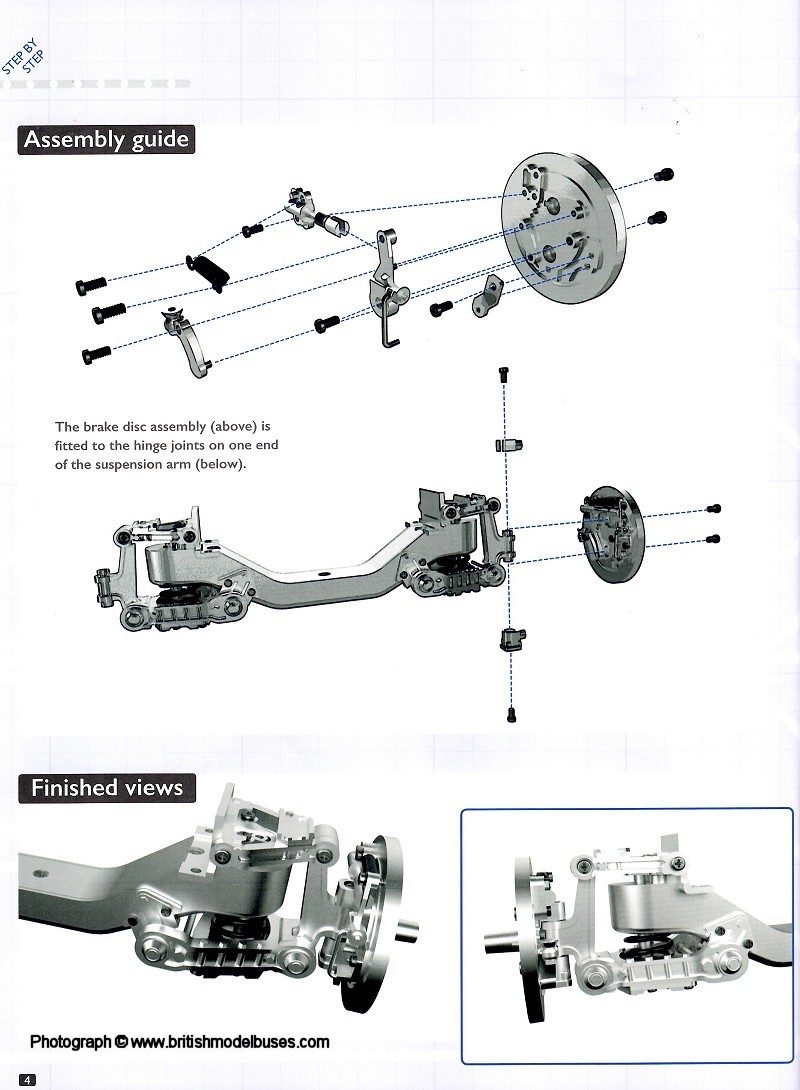
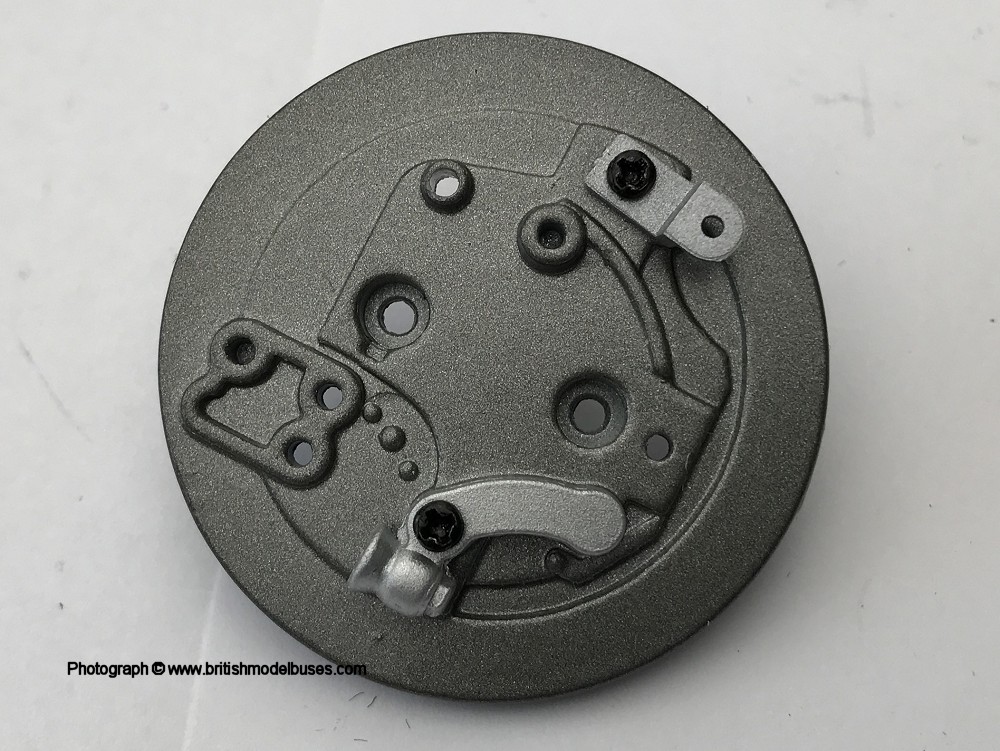
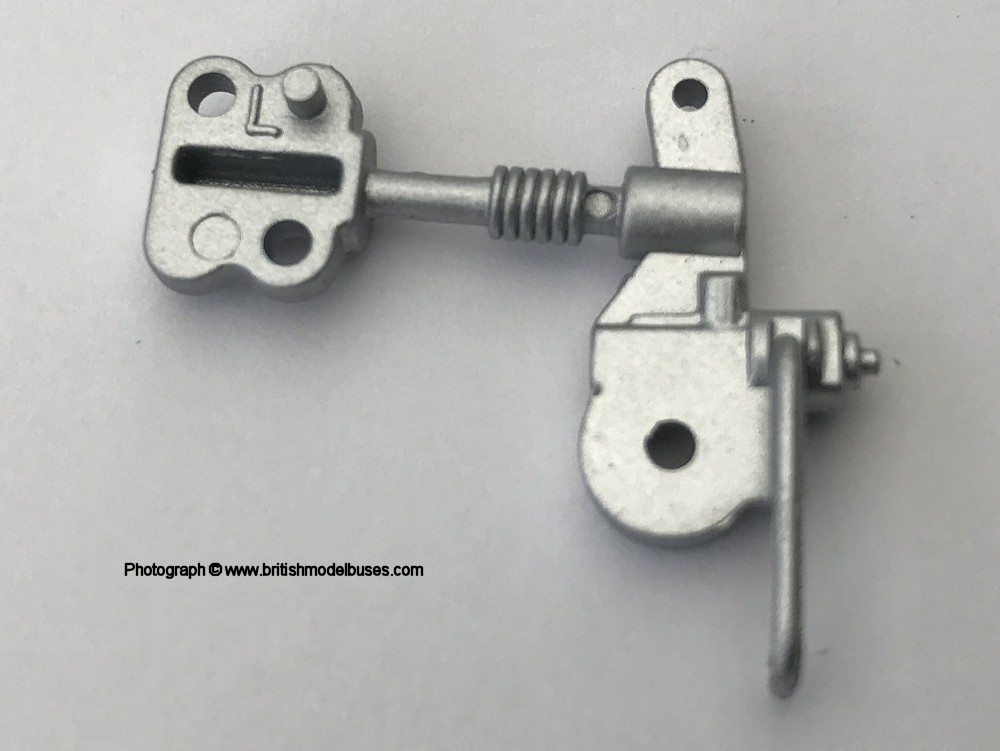
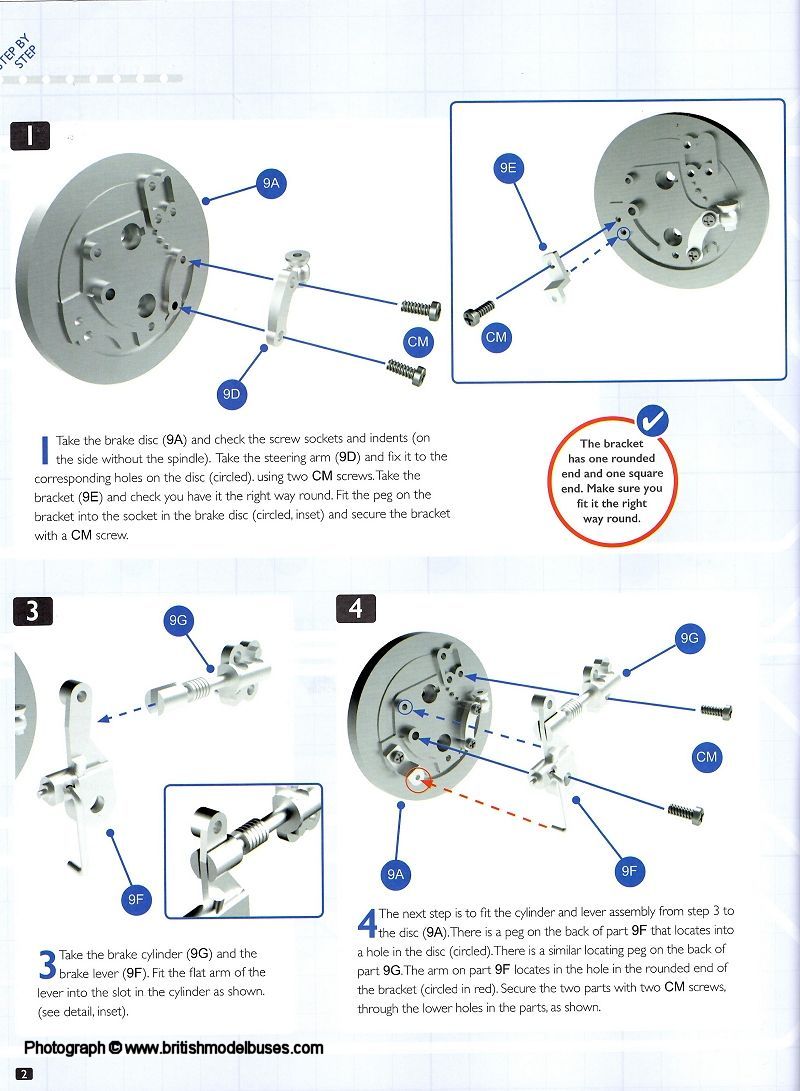
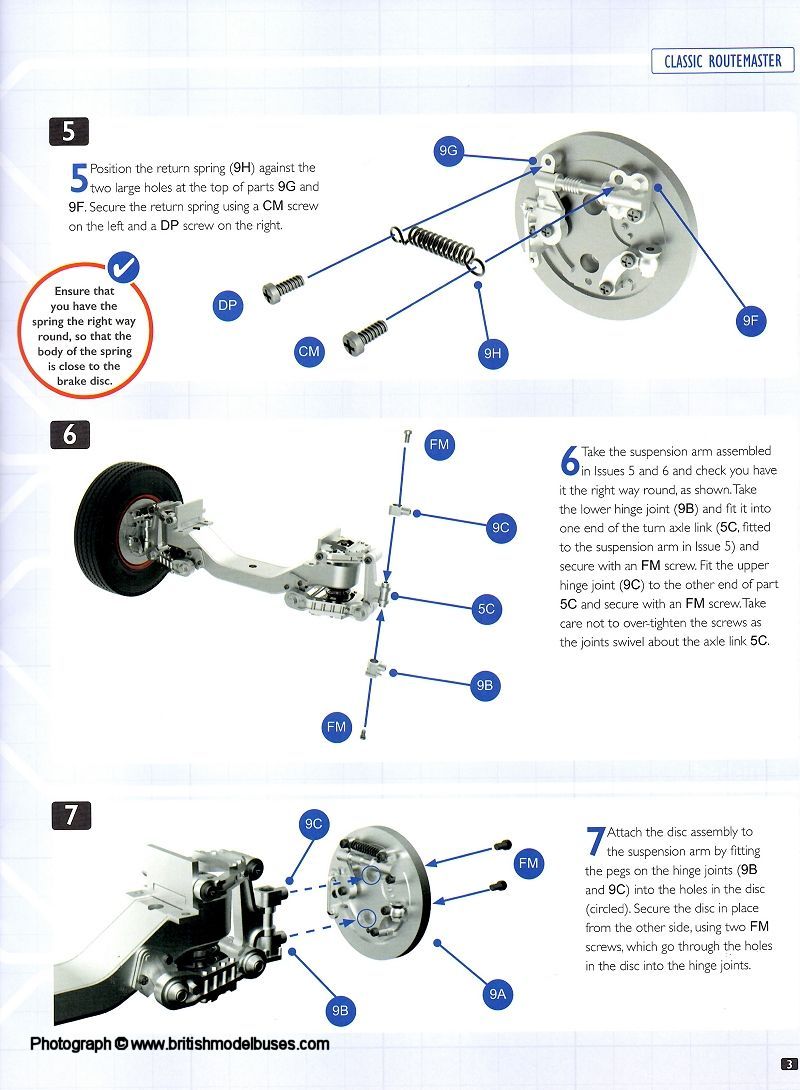
INSTRUCTIONS ISSUE 7 - FITTING THE FIRST DISC BRAKE

Click here for a higher resolution image Click here for a higher resolution image Click here for a higher resolution image Click here for a higher resolution image

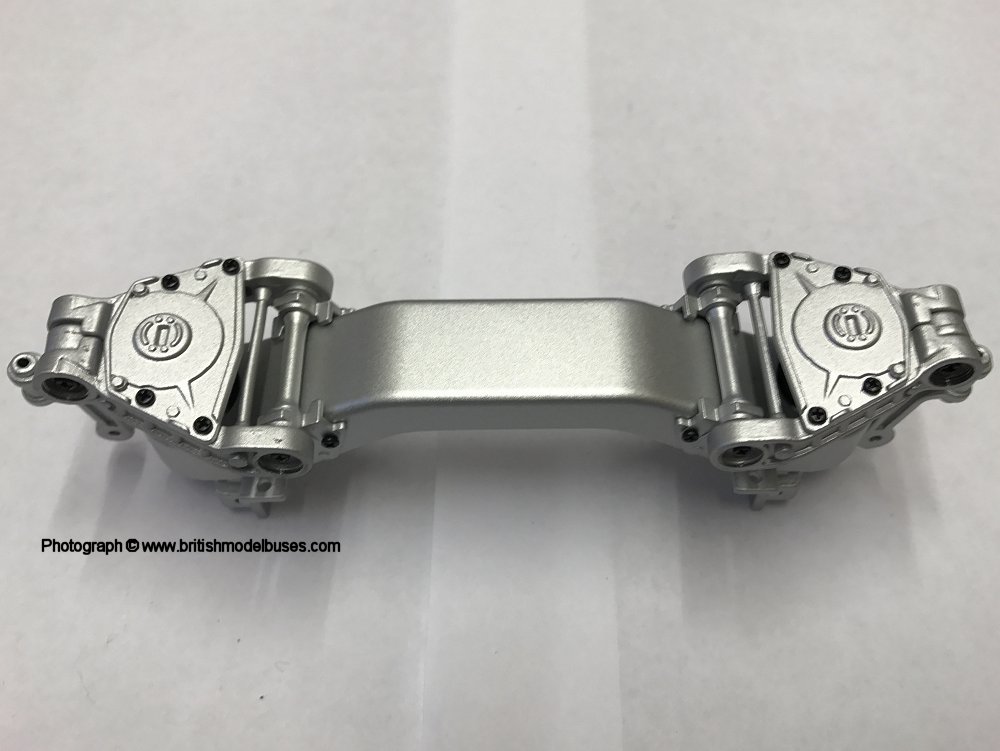
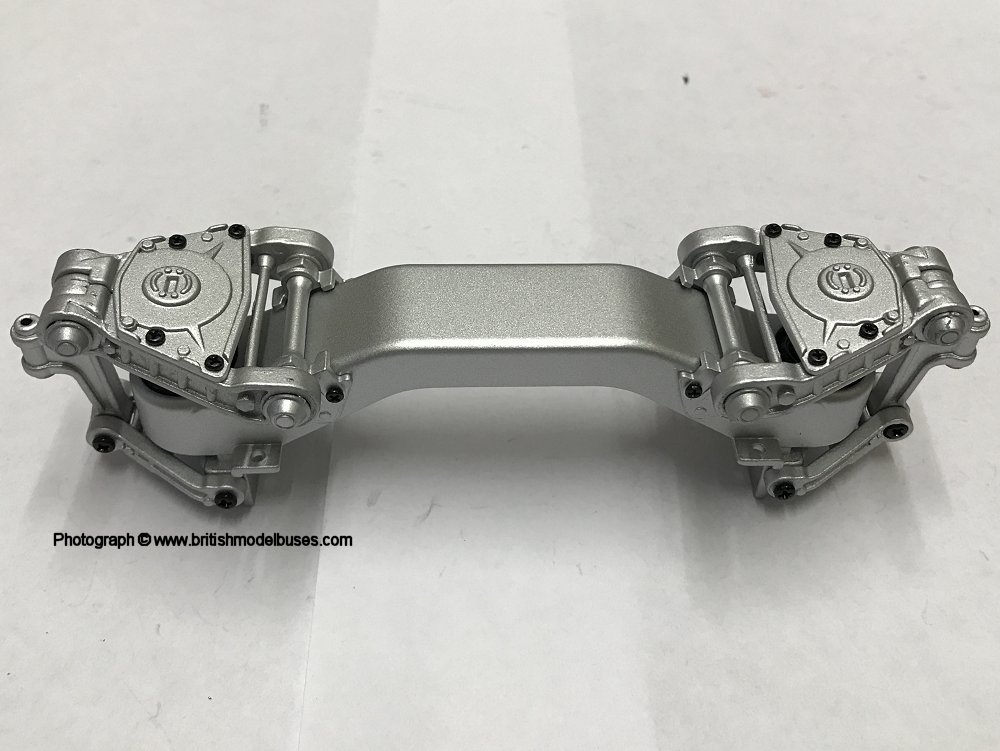
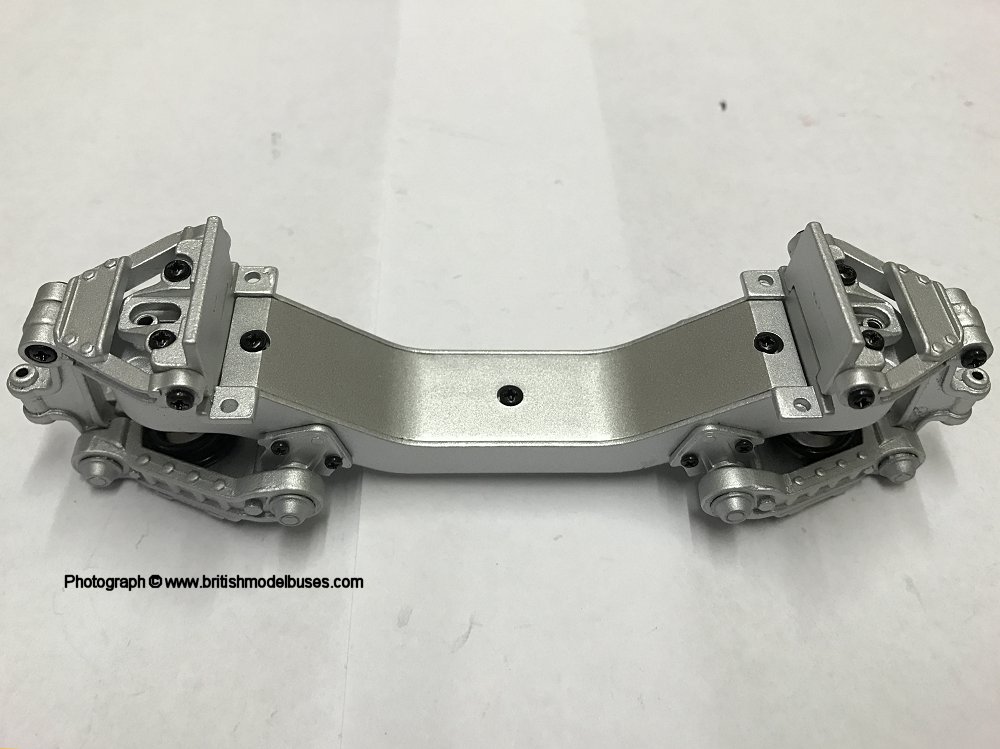
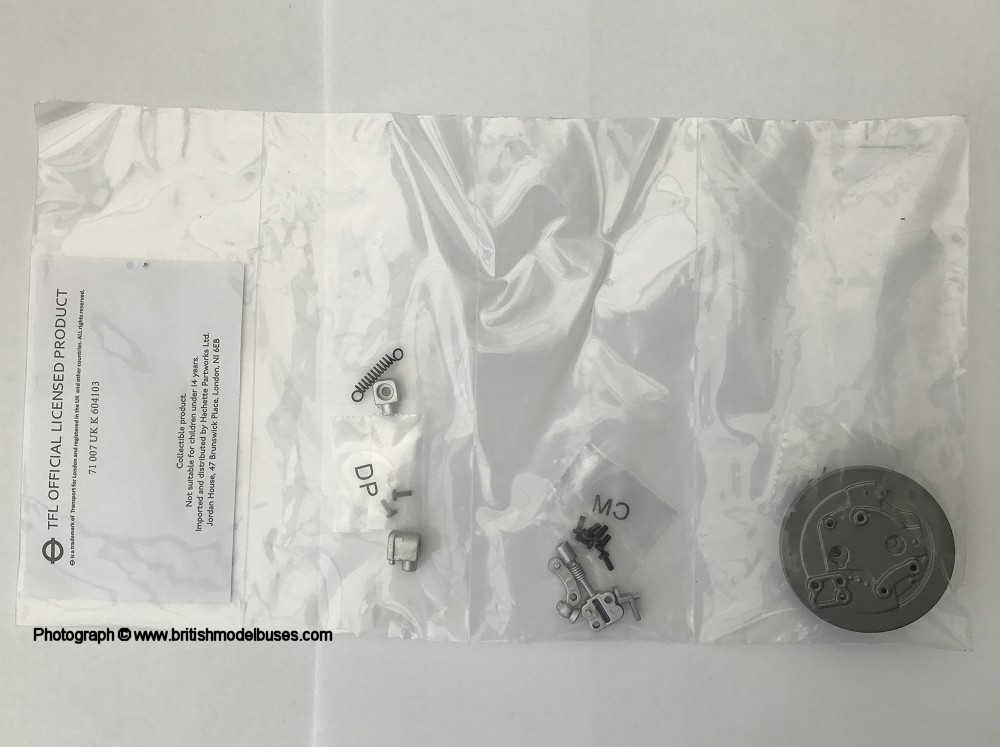
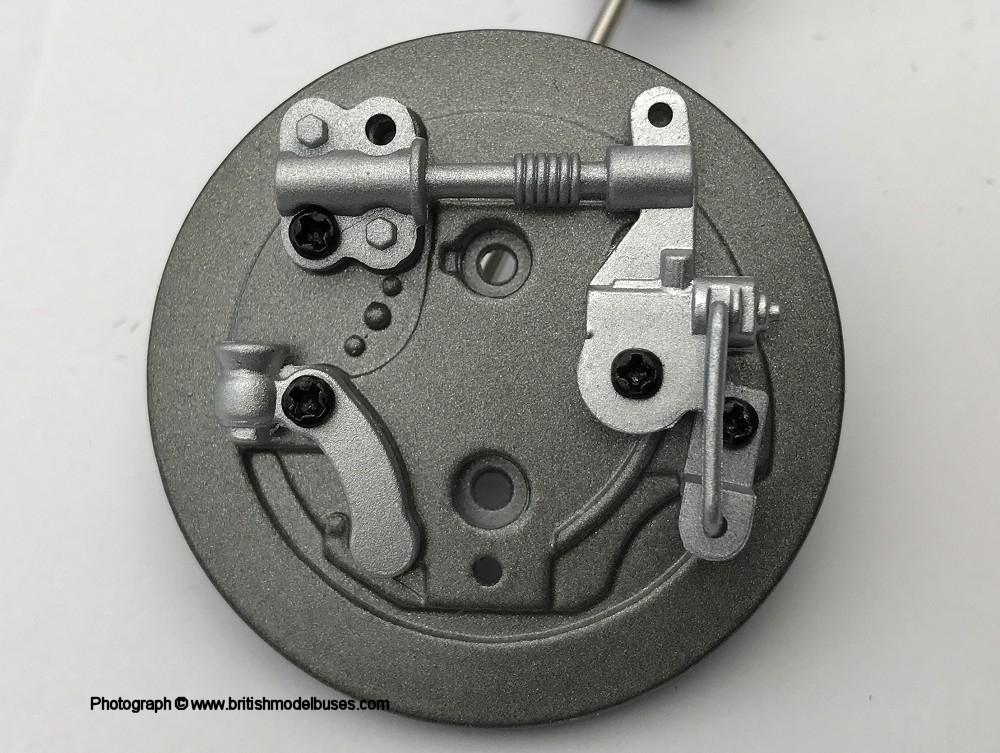
BUILD ISSUE 7 - FITTING THE FIRST DISC BRAKE

Click here for a higher resolution image Click here for a higher resolution image Click here for a higher resolution image Click here for a higher resolution image Click here for a higher resolution image Click here for a higher resolution image

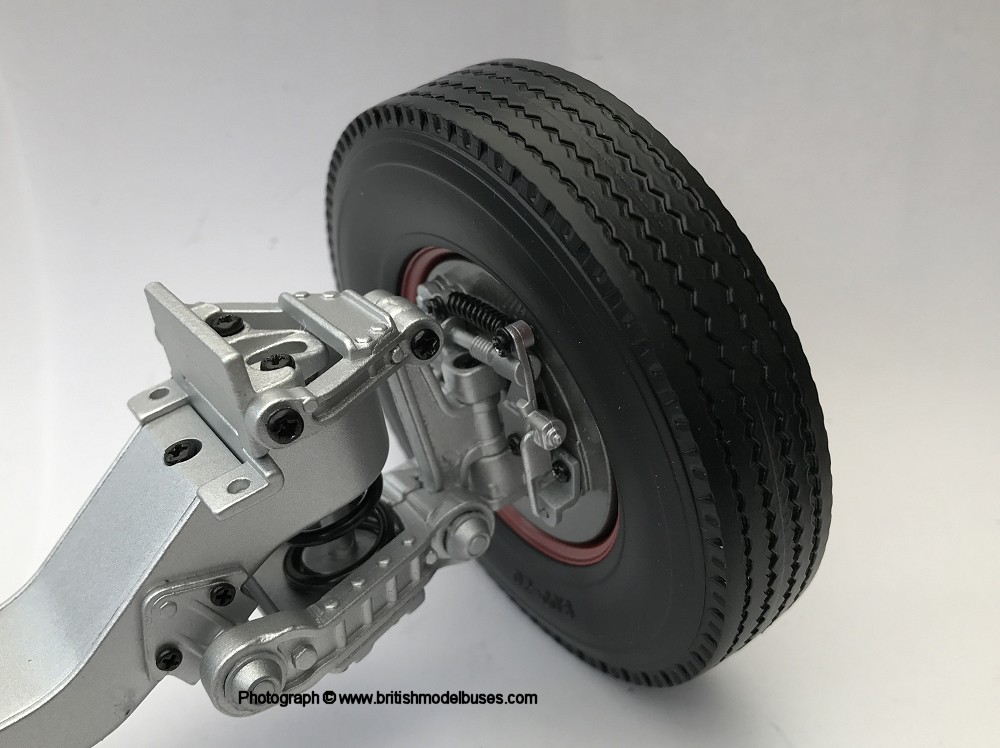
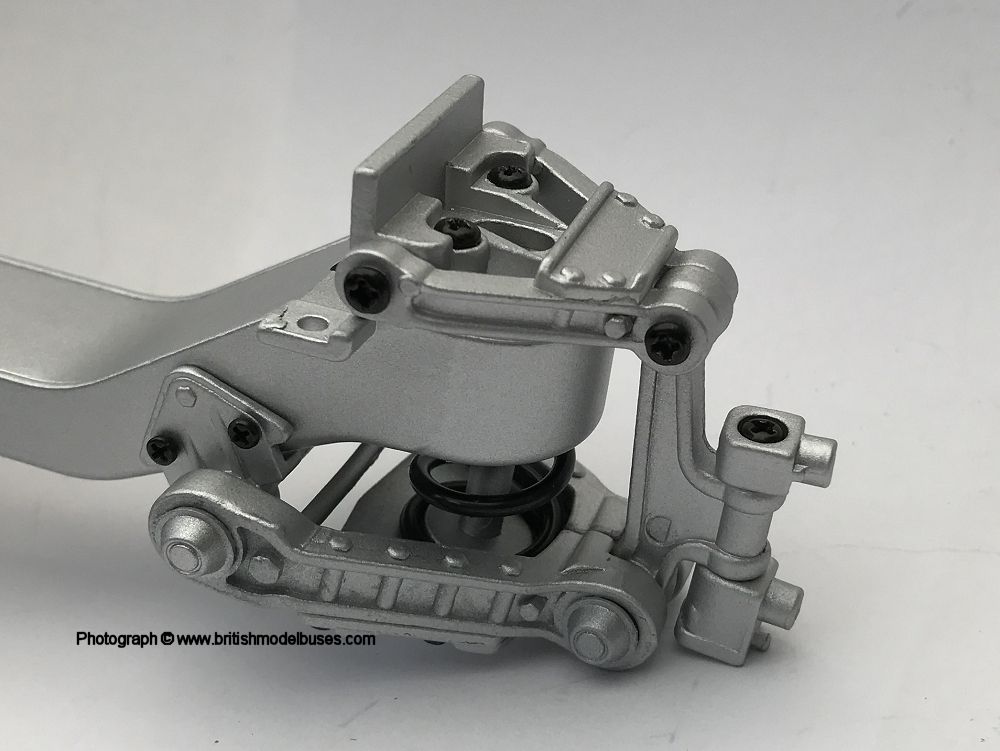
See week 8 (below) showing the disc brake attached to the suspension arm. The spring referred in my notes (above) to can also be seen in the week 8 photographs. 


MAGAZINE ISSUE 8 - FITTING THE FIRST TYRE AND WHEEL
This weeks build involved fitting one of the front tyres to the hub and then attaching it to the suspension arm and disc brake (see week 7). The magazine features articles on the South bank and Frank Pick and his role in shaping London's transport system.

This week was a very straight forward build, with only a small number of parts. To make the plastic tyre flexible enough to fit onto the hub, it suggested either soaking it in warm water (taking care to dry it inside properly) or to use a hairdryer. I went for the hairdryer option and after some gentle warming, it fitted easily onto the hub. I have read that some people experienced wobble on the wheel after fitting it to the disc, I did not experience this at all, but took care to make sure the tyre was seated properly before I tightened the screw. Issue 9 will involve constructing the second front disc brake.

Click here for a higher resolution image Click here for a higher resolution image Click here for a higher resolution image

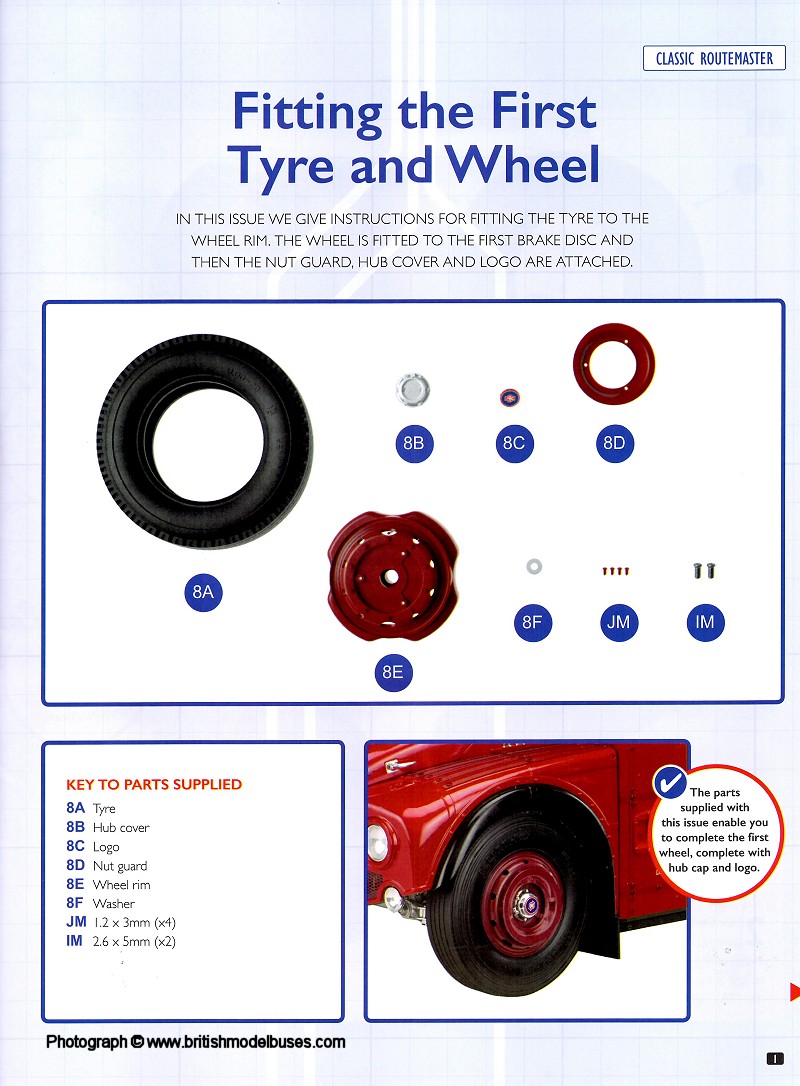
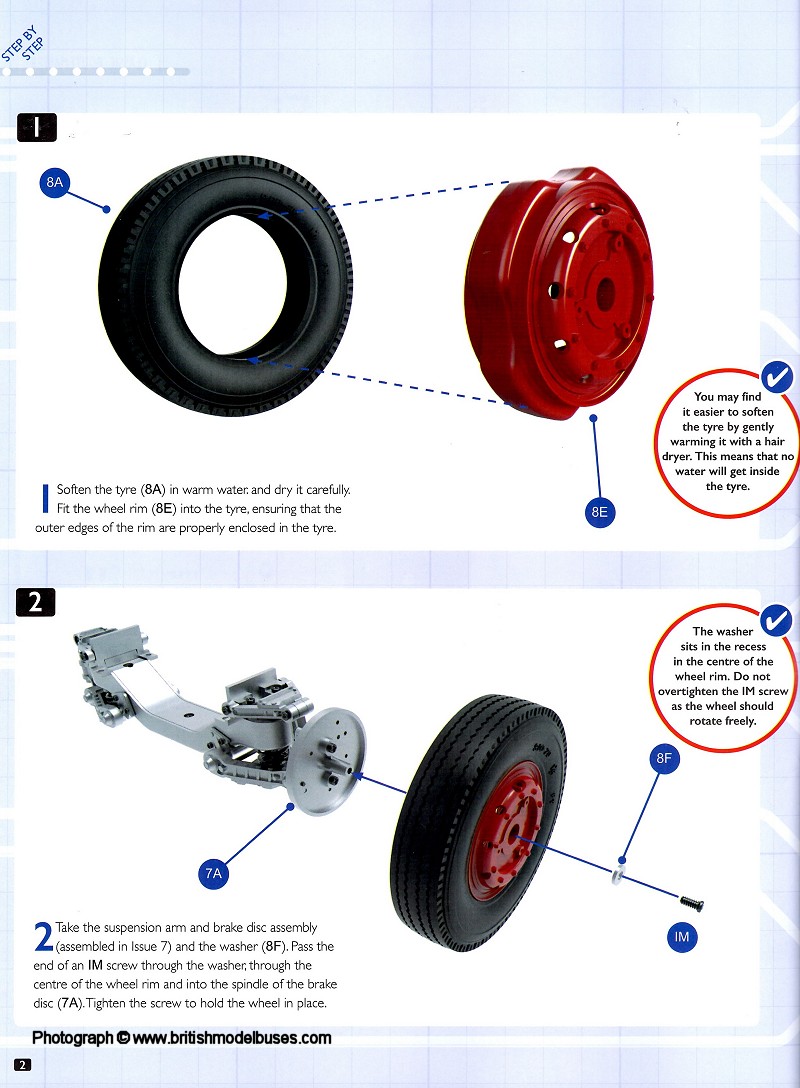
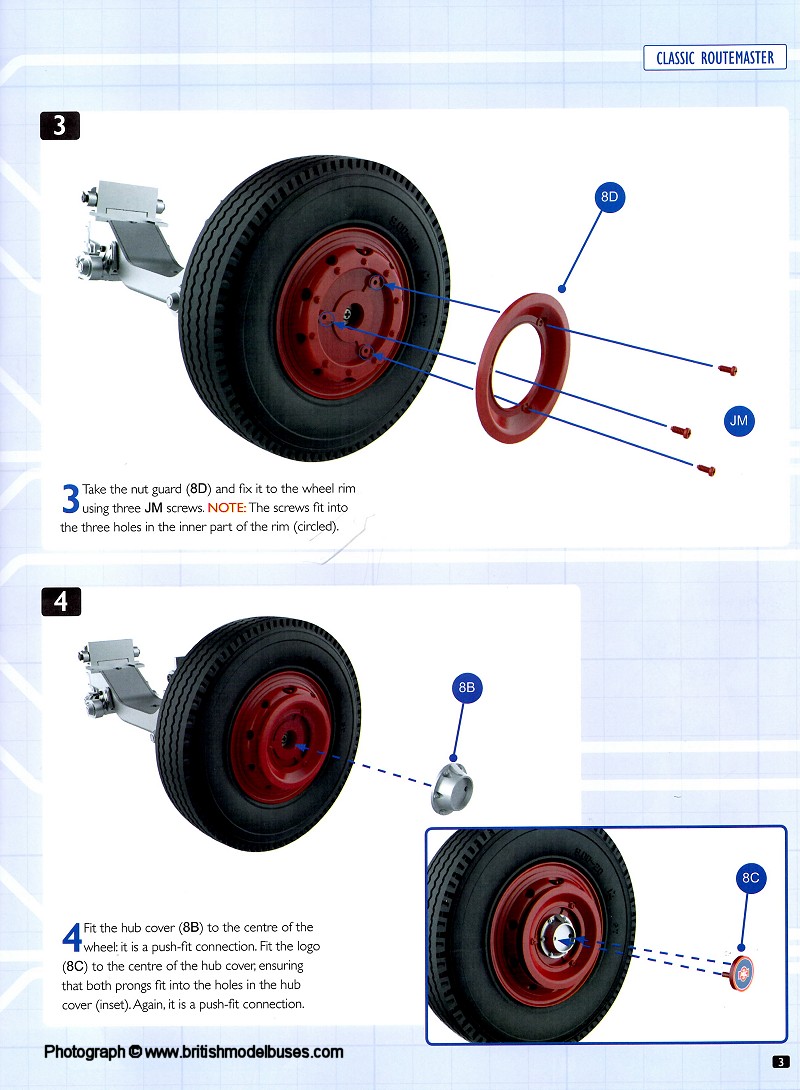
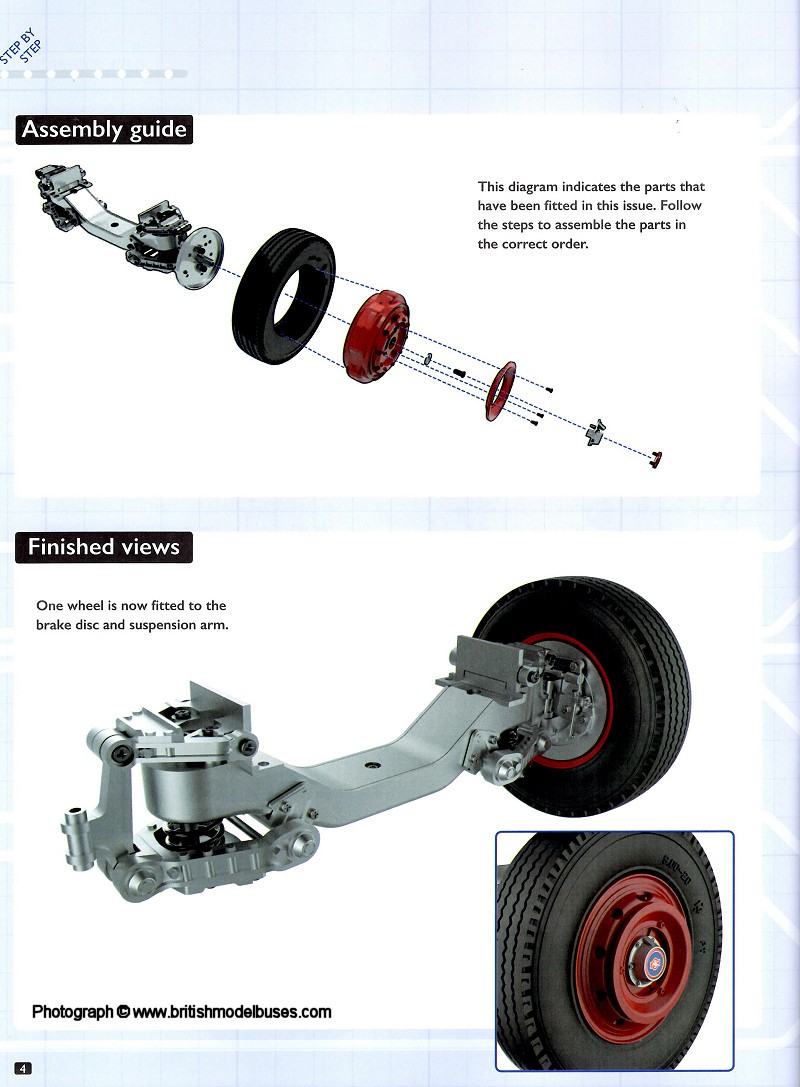
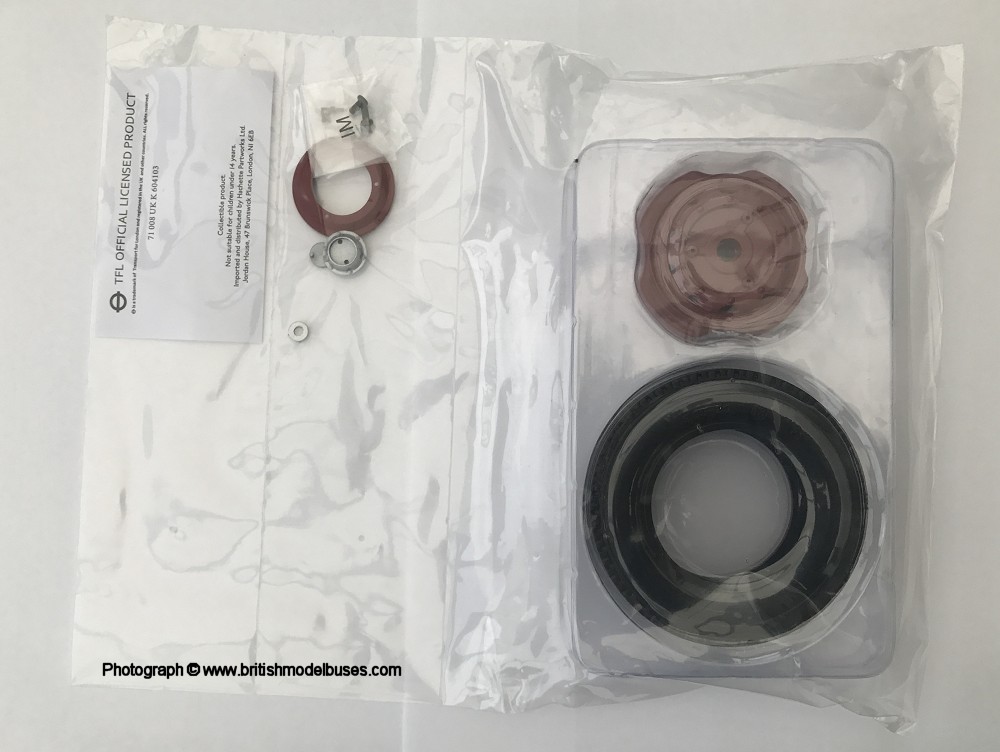
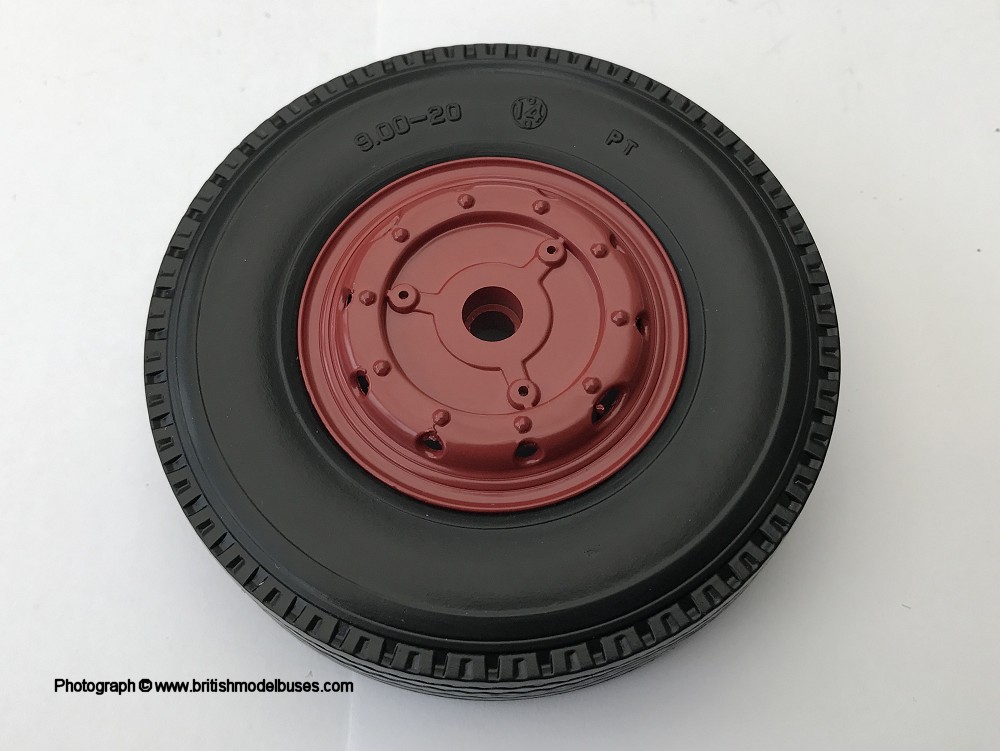
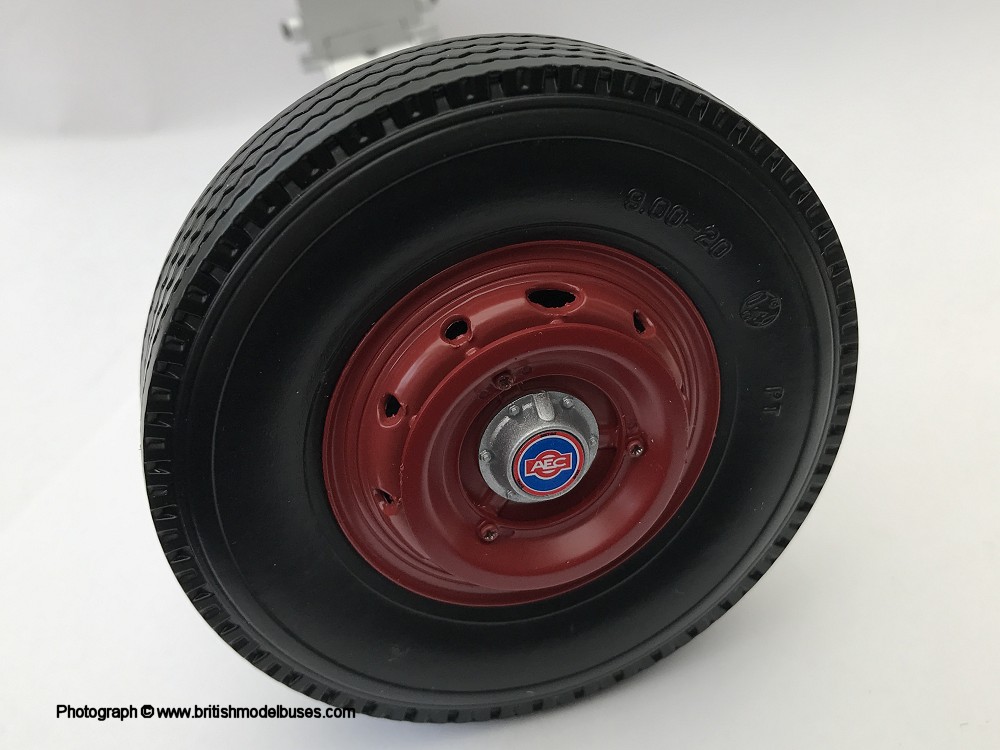
INSTRUCTIONS ISSUE 8 - FITTING THE FIRST TYRE AND WHEEL

Click here for a higher resolution image Click here for a higher resolution image Click here for a higher resolution image Click here for a higher resolution image

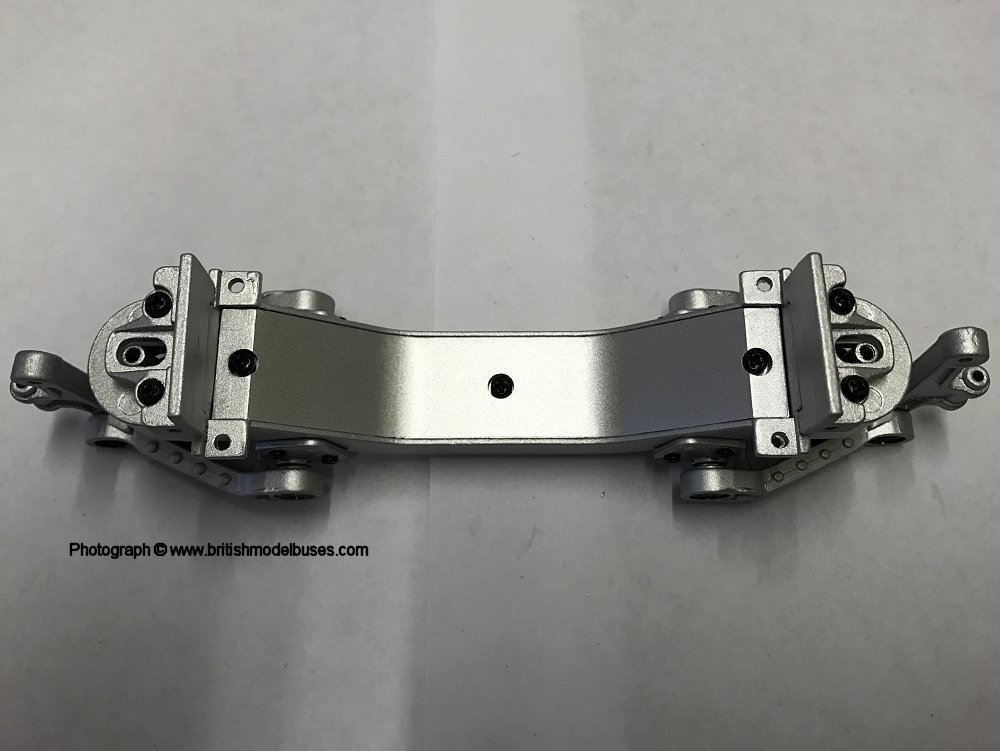
BUILD ISSUE 8 - FITTING THE FIRST TYRE AND WHEEL

Click here for a higher resolution image Click here for a higher resolution image Click here for a higher resolution image Click here for a higher resolution image


MAGAZINE ISSUE 9 - FITTING THE SECOND DISC BRAKE
This weeks build is a repeat of week 7 but for the opposite front disc brake. This weeks magazine has a further article about route RV1 including information about landmarks along the route. A second article discusses the competition for the omnibuses from the early underground railway. Next weeks issue is the fitting of the second tyre and wheel

Having previously constructed the other disc brake, no issues were encountered with the build.

Click here for a higher resolution image Click here for a higher resolution image Click here for a higher resolution image

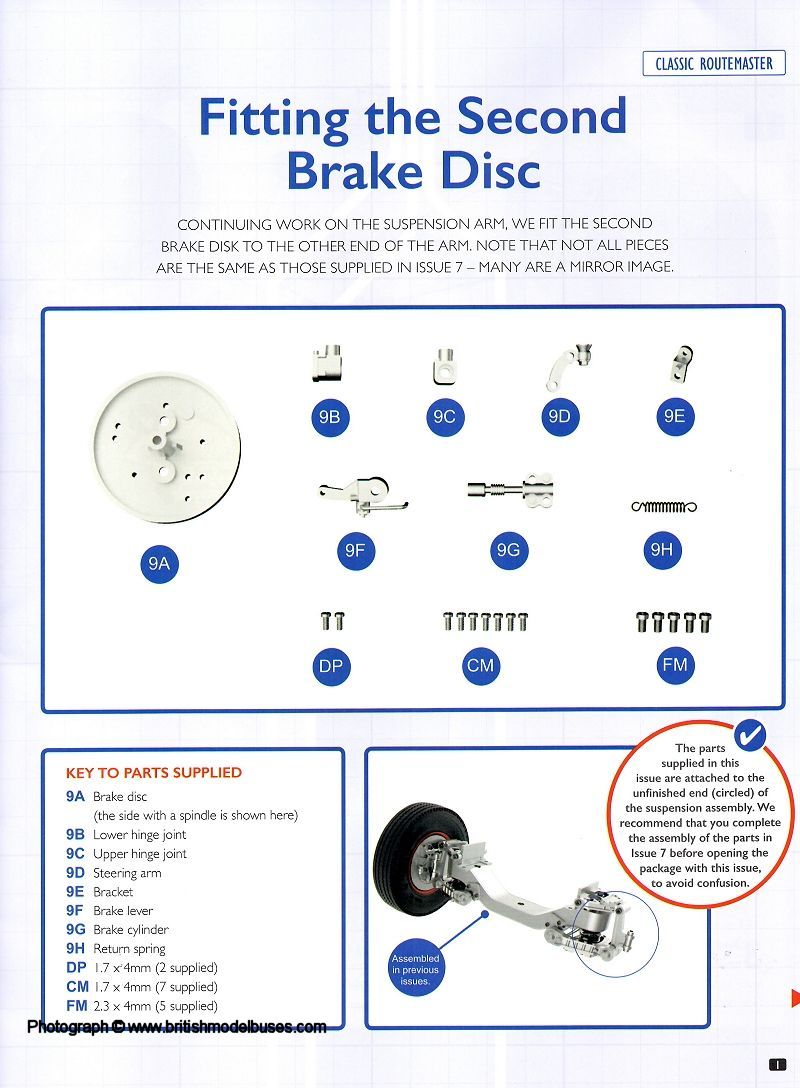
INSTRUCTIONS ISSUE 9 - FITTING THE SECOND DISC BRAKE

Click here for a higher resolution image Click here for a higher resolution image Click here for a higher resolution image Click here for a higher resolution image

BUILD ISSUE 9 - FITTING THE SECOND DISC BRAKE

Click here for a higher resolution image Click here for a higher resolution image Click here for a higher resolution image


MAGAZINE ISSUE 10 - ASSEMBLING AND FITTING THE SECOND WHEEL
This was a very simple build and a repeat of week 8 and again only took a few minutes. The hairdryer was again used to make the tyre soft enough to fit easily onto the hub.

This week magazine features the final section of route RV1 from Southwark to Thames Gateway and an article about the man behind the Routemaster, Albert Durrant.

Next weeks build involves the rods and links for the steering system and to attach them to the front axle.

Click here for a higher resolution image Click here for a higher resolution image Click here for a higher resolution image

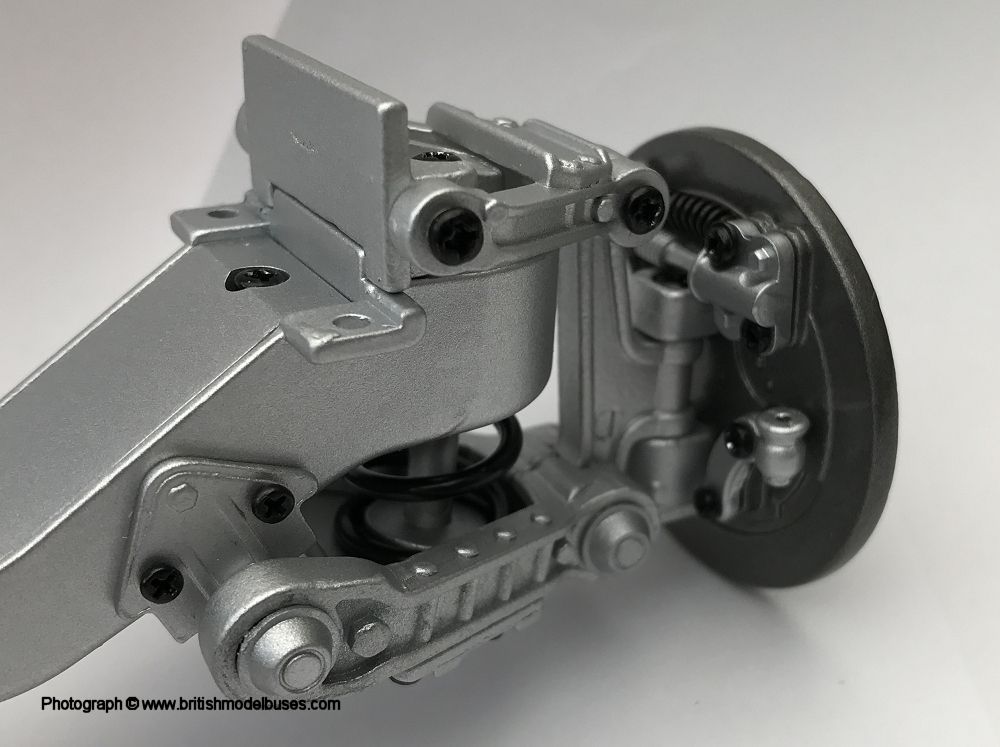
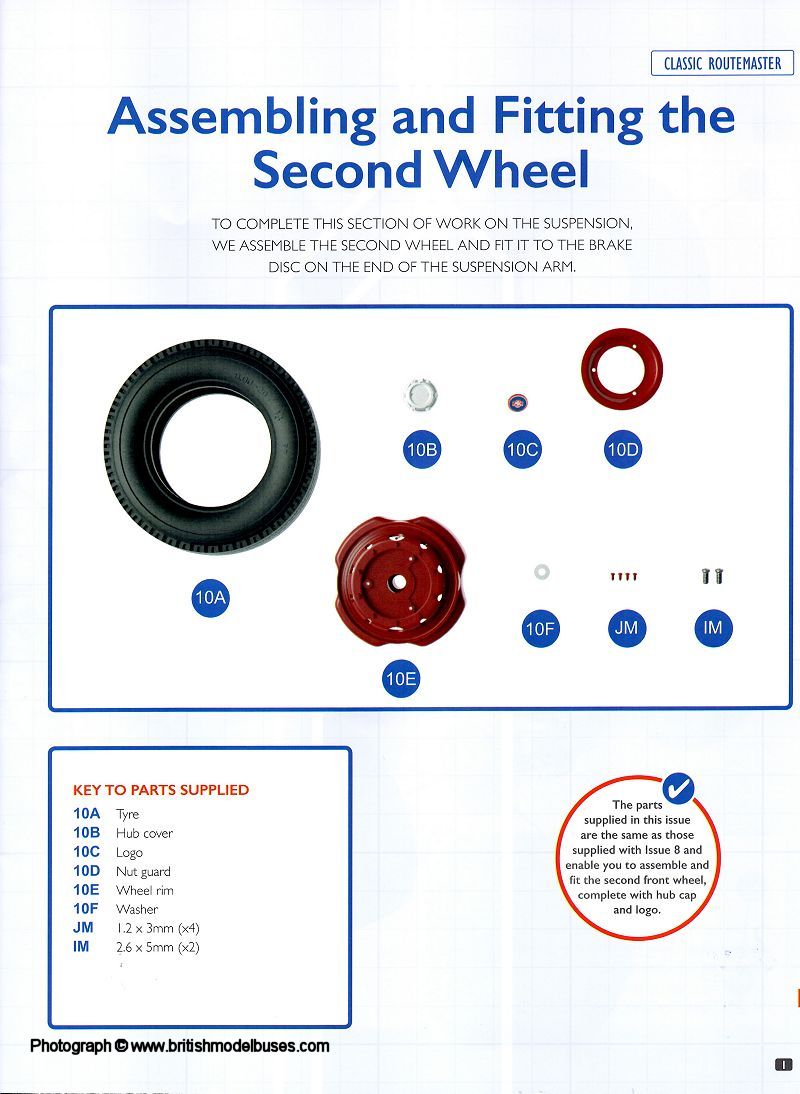
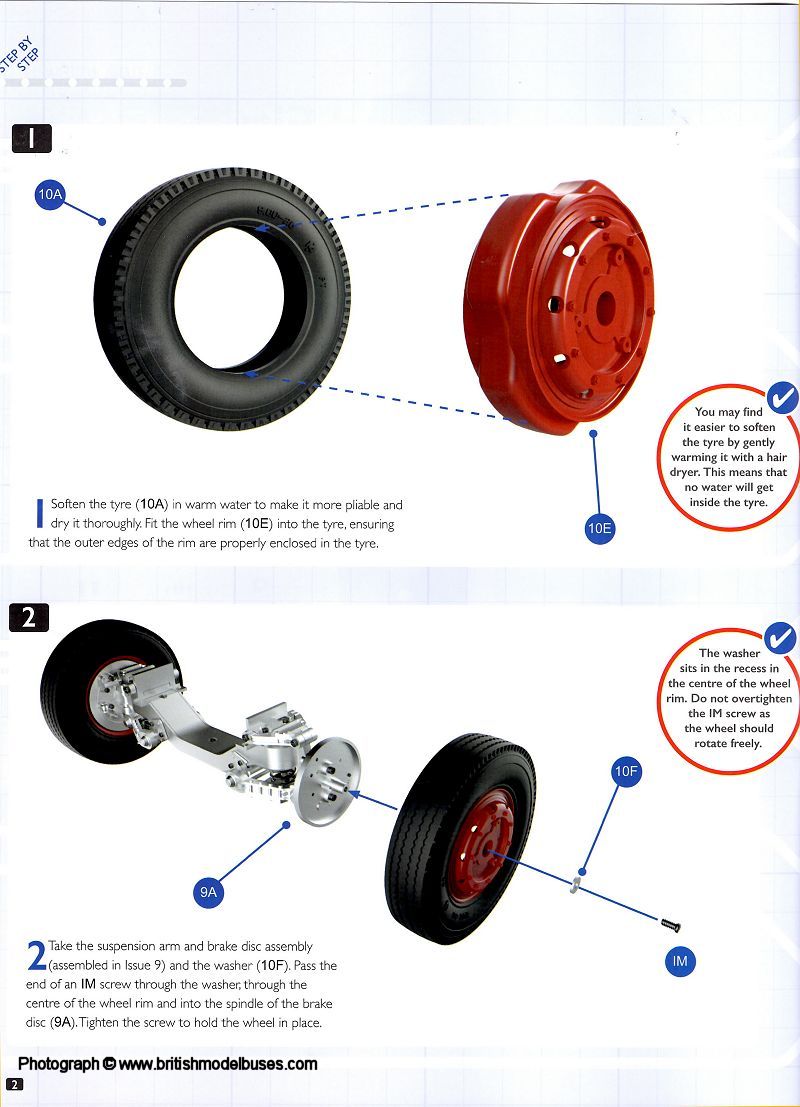
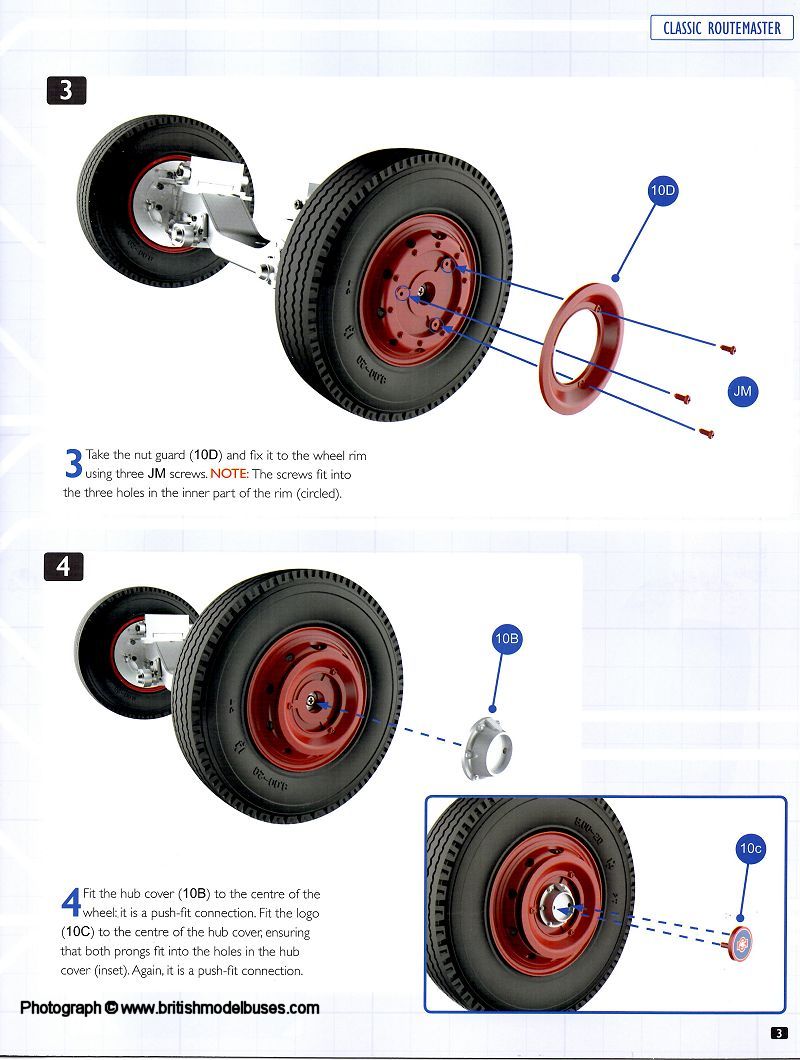
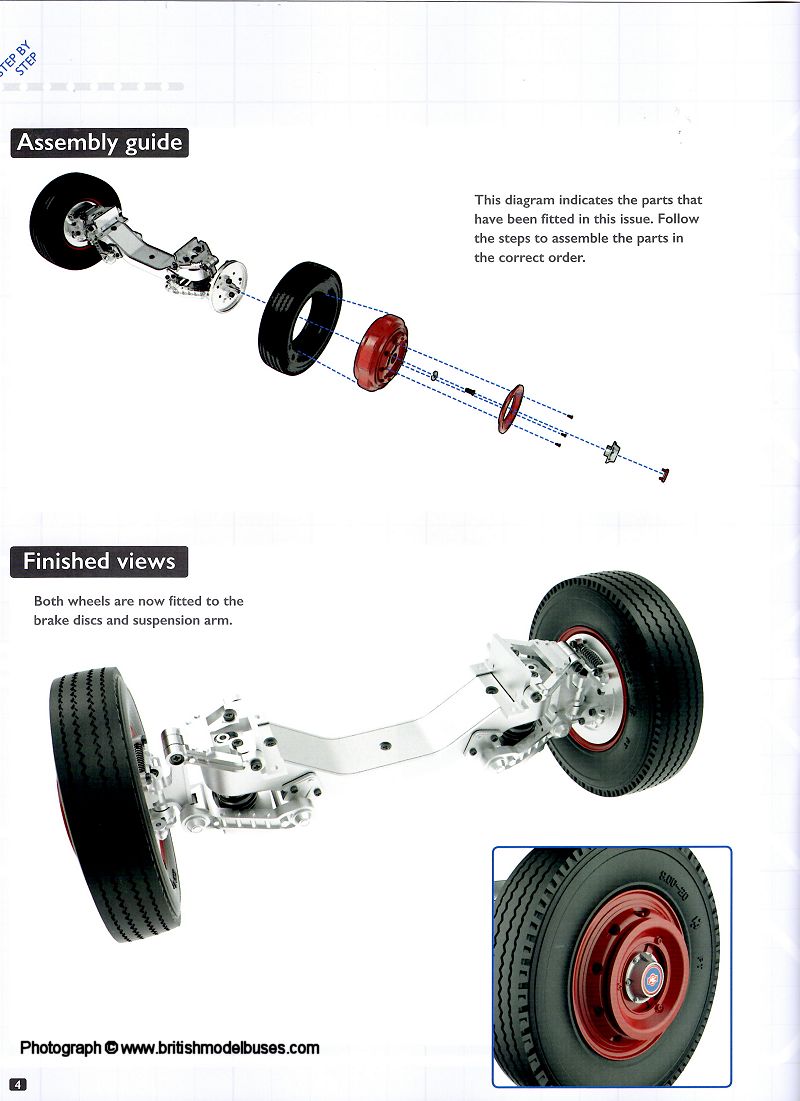
INSTRUCTIONS ISSUE 10 -  ASSEMBLING AND FITTING THE SECOND WHEEL
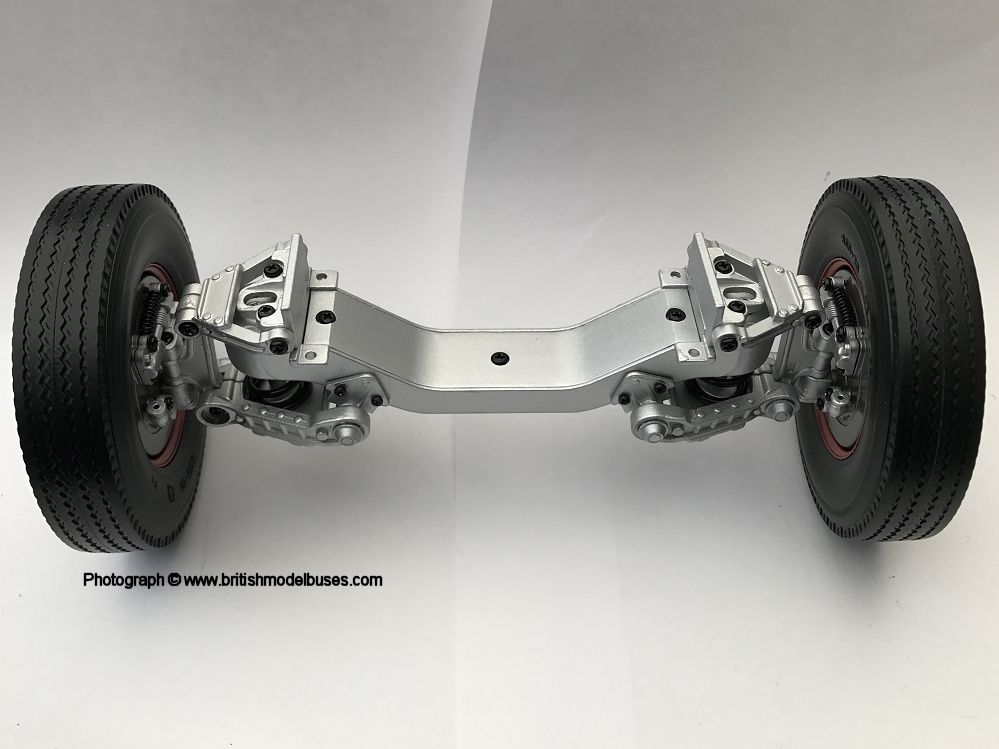
Click here for a higher resolution image Click here for a higher resolution image Click here for a higher resolution image Click here for a higher resolution image

BUILD ISSUE 10 -  ASSEMBLING AND FITTING THE SECOND WHEEL
The front axle is now complete

Click here for a higher resolution image


BUILD YOU OWN ROUTEMASTER

ISSUES ONE TO TEN

This page last updated Friday, 24 April 2020

© British Model Buses 2018